
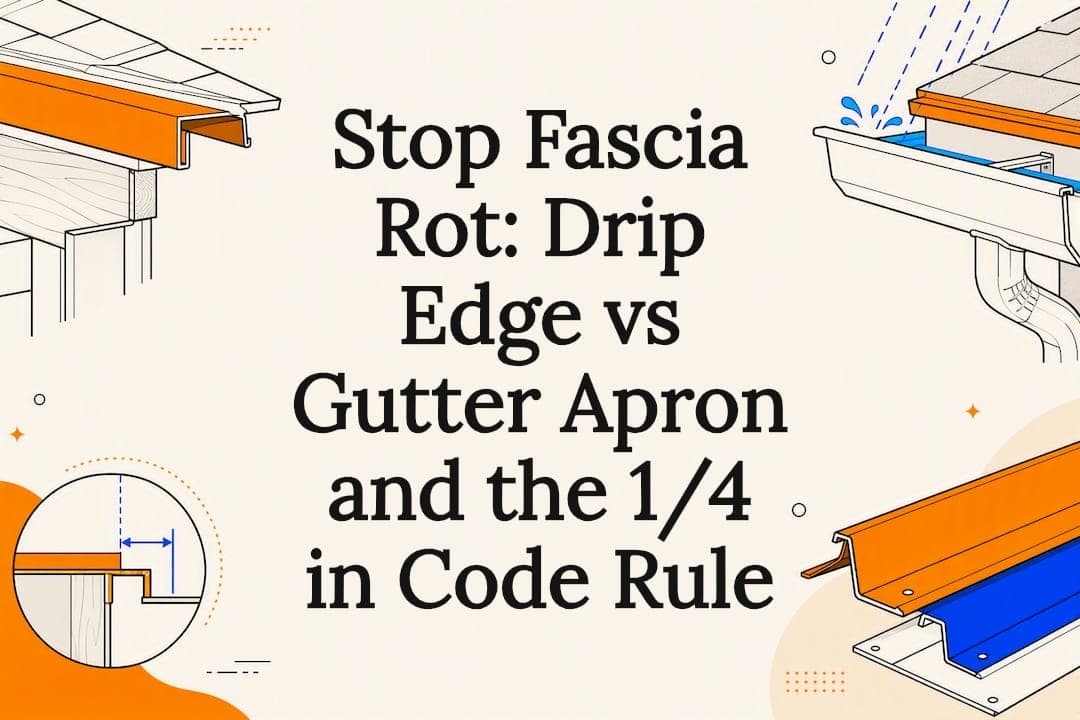
Use gutter apron at any eave where a gutter hangs, and use standard drip edge at rakes (the sloped sides of the roof) and at any eave with no gutter attached. Most roofs actually need both, just in different spots, and the apron can legally stand in for the eave drip edge required by code when it's installed the right way. Get the sequence wrong, though, and you're looking at fascia rot down the road.
TL;DR:
- Installing gutter apron at every guttered eave prevents water wicking behind gutters and protects fascia from rot.
- Drip edge should always be used on rakes and at eaves without gutters, with proper sequencing according to code to avoid water damage.
- Common installation mistakes include reversing the order of underlayment and flashing, and incorrect overlap at roof corners, which can lead to fascia rot.
- Gutter apron costs are similar to drip edge, typically between $1.50 and $4.00 per linear foot, and should be used in regions with heavy rainfall or ice buildup.
- An inspection by qualified professionals can identify improperly installed flashing, gaps, and damage that predispose roofs to leaks and fascia deterioration.
Table of Contents
- Drip Edge vs Gutter Apron: The Basic Definitions
- Drip Edge vs Gutter Apron: How Each One Handles Water
- Drip Edge Requirements: What Code Actually Says
- Signs Your Roof Edge Flashing Is Failing
- Why Exterior Genie Treats Flashing as the Real Story
- The Overlooked Part of This Whole Debate
- Get Your Roof Edge Inspected Before It Becomes a Bigger Repair
- Sources
- FAQ
Drip Edge vs Gutter Apron: The Basic Definitions
Both pieces are metal flashing, and both are shaped to kick water away from the roof deck. The difference is in the profile and the job each one does.
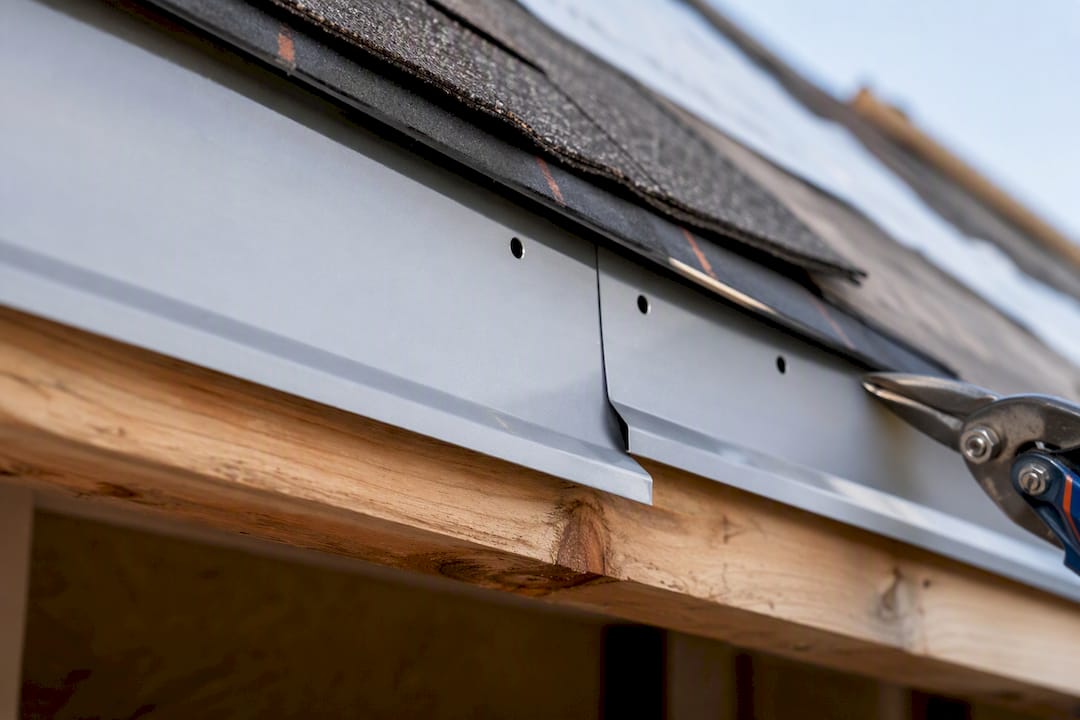
Drip edge comes in a few shapes: L-profile, T-profile, and F-profile, with F-style hemmed edges being the most common choice for residential reroofs because the hem stiffens the metal and creates a deeper kick-out. It typically runs 2 to 4 inches wide and installs along the rakes, plus any eave that doesn't have a gutter. Most is stamped from 26-gauge galvanized steel or 0.016-inch aluminum, though copper shows up on higher-end or historic roofs. The drip edge and code requirements guide from The Roofing Brief breaks down profile options in more detail.
Gutter apron is really a stretched-out cousin of drip edge, built specifically for eaves that have gutters. It's L-shaped, usually 3 to 6 inches wide, and the extra length matters: it tucks under the shingles at the top and bends down far enough to reach inside the gutter trough itself, according to The Roofing Brief's breakdown of gutter apron flashing.
Here's how the layers stack, working from the roof deck outward:
- Roof deck and sheathing form the base layer.
- Drip edge or gutter apron sits directly on the deck at the appropriate edge.
- Underlayment laps over or under the metal depending on whether it's an eave or a rake (more on that below).
- Shingles cover the top flange, leaving only the kicked-out lower edge exposed.
That last point trips people up during inspections. If you can see the flat top flange of the metal without lifting a shingle, something was installed wrong.
Drip Edge vs Gutter Apron: How Each One Handles Water
The functional split comes down to where the water needs to go. Drip edge is built to throw water clear of the fascia, letting it drop straight off the roof edge. Gutter apron is built to redirect that same water into a trough instead of letting it fall free, which matters because a too-short piece of metal at a gutter eave lets runoff wick backward behind the gutter and soak into the fascia board.
When to use which:
- Gutter apron at every eave where a gutter is mounted, since its longer leg closes the gap between the roof deck and the back of the gutter.
- Drip edge at rakes, always, and at any eave with no gutter, since there's no trough to aim water into.
- Both, layered on retrofit jobs where a gutter was added after the fact, or where clearance between the roof edge and the gutter has grown. Installers sometimes run an apron directly over existing eave drip edge as a low-cost insurance move, per Fine Homebuilding's practitioner take on the question.
Before you call a contractor, run through this checklist: Do you already have gutters, or are you planning to add them? Is this a full reroof or a flashing-only retrofit? What condition is the fascia in right now? Are your eaves unusually wide, which can leave a gap even standard apron won't close? And do you care about the visible reveal line, since apron sits slightly differently against the shingle course than drip edge does.
Cost-wise, adding drip edge during a reroof typically runs $1.50 to $4.00 per linear foot installed, with gutter apron landing in a similar range since the material and labor are comparable.
Pro Tip: If your home is in a region with heavy seasonal rainfall or regular ice buildup, don't skimp on the eave apron even if your existing setup "seems fine." Consult your local National Weather Service climate data for runoff patterns before deciding how aggressive to get with eave protection.
Drip Edge Requirements: What Code Actually Says
The 2024 International Residential Code, Section R905.2.8.5, requires drip edge on asphalt shingle roofs at both eaves and rakes. The code calls for corrosion-resistant metal, usually 26-gauge galvanized steel or 0.016-inch aluminum, fastened at a maximum of 12 inches on center. Pieces need to overlap by at least 2 inches and project at least 1/4 inch beyond the fascia or sheathing edge.
Sequence is where the code gets specific, and where most mistakes happen:
- At the eave, drip edge (or apron) goes down first, then underlayment goes over it.
- At the rake, the order flips: underlayment goes down first, then drip edge goes over it.
- At the corner where eave meets rake, the eave piece goes on first, then the rake piece overlaps it by at least 2 inches, so the rake metal ends up as the top layer.
That corner detail isn't cosmetic. Getting the overlap backward at the corner is one of the most common, and most repairable, mistakes installers make, and it's a direct path to corner fascia rot over a few seasons, according to a summary of the IRC 2024 drip edge rules.
Installation guides from manufacturers reinforce a few more details worth checking: pre-drill fastener holes slightly larger than the nail shank to allow for thermal expansion, overlap adjacent lengths by 1.5 inches rather than butting them, and make sure shingles fully cover the top flange, per Appleton's install guide hosted on Inspectapedia. Flashing issues are a major cause of roof leaks, often more so than shingles themselves, which is exactly why this sequencing detail carries more weight than most homeowners assume, based on Exterior Genie's own flashing leak breakdown.
Signs Your Roof Edge Flashing Is Failing
A handful of visible clues usually mean something at the roof edge was skipped or installed wrong:
- Peeling paint or soft, discolored wood along the fascia board.
- Water stains running down siding directly below the gutter line.
- Water visibly running behind the gutter instead of into it during rain.
- Gutter ends sagging or pulling away from the fascia.
- Shingle edges curling, cracking, or deteriorating faster than the rest of the roof.
The usual root causes are a missing apron at a gutter eave, drip edge set too high so it doesn't reach past the fascia, a botched eave/rake sequence, or a gutter hung too low or too high relative to the metal above it. Clogged gutters make all of this worse by forcing water to pool and find the weak point.
For a quick DIY check, measure the gap between the roof edge metal and the gutter, look for a 1/4 to 1/2 inch projection past the fascia, and check that overlaps run in the right direction at corners. If you spot active wood rot, standing water, or you're not comfortable on a ladder near the roofline, that's the point to call a licensed roofer instead of troubleshooting further yourself.
Why Exterior Genie Treats Flashing as the Real Story
Ebben, writing for Exterior Genie, has walked plenty of roofs where the shingles looked brand new and the fascia underneath was already soft. That gap between what's visible from the ground and what's actually happening at the roof edge is where most flashing failures hide. The contractor's discipline shows up specifically in how flashing gets sequenced, not just installed.
In the field, the call between apron and drip edge usually isn't complicated: gutters present means apron at that eave, no exceptions. What varies by region is how aggressive to get with overlap and fastening given local rain intensity and freeze-thaw cycles, which is why a quick inspection beats guessing every time.
The Overlooked Part of This Whole Debate
Most articles on this topic treat drip edge and gutter apron like two competing products, and that framing does homeowners a disservice. They're not competitors. They're the same category of flashing sized differently for two different jobs, and treating the choice as an either-or question is how people end up with the wrong metal in the wrong place.
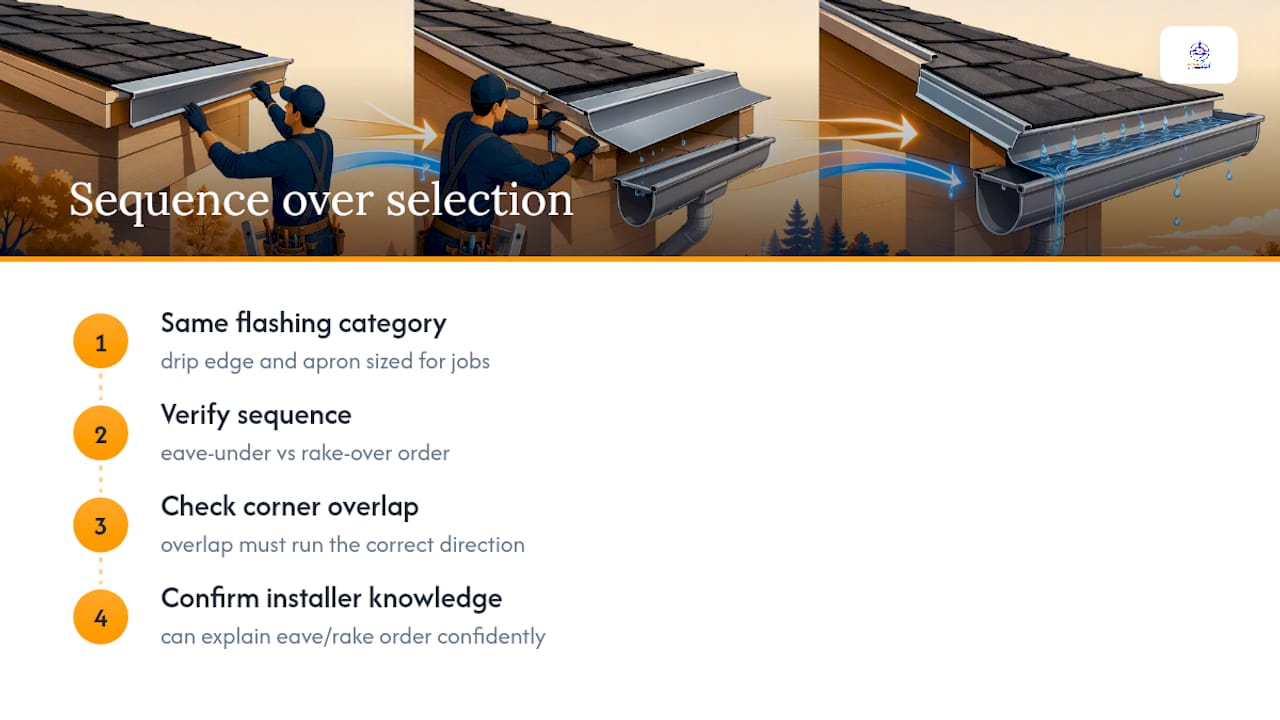
The part conventional advice glosses over is sequence, not selection. Homeowners fixate on "which one do I buy" when the bigger risk sits in whether the installer got the eave-under, rake-over rule right and whether the corner overlap runs the correct direction. A perfectly chosen gutter apron installed with reversed sequencing at the corner will fail just as fast as no flashing at all.
If you take one thing from this guide, prioritize verifying sequence and overlap over agonizing on style or profile. A roofer who can explain the eave-versus-rake order without hesitation is telling you more about their competence than any five-star review will.
— Ebben
Get Your Roof Edge Inspected Before It Becomes a Bigger Repair
Exterior Genie handles what most homeowners can't safely check themselves: crawling the roofline to confirm drip edge and gutter apron are sequenced correctly, fastened to spec, and free of the wicking gaps that rot fascia boards from the inside out.

An inspection includes photo documentation of the eaves, rakes, and gutter line, a plain-language explanation of what needs fixing, and a rough cost estimate before any work starts. Because HAAG-certified inspectors are on staff, Exterior Genie can also flag when flashing damage ties back to storm activity that your homeowner's policy may cover, and walk you through the insurance claims assistance process if that applies. Flashing work often pairs naturally with gutter repair or replacement, so a single visit can cover both.
If you noticed any of the warning signs above, from fascia staining to a gutter pulling away from the roofline, request a roof repair inspection and get a straight answer on what your eaves and rakes actually need.
Sources
- IRC 2024 — Chapter 9, R905.2.8.5 (drip edge flashing)
- Appleton (Inspectapedia) — Drip edge and gutter apron install guide
- Fine Homebuilding — Do I need a gutter apron?
FAQ
Can a gutter apron go over a drip edge?
Yes. Installers commonly add gutter apron over existing eave drip edge during a retrofit, especially when gutters are added after the original roof was installed, to make sure runoff lands in the trough instead of behind it.
Do I need a drip edge with gutters?
You need edge flashing either way, but at a gutter eave, gutter apron is the better choice because its longer leg reaches into the trough. Standard drip edge still belongs at your rakes.
Do you need a gutter apron?
If you have gutters, yes. A short standard drip edge at a gutter eave leaves a gap that lets water wick behind the gutter and soak the fascia, which is exactly what gutter apron is designed to prevent.
What are the common problems with drip edge on a roof?
The most frequent issues are reversed eave/rake sequencing, corner overlaps installed backward, pieces butted together instead of overlapped by at least 1.5 inches, and metal set too high to clear the fascia by the required 1/4 inch.