

A nail pop is a roofing nail that has backed out of the deck and pushed a shingle tab up from underneath. It's usually not an emergency, but it breaks the shingle seal and gives wind-driven rain a way in. Photograph and map every pop you find, then patch a small handful yourself or call a roofer if they line up in a pattern.
TL;DR:
- Most nail pops result from thermal cycling or decking shrinkage, and early occurrence within the first five years often indicates installation issues.
- Patterns of nail pops, such as lines along seams or across entire slopes, suggest underlying problems like delamination or heat exposure, requiring professional assessment.
- Visual inspection from the ground with binoculars is sufficient for initial mapping, but repairs should be done carefully to avoid cracking shingles and damaging the decking.
- Re-driving the same nail into the same hole is ineffective; replacing it with a ring-shank nail and sealing the old hole provides a long-lasting fix.
- Large clusters of nail pops, soft decking, or interior moisture signs should prompt calling a professional, as these often indicate significant structural or decking failure.
Table of Contents
- Understanding the Nail Pop Roof Problem
- What Causes Nail Pops on a Roof
- Why Nail Pops Deserve Attention, Not Panic
- How to Find and Inspect Nail Pops Safely
- Fixing Nail Pops on a Roof the Right Way
- When to Call a Roofer and What Repairs Cost
- Preventing Nail Pops on Your Next Roof
- An Honest Look at Nail Pops After a New Roof
- Get a Nail Pop Roof Inspection Done Right
- Sources
- FAQ
Understanding the Nail Pop Roof Problem
A nail pop happens when the fastener holding a shingle down works its way back out of the roof deck. As it rises, the nail head shoves the shingle tab above it upward, creating a small bump or ridge you can often spot from the ground on a sunny day.
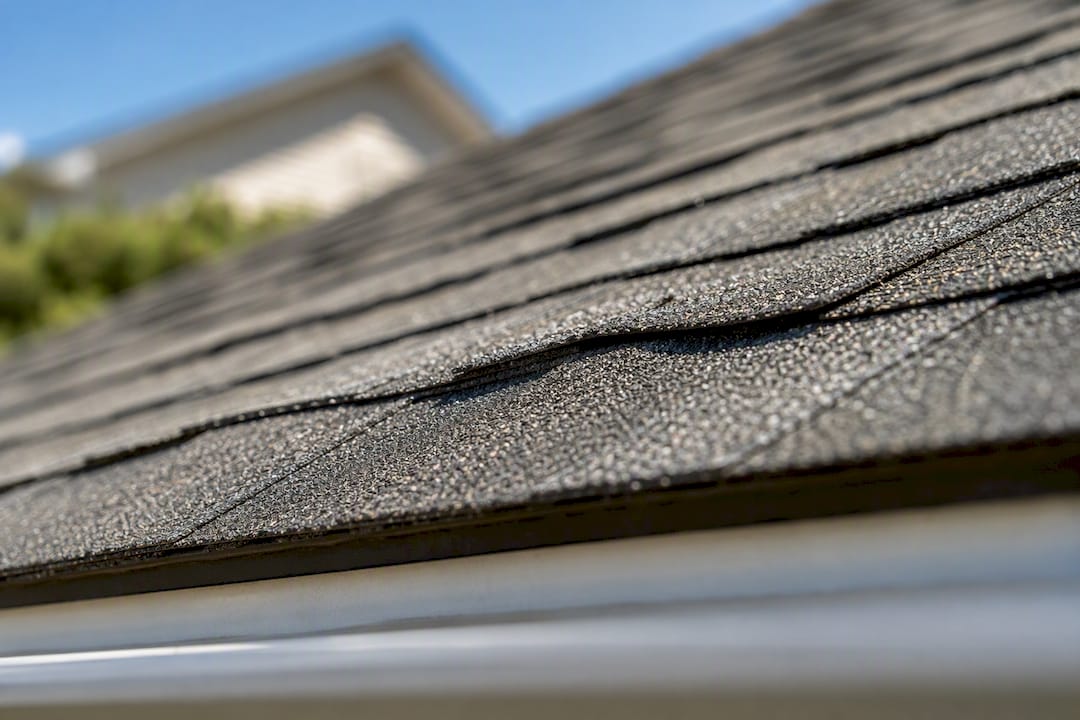
That bump isn't just cosmetic. Asphalt shingles rely on a sealant strip that bonds each tab to the one below it, and a raised shingle breaks that bond right at the point where wind gets the most leverage. According to roofing industry data, raised shingles become significantly more vulnerable to wind blow-off and to puncture damage from foot traffic or hail, since the tab is no longer lying flat against the surface beneath it.
Signs you can catch early include:
- A visible bump or ridge running along a shingle course
- A shingle corner that flaps slightly in wind
- A shiny or discolored nail head poking through the shingle surface
- Small circular cracks radiating from a raised spot, especially on older shingles
Left alone long enough, that exposed nail head eventually rusts, and the hole around it widens every time the shingle flexes in the heat.
What Causes Nail Pops on a Roof
Most nail pops trace back to one of four things, and figuring out which one you're dealing with tells you how worried to be.
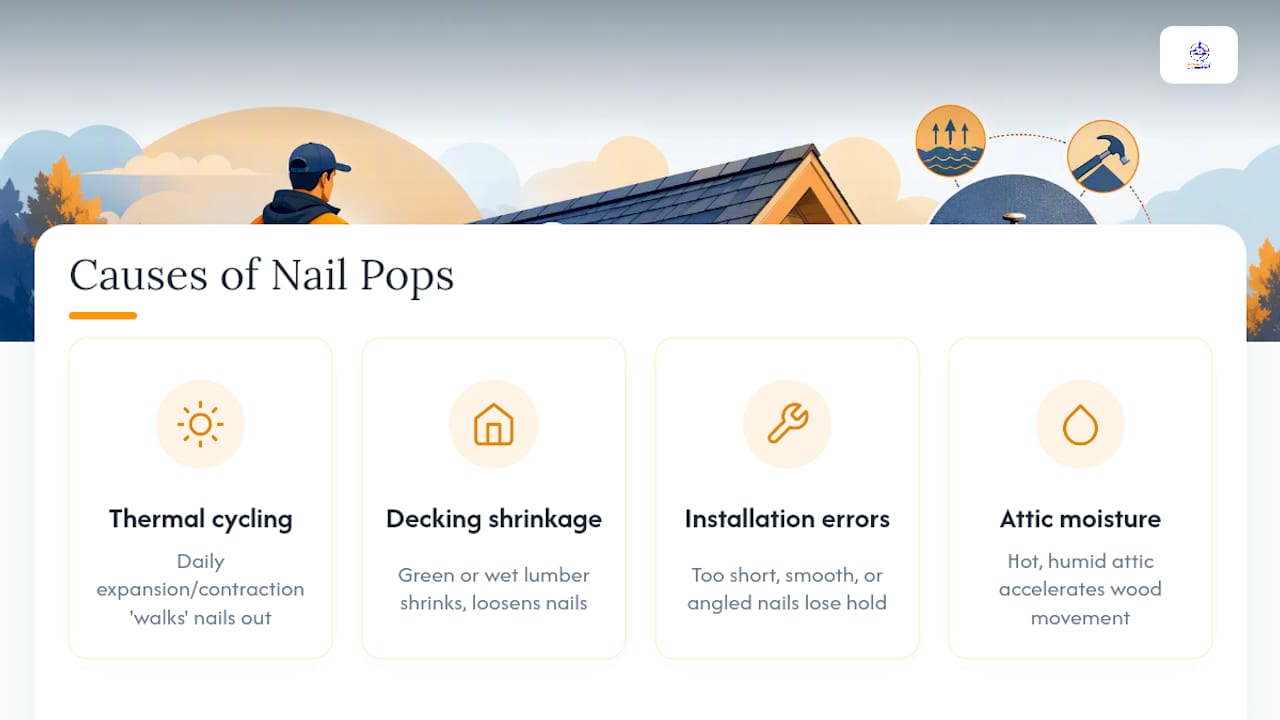
Thermal cycling is the slow, boring culprit behind most pops. Every day the roof deck heats up and expands, then cools and contracts at night. Over years, that constant movement gradually "walks" a nail out of the wood a fraction of a millimeter at a time until it finally breaks the surface.
Decking shrinkage is a faster version of the same problem. Green or improperly dried lumber, and OSB panels that later delaminate or swell from moisture, shrink or shift enough to loosen nails that were driven in tight originally.
Installation errors cause a lot of pops that show up within the first year or two. A nail that's too short, a smooth-shank fastener instead of a ring-shank one, or a nail driven at an angle instead of straight down all reduce holding power from day one.
Attic moisture and ventilation problems feed back into decking movement, since a hot, humid attic accelerates the wood expansion and contraction cycle that pushes nails loose in the first place.
Fastener specs matter more than most homeowners realize. Nails should penetrate at least 3/4 inch into the decking, and manufacturer guidance from GAF calls for galvanized or coated roofing nails, 10 to 12 gauge, with a head around 3/8 inch, driven flush rather than over-driven or under-driven.
Pro Tip: If your roof is under five years old and you're already seeing several pops on the same slope, ask whoever installed it what nail length and type they used. A pattern that early usually points to installation, not age.
Why Nail Pops Deserve Attention, Not Panic
A single nail pop rarely causes a leak on its own. The risk climbs when several pops line up, because each one weakens the wind resistance of the shingles around it and multiplies the number of entry points for water.
The pattern is the real diagnostic tool here. Inspectapedia's analysis of shingle nail pops notes that isolated, scattered pops are usually simple maintenance items, while pops arranged in lines or clusters often point to something happening underneath the shingles, not on top of them.
Use this rough guide when you're scanning your roof:
- One or two pops, scattered randomly: typically thermal cycling, low urgency, easy DIY fix
- A line of pops following a straight edge: often a rafter line or a nailing-strip issue
- Pops every 8 to 12 inches along a seam: frequently a sign of OSB delamination at the panel joint, per roofing failure documentation
- Pops across an entire slope, especially south or west facing: usually heat exposure combined with a ventilation or installation problem
If your roof is still within its workmanship warranty window and pops are showing up in a pattern, that's worth a call to the original installer before you spend money out of pocket.
How to Find and Inspect Nail Pops Safely
Skip the ladder for the first pass. Nail pops show up clearly enough from the ground with a pair of binoculars on a bright day, and that's the safer place to start counting them.
- Scan each slope from the ground, moving slowly and checking for bumps, shadows, or shiny nail heads along the shingle courses.
- Sketch a rough map of your roof and mark where each pop appears, noting whether they cluster near a valley, ridge, or seam.
- Count pops per slope rather than treating your whole roof as one unit. A roof with three pops on the north slope and twenty on the south slope has a heat problem, not a bad batch of nails.
- Get on the roof only if you're comfortable and the pitch is safe, and always use a stabilized ladder with someone aware you're up there.
- Gently lift a shingle tab near a pop to check the nail position, the condition of the decking underneath, and whether the sealant strip is still intact on the shingle above.
Watch for these warning signs while you're up close:
- Soft or spongy decking when you press near a pop
- Dark staining or mold on the underside of a lifted shingle
- Multiple nail heads visible under one tab, suggesting a prior repair attempt
If the decking flexes under light pressure, stop the inspection and treat it as a professional matter rather than a weekend project.
Fixing Nail Pops on a Roof the Right Way
The single biggest DIY mistake is hammering the popped nail back into the same hole. That hole is already stripped out from the nail working loose, so re-driving it just delays the problem by a season or two before it pops right back out.
Here's the sequence that actually holds:
- Lift the shingle tab carefully using a flat pry bar, working slowly so you don't crack the shingle in cold weather.
- Pull the old nail completely out rather than trying to reset it in place.
- Drive a new ring-shank roofing nail one to two inches away from the old hole, into solid, undamaged decking, keeping it inside the shingle's designated nailing zone.
- Seal the abandoned hole and the new nail head with roofing or flashing cement, covering both completely so neither becomes a future leak point.
- Press the shingle tab back down firmly over the sealant strip so the adhesive bond can reform in warm weather.
Ring-shank nails resist pulling back out far better than smooth-shank ones, which is exactly why replacing a popped nail with a ring-shank fastener in fresh wood matters more than the patch job itself.
Pro Tip: Do repairs on a warm day whenever possible. Cold shingles are brittle and crack easily when lifted, and the sealant strip needs some heat to reseal properly once you press the tab back down.
Common mistakes worth avoiding: skipping the cement seal on the old hole, using a standard framing nail instead of a roofing nail, and working on a steep or wet roof without fall protection. If you find soft decking, more than a handful of pops per slope, or staining inside the attic, stop and treat it as a job for a licensed roofer rather than a repair kit.
When to Call a Roofer and What Repairs Cost
Call a professional when pops show up in lines or clusters, when you see interior ceiling stains, or when the decking feels soft or spongy under a lifted shingle. Any of those point toward a decking or structural issue that a patch kit won't fix.
Insurance treats nail pops as a maintenance issue in most cases, not a covered peril, since they result from gradual wear rather than a sudden event. That changes if the pops trace back to storm damage or a documented installation defect, in which case an insurer may cover resulting leaks after inspection. Document everything with dated photos and check whether your original roof installer offers a workmanship warranty, which typically runs one to two years.
On cost, expect a wide range depending on scope:
- A handful of isolated pops: roughly $50 to $200 for a small repair visit
- Widespread pops across one or more slopes: often a few hundred to over a thousand dollars, depending on how much decking needs replacement
- Confirmed decking failure or delamination: partial or full reroofing, which can run into the thousands depending on square footage and material choice
The gap between those numbers is exactly why the pattern diagnosis matters. Ten scattered pops on an otherwise sound roof is a Saturday afternoon fix. Forty pops following every seam line is a decking conversation.
Preventing Nail Pops on Your Next Roof
The fix that actually lasts starts before the first shingle goes down. If you're planning a reroof or hiring someone to do one, specify these requirements up front rather than assuming your contractor already follows them.
- Require ring-shank roofing nails, 10 to 12 gauge with a 3/8 inch head, long enough to penetrate at least 3/4 inch into the decking as outlined in GAF's fastener guidance
- Confirm nails will be hand-checked for depth, not just gun-driven and assumed correct, since over-driven and under-driven nails both create the weak points that lead to pops
- Ask about attic ventilation upgrades during the reroof, since better airflow reduces the temperature swings that drive thermal cycling
- Have decking inspected panel by panel for soft spots or delamination before new shingles go down, and replace any questionable sheathing rather than roofing over it
None of this eliminates nail pops entirely over a 20 to 30 year shingle lifespan. It does cut the odds of seeing them cluster into a pattern within the first five years, which is the version that actually costs money.
An Honest Look at Nail Pops After a New Roof
Homeowners tend to panic more over nail pops after a new roof than pops on a 15 year old roof, and honestly, that reaction is backwards. A pop or two showing up in year one is often just the roof settling and the nails finding their final resting depth. What should actually worry you is a fresh roof with pops already forming lines along the seams, because that's a workmanship problem you're paying to have fixed twice.
The bigger blind spot is homeowners treating every pop the same way, either ignoring all of them or panicking over all of them. Neither is the right instinct. The pattern is the information. A roofer who diagnoses by counting and mapping pops, rather than just re-nailing whatever's visible from the ladder, is doing the job that actually prevents a callback next year. That pattern-first approach, checking decking condition before assuming a quick nail swap will hold, is the difference between a repair that lasts and one that reappears with the next hot summer.
— Ebben
Get a Nail Pop Roof Inspection Done Right
If you've mapped a cluster of pops, found soft decking, or just don't want to get on a ladder to find out, Exterior Genie handles the inspection and the repair in one visit instead of sending you back and forth between a patch job and a bigger problem later.

A service visit typically starts with a full slope by slope inspection, not just a look at the spots you already flagged, since pops on one side of the roof often mean something different than pops on another. If storm activity or a decking issue turns out to be the real cause, Exterior Genie's team includes HAAG-certified inspectors who can help document the damage for an insurance claim rather than leaving you to figure out coverage on your own. Isolated pops get repaired on the spot; patterns that point to decking failure get a straight answer about scope and cost before any work starts.
Start with a roof repair inspection to get an honest read on whether you're looking at a quick fix or a bigger decking issue, and if storm damage turns out to be the cause, the insurance claims assistance team can help you document it correctly from the start.
Sources
- Roof Nail Pops: Causes, Consequences & How to Fix Them
- Nail Pops on Shingles: Causes, Fix & Bigger Trouble Signs | TRB
- Shingle Nail Pops in Asphalt Shingle Roofs
- All about Roofing Nails for Shingles
FAQ
Are roof nail pops normal?
Yes, a few scattered nail pops over the life of a roof are normal and usually come from ordinary thermal cycling. A cluster or line of pops within the first few years is not normal and usually points to an installation or decking issue instead.
Are roof nail pops covered by insurance?
Usually not, since insurers typically treat nail pops as a maintenance item rather than a covered peril. Coverage can apply if the pops resulted from storm damage or a documented installation defect, which is why photographing and dating the damage matters.
Is it worth fixing nail pops?
Yes, because a raised shingle has a broken seal that leaves it exposed to wind and water intrusion until it's repaired. A handful of isolated pops can usually be fixed relatively quickly by a contractor and prevents a much larger repair down the road.
How much does it cost to fix roof nail pops?
A small repair job covering a handful of isolated pops typically runs $50 to $200. Widespread pops tied to decking failure can push costs into the thousands if partial or full reroofing becomes necessary.