

A roof flashing leak means water is getting past the metal or rubber seals at a roof joint, usually where a chimney, vent pipe, or wall meets the shingles, instead of running off harmlessly. If you spot a ceiling stain or damp attic wood, start with a safe attic trace and contain the drip with a bucket or tarp. Call a roofer if you see rot, a chimney or valley failure, or flashing you can't reach safely.
TL;DR:
- Roof flashing fails most often occur at roof-wall intersections, chimneys, valleys, vent pipes, and skylights, with missing or damaged material being the main cause.
- Diagnosing a leak requires inspecting the attic for water stains or daylight and conducting a controlled hose test from outside to confirm the leak source.
- Temporary fixes like tarp covers and polyurethane sealants can buy time but should not replace proper, durable repairs for long-term reliability.
- Properly repairing flashing involves replacing multiple components, such as step and kick-out flashing at joints, chimney systems, valleys, vent boots, and skylight flashing, following manufacturer instructions.
- Regular maintenance includes visual inspections twice a year, after storms, and upgrading flashing materials during reroofing to prevent future leaks.
Table of Contents
- Signs Your Roof Leak Is Coming From Flashing
- Where Roof Flashing Most Commonly Fails
- How Do You Find Where a Roof Flashing Leak Is Coming From?
- Temporary Fixes That Actually Buy You Time
- Permanent Repair Methods for Each Type of Flashing Failure
- When to Call a Professional and What It Costs
- A Simple Maintenance Plan to Prevent Flashing Leaks
- How Exteriorgenie Approaches Flashing Leak Repairs
- Stop Patching, Start Repairing Flashing Properly
- Get Your Flashing Leak Inspected and Fixed
- Sources
- FAQ
Signs Your Roof Leak Is Coming From Flashing
Flashing failures rarely announce themselves clearly. Instead, they show up as a pattern of clues that, together, point away from a worn shingle field and toward a joint somewhere on the roof.
Inside the house, look for ceiling stains that sit uphill or off to the side of where water actually seems to be dripping. That offset matters. Check the attic with a flashlight for wet or discolored sheathing, and look for pinholes of daylight around pipes, chimneys, or dormers. Outside, walk the roofline (from the ground with binoculars if you're not comfortable up there) and look for flashing that's missing, rusted, or bent, plus any seam that's been "repaired" with a bead of caulk instead of proper metal.
Signs to check for:
- Ceiling or wall stains that appear during or right after rain, not on dry days
- Curling, cracked, or crumbling rubber around a vent pipe boot
- Daylight visible around a chimney or skylight when you look up from inside the attic
- Pooled water or debris buildup in a valley or where a roof meets a wall
- Caulk smeared over a seam where metal flashing should be doing the work
Flashing problems account for roughly 40 to 50 percent of residential roof leaks, which is a big reason chasing the wrong shingle can waste weeks and money. Part of the confusion is distance: water rarely drips straight down from where it entered. It often travels 10 to 20 feet along the rafters or sheathing before it finally shows up as a stain, so the ceiling spot you're staring at is usually not the source.
Where Roof Flashing Most Commonly Fails
Almost every flashing leak traces back to one of a handful of predictable spots. Knowing them ahead of time saves a lot of guesswork once you're up in the attic or on a ladder.
- Roof-wall intersections: Step flashing and kick-out flashing are supposed to divert water away from the wall at these joints, and missing or buried kick-out flashing is one of the most common causes of hidden wall damage, according to a BASC resource guide on step and kick-out flashing. Siding installers sometimes cover this flashing entirely, which defeats its purpose.
- Chimneys: A proper chimney flashing system has four parts working together (apron, step flashing, counter flashing, and often a cricket behind the chimney on wider units). If even one piece is missing or corroded, water finds a way in.
- Valleys: These channels carry more water than almost any other part of the roof, so a gap or a missing centerline layer of protection turns a valley into a funnel straight into the attic.
- Vent pipe boots: The rubber collar around a plumbing vent breaks down under UV exposure faster than the metal base it's attached to, cracking and splitting years before the rest of the roof shows wear.
- Skylights: These use a perimeter flashing kit that's easy to install slightly wrong, and a rushed or reused kit is a frequent culprit behind skylight leaks that show up a season or two after installation.
How Do You Find Where a Roof Flashing Leak Is Coming From?
Diagnosing a flashing leak the right way means starting inside, not outside. Working from the interior first keeps you off the roof until you actually know where to look.
- Trace the stain uphill in the attic. Bring a flashlight and go straight to the area above the ceiling stain, then work uphill along the rafters looking for wet, dark, or moldy sheathing.
- Check for daylight at penetrations. With the attic lights off, look for pinpricks of light around vent pipes, chimneys, and skylight curbs. Light gaps mean water gaps.
- Mark the suspect spot. Once you find damp wood or a light gap, note its position relative to a roof vent, chimney, or exterior wall so you can find the same spot from outside.
- Run a controlled hose test. With a helper watching the attic spot from inside, run water over the suspected flashing area for about 10 minutes, working from the bottom of the roof upward and pausing between spots. If water shows up at your marked location, you've confirmed the source.
- Stop if it gets risky. Skip the exterior part of this on steep roofs (generally anything steeper than about a 6:12 pitch), wet shingles, or roofs over two stories. Call a professional instead.
This attic-then-exterior sequence, including the hose test with an assistant, mirrors the diagnostic method roofing professionals use because it isolates the leak before anyone climbs onto a potentially wet, slippery roof to guess.
Pro Tip: Do the hose test in short bursts, not one long soak. Ten minutes per section with pauses lets your helper report back in real time, so you're not flooding three different flashing joints at once and guessing which one actually leaked.
Temporary Fixes That Actually Buy You Time
Once you've confirmed the leak's rough location, the next question is what to do before a contractor shows up. Some stopgaps genuinely hold; others just look like they're working.
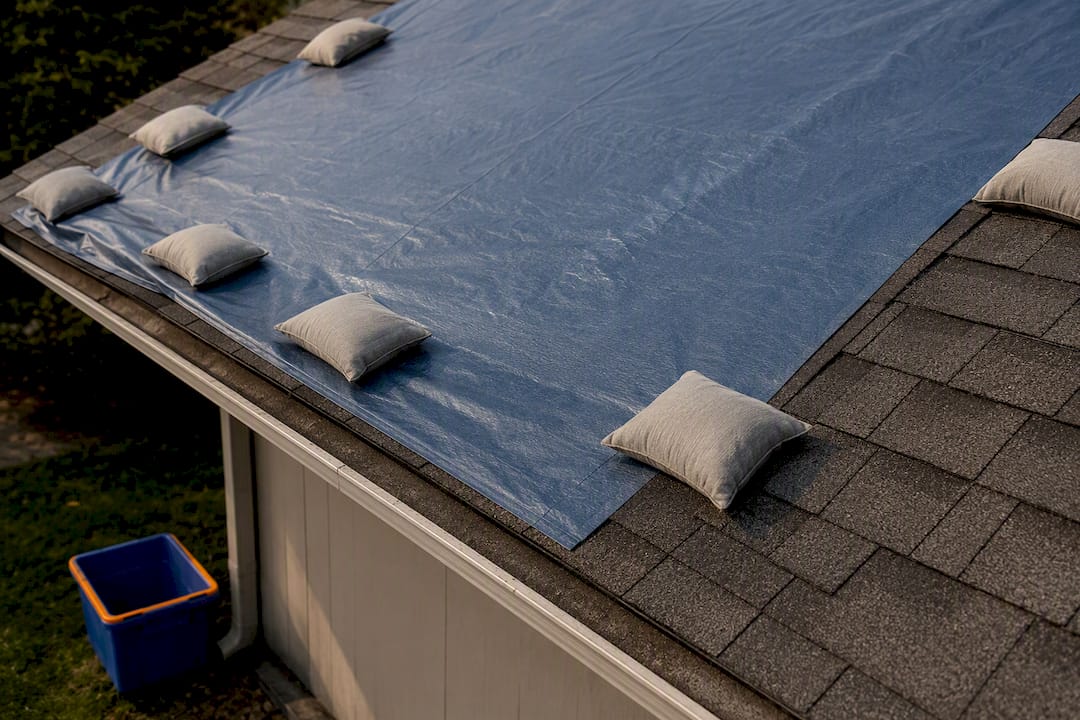
Inside, move anything valuable out from under the drip, set a bucket or bin to catch water, and puncture a small hole in a sagging, water-filled ceiling bulge to relieve pressure in a controlled way rather than letting it collapse on its own. Outside, if the source is confirmed and accessible, a tarp secured over the area (weighted at the edges, never nailed through good shingles) can hold until repairs happen. A guide on temporary roof repair options walks through the safe way to set one.
For sealant, skip silicone. Contractor guidance consistently warns against silicone as a flashing sealant because it adheres poorly to asphalt and breaks down fast under UV exposure. Polyurethane or tripolymer products, like Geocel 2300 ProFlex or NPC Solar Seal 900, hold up considerably longer as a stopgap.
What's realistically a homeowner job versus what isn't:
- Swapping a vent boot on a low, walkable roof: reasonable for a comfortable DIYer with the right ladder safety
- Sealing a small, accessible seam with a proper polyurethane sealant: fine as a short-term patch
- Weaving new step flashing under existing shingles or rebuilding a chimney cricket: not a homeowner job
- Anything on a steep or multi-story roof: not worth the risk for a patch that's temporary anyway
A polyurethane patch might hold for a season or two. A properly sequenced, permanent repair is built to last the life of the roofing material around it, which is the trade-off worth weighing before you decide a quick fix is "good enough."
Permanent Repair Methods for Each Type of Flashing Failure
Patch jobs and permanent repairs are not the same category of work, and knowing the difference helps you push back if a contractor's scope looks thin. Each flashing type has its own correct repair sequence.
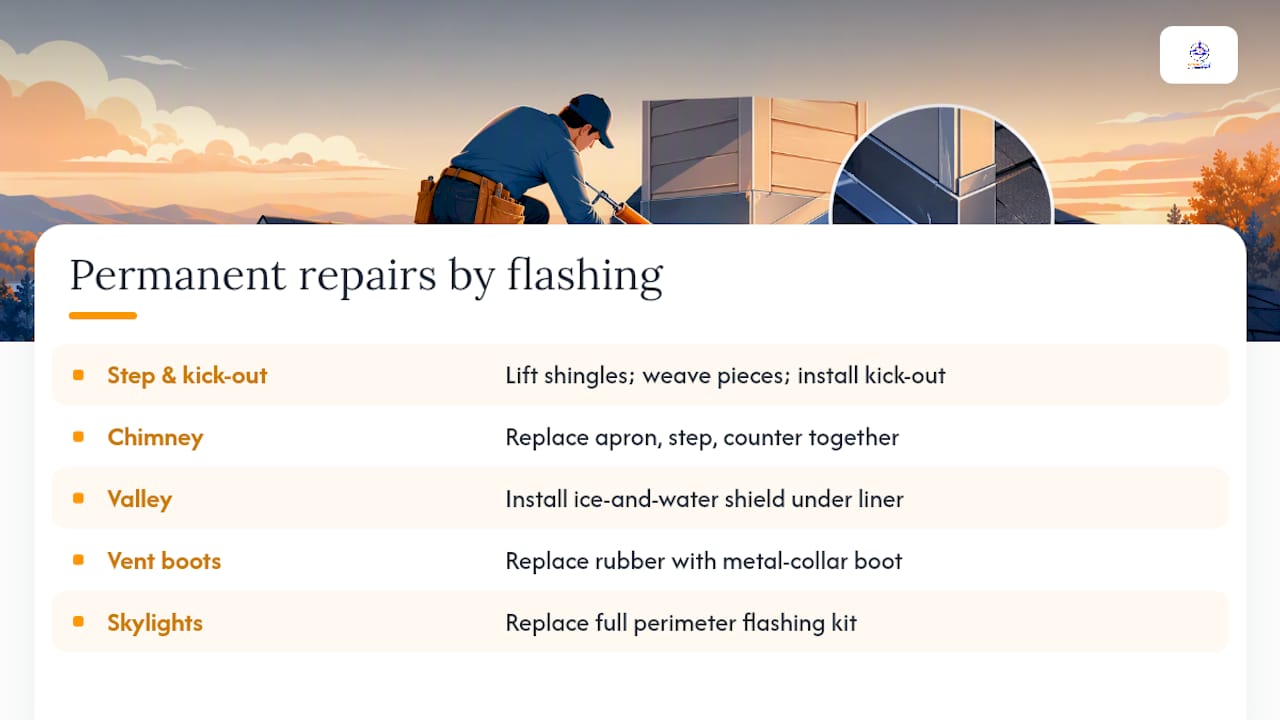
Step and kick-out flashing at roof-wall joints requires lifting the siding or shingles rather than just running caulk along the visible seam. Each step flashing piece gets woven in with its own shingle course, and a kick-out piece diverts water away from the wall at the bottom of the run rather than letting it drain behind the siding. This sequencing detail is exactly what installation guides from IKO recommend doing during a reroof, since retrofitting flashing under intact shingles later is a common source of future leaks.
Chimney flashing is a four-piece system, and repairing it properly usually means replacing the apron, step flashing, and counter flashing together rather than resealing one piece. If the chimney is wide enough to shed a lot of water, adding a cricket behind it, essentially a small peaked ridge that splits water around the chimney, prevents the pooling that wears through flashing early.
Valley repairs should include an ice-and-water shield membrane under the metal or shingle valley liner, not just a new layer of shingles pressed over the old flashing. That membrane is what stops water that gets past the surface layer from reaching the sheathing.
Vent boots get a straightforward upgrade: swap the cracked rubber collar for a boot with a metal collar, which holds up far longer against sun exposure. Skylights need a full perimeter flashing kit replacement, matched to the skylight's exact model, rather than a bead of sealant around the frame.
Building codes back this up structurally. Step and kick-out flashing installations reference corrosion-resistant material requirements, generally not less than 26-gauge galvanized sheet metal, which is thicker and more durable than the flimsy flashing sometimes used on budget installations.
When to Call a Professional and What It Costs
Some flashing problems are safe and simple enough to handle yourself. Others involve structural risk, steep pitches, or repairs that need to be sequenced correctly to actually last, and that's where a professional earns their fee.
Call a roofer when you're dealing with a two-story or steep-pitch roof, any sign of soft or rotted decking, a chimney or valley failure, or a repair that requires weaving flashing under existing shingle courses. A qualified inspection should include an attic check, some form of moisture mapping, a hose test if the source isn't obvious, photo documentation of the damage, and a written scope that clearly separates a temporary patch from a permanent repair.
Cost typically breaks down by scope:
Ask any contractor for a workmanship warranty and specific material callouts (gauge, coating, sealant brand) in writing. Be wary of anyone who promises a long lifespan on a caulk-only fix. A breakdown of chimney flashing repair costs covers this scope in more detail if a chimney is the suspected source.
A Simple Maintenance Plan to Prevent Flashing Leaks
Most flashing leaks are preventable with a routine that takes maybe an hour, twice a year, plus a quick look after any bad storm.
- Walk the roofline visually every spring and fall, and again after any hailstorm or high-wind event, checking for lifted, rusted, or missing flashing.
- Check the attic twice a year for damp sheathing, rust streaks on nails, or daylight around penetrations, even if you haven't noticed an interior stain yet.
- Look specifically for cracked vent boots, buried kick-out flashing, loose fasteners, and gaps at seams. These are the failures that show up years before a full leak develops.
- When reroofing, upgrade to ice-and-water shield in valleys, metal-collar vent boots, and prefabricated kick-out flashing at every roof-wall intersection instead of reusing old pieces.
- Photograph problem areas and keep dated records. That documentation makes warranty claims and insurance conversations far smoother later.
How Exteriorgenie Approaches Flashing Leak Repairs
This guide was written by Ebben, whose deeper breakdowns on temporary roof repair options and chimney flashing repair costs go further into specific scopes. The company is a contractor with certifications including Owens Corning Platinum Preferred Contractor, and employs HAAG-certified inspectors who document damage for insurance claims. The team's approach favors replacing failed flashing over caulking it, backed by photo records at every stage of a repair.
Stop Patching, Start Repairing Flashing Properly
Repeated caulk patches on failed flashing tend to cost more over time than fixing it once, since each patch buys a season or two while the wall or decking underneath keeps absorbing moisture. If you're getting quotes, ask for a written scope that names the difference between a temporary patch and a permanent repair, not a single vague line item. That clarity is what actually lets you weigh cost against how long the fix will hold.
— Ebben
Get Your Flashing Leak Inspected and Fixed
If a hose test, an attic trace, or a storm just told you flashing is the problem, the next move is getting eyes on it before the damage spreads to decking or interior drywall, which is critical for finding trusted contractors through roof repair leads in your area. They handle a full range of services including emergency tarping, vent boot and step flashing repair, chimney and cricket work, and full valley or skylight flashing replacement.

Visits typically include a documented inspection, photos of the failure point, and a written scope that separates a temporary patch from a permanent fix. Because of certified inspectors, storm-related flashing damage can often be coordinated directly with your insurance claim instead of leaving you to navigate the paperwork alone. If you're in the middle of an active leak or just found a suspicious stain, start with a roof repair request to have a technician inspect the actual joint, not just the ceiling stain it left behind.
Sources
- Step and kick-out flashing — BASC / PNNL resource guide
- Roof Flashing: Types, Installation + Why It Leaks | The Roofing Brief
- The Roof Flashing Installation Guide - IKO North America
FAQ
Does homeowners insurance cover flashing repair?
Homeowners insurance typically covers flashing damage caused by a sudden event like a storm or falling debris, but not damage from gradual wear or neglected maintenance. A HAAG-certified inspection can help document which category your damage falls into.
How much does it cost to repair flashing on a roof?
Small repairs like a vent boot swap generally run $150 to $400, while step flashing or chimney flashing repairs run $500 to $1,800, and full valley or skylight flashing jobs can reach $2,400 or more.
How often should roof flashing be replaced?
There's no fixed replacement schedule, but flashing should be inspected every spring and fall and after major storms, with metal flashing generally lasting decades and rubber vent boots needing replacement roughly every 10 years due to UV cracking.
Can I replace roof flashing myself?
You can safely handle a vent boot swap on a low, walkable roof or seal a small accessible seam with polyurethane sealant, but weaving step flashing, rebuilding a chimney cricket, or working on a steep or multi-story roof calls for a professional.