
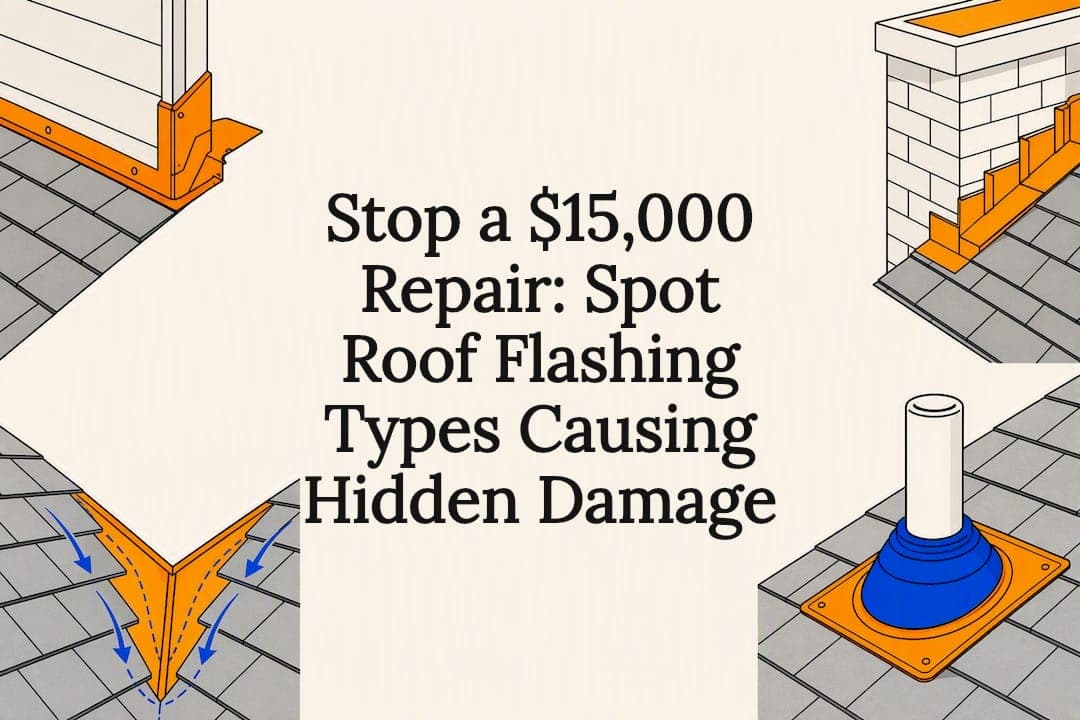
Roof flashing is the thin metal or membrane material installed at every roof transition, joint, and penetration to direct water away from the structure. The main types homeowners run into are drip edge, valley, step, counter, chimney, kickout, pipe/vent, skylight, and continuous or base flashing. Each one solves a different water problem, and the vast majority of roof leaks trace back to a flashing failure rather than a worn shingle.
TL;DR:
- Most roof leaks originate from flashing failures, especially at joints, transitions, or penetrations, rather than from worn shingles.
- Common issues include cracked pipe boots, missing kickout flashing, or corroded metal, which often indicate specific failure points needing targeted repairs.
- Regular twice-yearly inspections and after-storm checks can catch flashing problems early, especially focusing on visible rust, gaps, or staining.
- Repair costs are generally lower than replacement, with isolated failures such as a cracked pipe boot being repairable, but widespread damage may require a full roof upgrade.
- Proper installation with correct layering, metal compatibility, and professional assessment are key to avoiding costly water intrusion and extending flashing lifespan.
Table of Contents
- What Are the Different Roof Flashing Types?
- How Long Do Different Flashing Materials Last?
- What Causes Roof Flashing to Fail?
- How Often Should You Inspect Roof Flashing?
- Should You Repair or Replace Failing Flashing?
- Exterior Genie's Field Notes on Flashing Done Right
- Why Flashing Should Top Your Roof Priority List
- Get a Professional Flashing Inspection From Exterior Genie
- Sources
- FAQ
What Are the Different Roof Flashing Types?
Knowing what is roof flashing supposed to look like at each spot on your roof is the first step toward catching a problem before it becomes a ceiling stain. Flashing is classified mostly by where it sits and what shape it takes, and the type used often shifts depending on the roofing material and how steep or complex the roof geometry is.
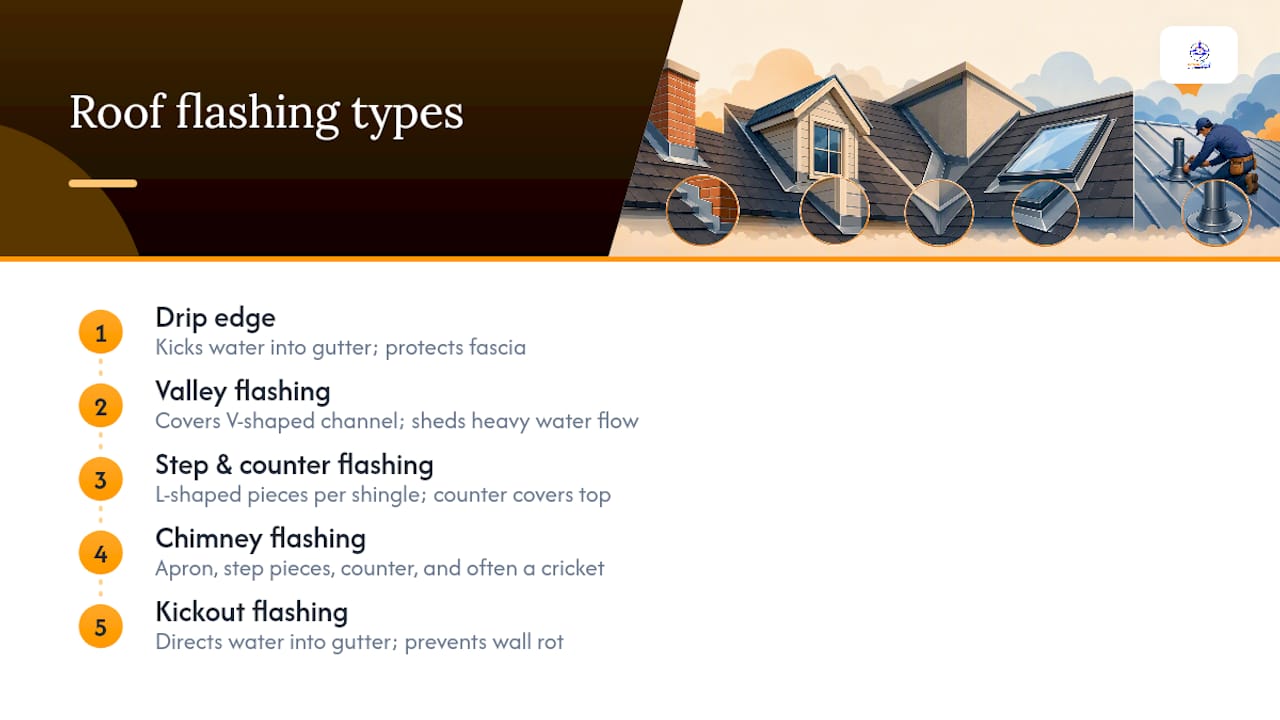
Drip edge runs along the eaves and rakes, the outermost edges of the roof. Its job is simple: kick water away from the fascia and into the gutter instead of letting it wick back under the shingles. When drip edge is missing, undersized, or bent, you'll usually see rot at the fascia board or staining on the soffit below.
Valley flashing covers the V-shaped channel where two roof planes meet, which carries more water volume than almost any other spot on the roof. You'll find it installed two ways: open valleys leave a strip of exposed metal down the center, while closed or woven valleys tuck shingles over the metal so it's hidden. Open metal valleys tend to last longer and shed debris better, which matters a lot if your roof sits under oak or pine trees. Woven valleys look cleaner but tend to wear out sooner because shingle granules take the brunt of the water flow.
Step flashing and counter flashing work as a pair wherever a roof plane meets a vertical wall, like a dormer or a sidewall. Step flashing is a series of small, L-shaped metal pieces, one per shingle course, each overlapping the next like fish scales so water always has somewhere to go. Counter flashing then covers the top edge of that step flashing, tucked into the wall material so water can't sneak in behind it. A properly detailed step and counter system lets both pieces move independently as the house settles and temperatures swing, which is exactly why cutting corners here causes so many callbacks.
Chimney flashing is really a small system, not a single piece. It includes an apron at the front (downslope) side, step flashing running up both sides, counter flashing over the step pieces, and often a cricket, a small peaked structure behind wide chimneys that splits water around instead of letting it dam up. Chimney leaks are common because four separate flashing components meet in one small area, and any one of them failing can look identical from inside the attic.
Kickout flashing is easy to miss because it's small, but its absence causes some of the most expensive damage in residential roofing. It sits at the bottom end of a step flashing run, where a roof-to-wall junction ends at a gutter, and its job is to kick water outward into the gutter instead of letting it run down behind the siding and into the wall cavity. A missing kickout is one of the most common causes of hidden wall rot behind exterior siding.
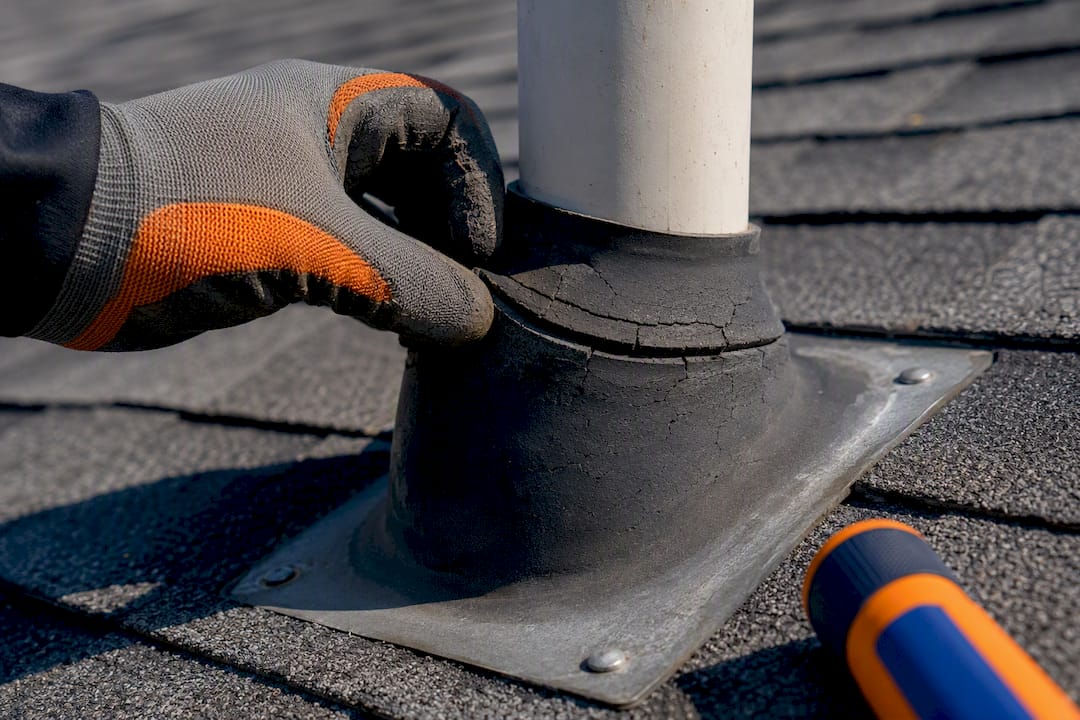
Pipe and vent flashing, often called boots, seal around plumbing stacks and vent pipes. Most are a metal base plate with a rubber or thermoplastic collar that grips the pipe. The collar is the weak link, not the metal base, because it sits in direct sun and constant temperature swings.
Skylight flashing typically comes as a kit from the skylight manufacturer, combining head flashing above the unit, step flashing along the sides, and an apron below. Head and apron flashing also show up on their own wherever a roof meets a wall perpendicular to the slope, such as above a porch roof or a dormer window.
Rounding out the list: continuous or base flashing runs along longer wall-to-roof junctions in one piece rather than stepped sections, ridge flashing (sometimes just the ridge cap itself) covers the peak, and barge or edge flashing protects gable ends on some roof styles.
Every one of these follows the same underlying rule: flashing has to move water down and out, never toward another building element, and the layering sequence during installation determines whether that actually happens.
How Long Do Different Flashing Materials Last?
Material choice drives both your upfront cost and how many times you'll deal with flashing repairs over the life of the roof.
Galvanized steel is the most common and least expensive option, typically lasting 20 to 30 years before the zinc coating wears thin enough to let rust take hold. Aluminum costs a bit more, resists rust well, and holds up for a similar span, but it corrodes quickly if it touches masonry mortar or treated lumber directly. Copper is the premium choice, often lasting 50 years or longer and developing a green patina that plenty of homeowners actually like, but it costs several times more than steel per square foot. Stainless steel splits the difference: excellent corrosion resistance, a lifespan that can rival copper, and a price tag that sits below it.
Nonmetal options have carved out a real niche too. Peel-and-stick membrane flashing works well at complex penetrations and tight transitions where bending rigid metal cleanly just isn't practical, though these membranes generally don't match metal's long-term durability in full sun exposure.
One detail trips up a lot of DIYers: mixing metals causes galvanic corrosion. Aluminum flashing fastened with copper nails, or aluminum sitting against copper gutters, will corrode fast at the contact point. The installation method matters as much as the material itself. Counter flashing set into a masonry reglet with sealant protected inside the groove can last 25 to 40 years, while surface-mounted counter flashing, caulked directly to the face of the wall, needs that sealant bead refreshed every 7 to 12 years or it starts letting water behind the metal.
What Causes Roof Flashing to Fail?
Most flashing problems fall into a handful of repeat offenders, and matching what you see to the likely cause saves time before you ever call a contractor.
- Seam or sealant failure — caulk and roofing cement dry out, crack, and shrink over years of UV exposure, breaking the seal at flashing joints.
- Missing or damaged kickout flashing — look for streaking on siding just below where a roofline meets a wall.
- Cracked or split pipe boot collars — the rubber or plastic collar splits from sun exposure long before the metal base fails.
- Corroded or rusted-through metal — thin spots or holes usually show up first at the lowest point of a flashing run, where water sits longest.
- Improper original installation — short step flashing legs, flashing face-nailed instead of hidden under shingles, or sealant substituted for proper laps.
Where you see the stain often tells you where the flashing failed. A stain directly beside a chimney points to the chimney flashing system. A line stain running down a sloped ceiling usually traces back to a valley. A stain near an exterior wall, especially at a lower roofline, often means a missing or corroded kickout. Do a visual check from the ground with binoculars or from a stable ladder against the gutter line. Skip climbing onto the roof itself unless you have the right footing and fall protection. This is one of the areas where a professional roof inspection earns its cost.
Pro Tip: If your roof is between 10 and 15 years old, check the pipe boots first. Rubber pipe boot collars commonly fail from UV and heat exposure well before the surrounding metal flashing does, making it the single most common leak point on a roof that's otherwise holding up fine. Full details on spotting and fixing this are in our roof vent repair guide.
How Often Should You Inspect Roof Flashing?
A twice-yearly check, spring and fall, catches most flashing problems before they become interior damage. Pair it with a walk-through after any major storm.
From the ground, look for:
- Streaking or staining on siding below roof-to-wall junctions
- Granules collecting in the gutter near valleys, a sign of accelerated wear
- Visible gaps, rust, or lifted edges at drip edge and valley metal
- Cracked caulk lines around any visible counter flashing
On or near the roof, a professional inspection should confirm valleys are clear of debris, pipe boots show no cracking, kickout flashing is present at every roof-to-wall termination, and gutters aren't pulling drip edge away from the fascia. Photograph anything questionable and date the images. That record becomes valuable if you ever file an insurance claim or need to show a warranty inspector when a problem started. Clearing debris from valleys and gutters is safe DIY territory; climbing onto steep pitches to inspect metal seams up close is not.
Should You Repair or Replace Failing Flashing?
A single bad component, one cracked pipe boot or one missing kickout, is almost always a repair, not a reason to touch the rest of the roof. Widespread corrosion across multiple flashing runs, repeated leaks after past patch jobs, or valley damage that's chewed through the underlayment usually points toward a larger project, sometimes tied to a broader roof repair or replacement.
Costs vary by access difficulty, material (copper runs well above steel), whether a cricket needs to be built behind a wide chimney, and any local code requirements triggered by the scope of work. Our breakdown of common residential roof repair types covers typical price drivers in more detail.
When you're comparing bids, ask specifically whether the quote includes new step and counter flashing or just resealing the old pieces, and whether kickouts will be added where they're missing. A quote that mentions caulk more than metal is a red flag.
Exterior Genie's Field Notes on Flashing Done Right
Flashing separates a roof that lasts from one that leaks in year three. As an Owens Corning Platinum Preferred Contractor, a veteran owned company, and a crew that runs HAAG certified inspections on every storm claim, A professional contractor treats flashing as core structural work, not a finishing touch.
Field mistakes we see constantly: step flashing cut short of the code-referenced wall leg, counter flashing surface mounted where a reglet cut would have lasted decades longer, and sealant smeared across an exposed face as a permanent fix instead of a stopgap. Sealant belongs inside a protected reglet joint, never exposed to weather as the primary defense. A DIY fix that skips this geometry often looks fine for a season and fails at the worst possible time, usually during the next hard rain.
Why Flashing Should Top Your Roof Priority List
Flashing repairs are almost always the cheapest fix available to prevent the most expensive kind of damage: hidden water intrusion into framing, insulation, and drywall. A $300 kickout repair prevents a $15,000 wall reconstruction. That math is not close, and it's the reason every inspection should include flashing details checked first, before shingle wear or granule loss enter the conversation.
Urgency gets ranked by what's behind the flashing, not just what's visible on top of it. A cracked pipe boot over an unfinished attic is a different priority than the same crack over a finished ceiling with a chandelier underneath it. Homeowners who understand that distinction end up making better decisions about which repairs to schedule now and which can reasonably wait a season.
— Ebben
Get a Professional Flashing Inspection From Exterior Genie
A HAAG certified inspection identifies exactly which flashing components are failing, with no upsell to a full roof replacement when a targeted repair will do.

As an Owens Corning Platinum Preferred Contractor, Exteriorgenie brings the same installer standards described throughout this guide, correct step and counter geometry, proper kickout placement, reglet mounted counter flashing where masonry allows, to every job. The team also handles emergency tarping, storm and hail damage assessment, and insurance claim assistance for homeowners dealing with flashing damage from a recent weather event. If a stain has shown up on your ceiling or siding, don't wait for it to spread before finding out which flashing type is behind it. Schedule a roof repair inspection and get a straight answer on what's actually wrong.
Sources
For more detail beyond this guide, GAF's overview of flashing's role in leak prevention, Building Science Corporation's technical flashing details, and Green Building Advisor's flashing type breakdown are solid technical references. On the Exteriorgenie site, see the guide on flashing leaks and chimney flashing repair costs.
- Understanding roof flashing: essential protection for every home (GAF)
- All about roof flashing (Green Building Advisor)
- Counter flashing: wall-junction detail & install (The Roofing Brief)
- What is roof flashing? 8 types explained (This Old House)
FAQ
What Is the Most Common Type of Roof Flashing Problem?
Cracked or split pipe boot collars are among the most frequent flashing failures on roofs older than a decade, since the rubber degrades from sun and heat well before the metal base does. Missing kickout flashing at roof-to-wall junctions is a close second and often causes hidden siding and wall damage.
What Is the Difference Between Step Flashing and Counter Flashing?
Step flashing is a series of small metal pieces installed one per shingle course along a roof-to-wall junction, allowing water to shed downward in stages. Counter flashing covers the top edge of the step flashing and tucks into the wall material, and both pieces need to move independently for the system to last.
How Long Does Roof Flashing Typically Last?
Galvanized steel and aluminum flashing generally last 20 to 30 years, copper often exceeds 50 years, and stainless steel falls in between. Counter flashing set into a masonry reglet can last 25 to 40 years, far longer than surface-mounted counter flashing that needs resealing every 7 to 12 years.
Can I Repair Roof Flashing Myself?
Ground-level and gutter-level visual inspections are reasonable for most homeowners, but climbing onto a roof to repair metal flashing carries real fall risk and requires correct lapping technique to avoid creating a new leak. For anything beyond clearing debris from a valley, a professional inspection from a company like Exteriorgenie is the safer and often cheaper path long term.
Does Exterior Genie Offer Flashing Inspections and Repairs?
Yes. Exteriorgenie provides roof repair services that include flashing diagnosis and repair, backed by HAAG certified inspectors and Owens Corning Platinum Preferred Contractor status. Current pricing is available directly through the site since costs depend on the scope of damage found during inspection.