

Most roof valley leaks trace back to one of two failures: cracked or corroded flashing, or missing and degraded ice-and-water shield underneath it. If water is actively coming through your ceiling, set a bucket, clear visible debris from the valley if you can do it safely, and skip the roof walk in wet or icy conditions. Soft decking or a leak that keeps returning after a patch means it's time to call a roofer, not reach for more sealant.
TL;DR:
- Most roof valley leaks originate from corroded or missing flashing and the absence of a proper ice-and-water shield beneath the valley.
- Diagnosing leaks requires inspecting the attic for stains and water trails, then running controlled water tests to confirm the leak entry point.
- Valleys fail mainly due to corrosion, debris buildup, improper shingle cuts, or ice dam pressure, often worsened by incorrect flashing installation.
- Temporary fixes like sealants and tarps can buy time, but permanent repairs involve replacing shingles, installing membrane, and metal flashing in a precise, step-by-step sequence.
- Costs vary from a few hundred dollars for emergency patches to several thousand for full valley rebuilds, with decking damage demanding professional attention.
Table of Contents
- Diagnosing a Roof Valley Leak Before You Touch Anything
- Why Roof Valleys Fail in the First Place
- How to Fix a Leaking Roof Valley: Step by Step
- Tools, Safety, and When the Job Isn't a DIY Job
- A Simple Maintenance Routine That Prevents Most Valley Leaks
- Signs a Roofer, Not a Sealant Tube, Is the Right Call
- What a Valley Repair Actually Costs and How Long It Takes
- Where to Draw Your Own DIY Line
- Get a Professional Look at Your Valley Before It Gets Worse
- Sources
- FAQ
Diagnosing a Roof Valley Leak Before You Touch Anything
Chasing the wrong spot on a roof wastes a Saturday and sometimes a shingle warranty. Water rarely drips straight down from where it enters. It travels along rafters, follows nail lines, and pools at low points before finally showing up as a ceiling stain that might be three feet from the actual breach.
Start in the attic, not on the roof. A flashlight and a slow walk along the valley's underside beat guesswork every time.
- Check the attic first. Look for dark staining on the decking, rusty nail heads, or compressed, water-stained insulation directly beneath the valley. Follow any staining uphill toward the ridge since gravity pulls water down but roof structure often channels it sideways first.
- Inspect the exterior valley. From a ladder or binoculars at ground level, scan for rusted or separated metal flashing, shingles that have lifted or been cut too aggressively at the valley line, and any debris pile that's been holding water against the surface.
- Run a controlled water test. Have someone in the attic with a flashlight while you run a garden hose at low pressure, starting at the bottom of the valley and working uphill in stages, pausing for a minute or two at each spot. This method mirrors the attic-and-exterior diagnostic approach professionals use to isolate valley leaks, and it's the single most reliable way to confirm a leak source without guessing.
- Track the water's actual path. If the attic observer sees dripping before you've reached the suspected trouble spot, stop and mark that lower point. The leak is entering above it, not at it.
Pro Tip: Chalk-mark every spot where water shows up during the test, from the inside and outside. When you're done, you'll have a map instead of a memory, and that map is what tells you exactly where to open up the roof.
Don't replace shingles the moment you spot a stain. Water that traveled ten feet from its entry point will fool you into patching the wrong section, and you'll be back on the ladder within a season.
Why Roof Valleys Fail in the First Place
A valley does more work than any other part of your roof. It's the funnel where two roof planes meet and dump their combined runoff into one channel, which means it deals with far more volume than a flat section ever sees. That's exactly why valleys are especially vulnerable when flashing or underlayment fails: there's simply more water looking for a way in.
Several specific failure points show up again and again:
- Corroded or pinholed flashing. Years of debris grinding against metal in a heavy-flow channel wear through galvanized flashing faster than flat-roof metal ever experiences.
- Missing or degraded ice-and-water shield. Older roofs, or cheap re-roofs, sometimes skip the self-adhering membrane entirely under the valley, leaving only felt paper as the last line of defense.
- Debris buildup. Leaves, pine needles, and granule wash create small dams that hold standing water against shingles and flashing far longer than the roof was ever designed to tolerate.
- Aging or improperly cut shingles. Closed-cut and woven valley techniques rely on precise overlap; sloppy cuts or brittle, sun-baked shingles open gaps that a properly woven valley would never have.
- Ice dam pressure. In freeze-thaw climates, ice backing up in the valley forces water uphill under shingles, defeating seals that work fine the other 10 months of the year.
Roofing contractors consistently point to flashing nailed too close to the valley center as one of the most common installation mistakes. Every nail is a potential entry point, and one placed inside the water channel instead of at the outer edge is asking for trouble the first time a real storm rolls through.
How to Fix a Leaking Roof Valley: Step by Step
Not every valley leak needs a full rebuild. But a lot of homeowners stop at the wrong step and end up doing this twice.
Emergency mitigation (buys you time, doesn't solve anything)
- Set a bucket or tarp inside to catch active dripping and protect flooring or drywall below.
- Clear leaves, granules, and debris from the valley if the roof is dry and you can reach it safely from a ladder without stepping onto the slope.
- Apply self-adhering roofing tape or a bead of polymer-modified roofing cement over an obvious crack or gap in the flashing.
- Cover a severely compromised section with a tarp, secured at the ridge, if a storm is imminent and you can't get a repair scheduled fast.
Roof cement and adhesive tape stop water today. They do not fix rot, and temporary patches often mask underlying decking damage that keeps deteriorating underneath the patch, invisible until it fails again.
The permanent repair sequence
Professionals rebuild a shingle valley in a specific order, and skipping steps is exactly why DIY sealant jobs fail within a year or two.
- Remove the damaged shingles around and above the failure point, working back far enough to expose sound material on both sides of the valley.
- Inspect the decking. Press on it. Soft, spongy, or discolored plywood means rot, and it has to be cut out and replaced before anything goes back on top.
- Install self-adhering ice-and-water membrane, centered directly in the valley and running the full length, overlapping upward in the direction water flows away from the low point.
- Add metal valley flashing, ideally 26-gauge, fastened only at the outer edges, never through the center channel where standing water sits.
- Re-shingle with correct valley cuts, using proper dog-ear trimming so each course sheds water into the channel instead of catching it at a butt joint.
- Seal exposed edges with polymer-modified roofing cement where shingle edges meet the metal, not as a substitute for the flashing itself.
This membrane-plus-metal-plus-shingle-integration sequence is the standard permanent fix professionals rely on rather than spray sealants, because sealant degrades under UV and thermal cycling while a properly layered valley doesn't depend on any single material staying flexible forever.
Pro Tip: Never mix flashing metals in the same valley. Aluminum touching copper, or the wrong fastener touching either, sets up galvanic corrosion that eats through metal from the inside, and it can happen even under paint.
Open metal valleys tend to outperform woven or closed-cut valleys in the durability department, mainly because you can actually see the channel to inspect it. A woven valley hides its condition under a layer of interlocked shingles, so a small tear in the underlayment can wick water sideways for months before it ever shows up as a stain.
Tools, Safety, and When the Job Isn't a DIY Job
Before you climb anything, get the right gear together. A roofing hammer, tin snips, a utility knife, a chalk line, a pry bar, and a stabilizer for your ladder cover most of what a valley repair actually requires. Fall protection, meaning a proper harness anchored to the roof structure, isn't optional gear for anything past a single-story ranch.
A few rules aren't negotiable:
- Never work a wet, icy, frosty, or steep roof alone. Wait for dry conditions and bring a second person.
- Stay clear of power lines and check for exposed wiring near vents, antennas, or satellite mounts before you set a ladder.
- Keep three points of contact at all times and never step directly on a valley itself. It's the weakest, wettest part of the surface you're standing on.
Pro Tip: If your roof pitch is steeper than about 6:12, or you're dealing with a second story with no safe ladder access, the math on DIY stops making sense. The cost of a fall outweighs the cost of a service call every time.
When decking rot extends beyond a small patch, or the pitch and height put you outside your comfort zone, that's the signal to hand the job to a licensed roofer rather than push through.
A Simple Maintenance Routine That Prevents Most Valley Leaks
Valleys punish neglect faster than any other part of a roof. A twice-yearly check, in late fall before leaves pile up and again in early spring after freeze-thaw cycles, catches most problems while they're still cheap to fix. Industry guides consistently recommend this same seasonal rhythm, plus a walk-around after any storm with sustained wind or hail.
Build a short routine and stick to it:
- Clear leaves, pine needles, and granule buildup from every valley, not just the ones you can see from the ground.
- Keep gutters and downspouts flowing freely so water actually leaves the roof instead of backing up at the eaves.
- Trim overhanging branches that drop debris directly into a valley or scrape against shingles in the wind.
- In snow-heavy regions, ask about extended ice-and-water shield coverage and check attic ventilation, since poor ventilation is a major contributor to ice dam formation.
- Photograph each inspection and keep dated records. Regular documented maintenance also supports warranty claims and insurance paperwork if a storm later causes damage.
None of this takes more than an hour, twice a year. Compare that to the cost of pulling up rotted decking after three seasons of a slow, undetected leak.
Signs a Roofer, Not a Sealant Tube, Is the Right Call
A veteran-owned general contracting company often approaches a valley inspection methodically, with documentation, and with an eye toward what an insurance adjuster will need to see.
A handful of signs mean it's past the point of a weekend fix:
- The leak returns after a temporary patch. Sealant that fails within a season usually means the underlying membrane or decking is the real problem, not the surface crack you covered.
- Decking feels soft or spongy underfoot anywhere near the valley. That's rot, and it spreads.
- More than one valley is failing, or the affected area covers a large section of roof rather than a single spot.
- You need documentation for an insurance claim. A HAAG-certified inspection carries more weight with adjusters than a homeowner's photos and a guess.
When you do call a contractor, ask direct questions: proof of licensing and insurance, the exact flashing gauge and membrane brand they plan to use, a written warranty on workmanship, a realistic timeline, and confirmation they'll actually inspect the decking and underlayment rather than shingle over a hidden problem.
What a Valley Repair Actually Costs and How Long It Takes
Costs swing widely depending on how far the damage has spread before anyone notices it, and timelines depend just as much on decking condition as on the visible flashing damage.
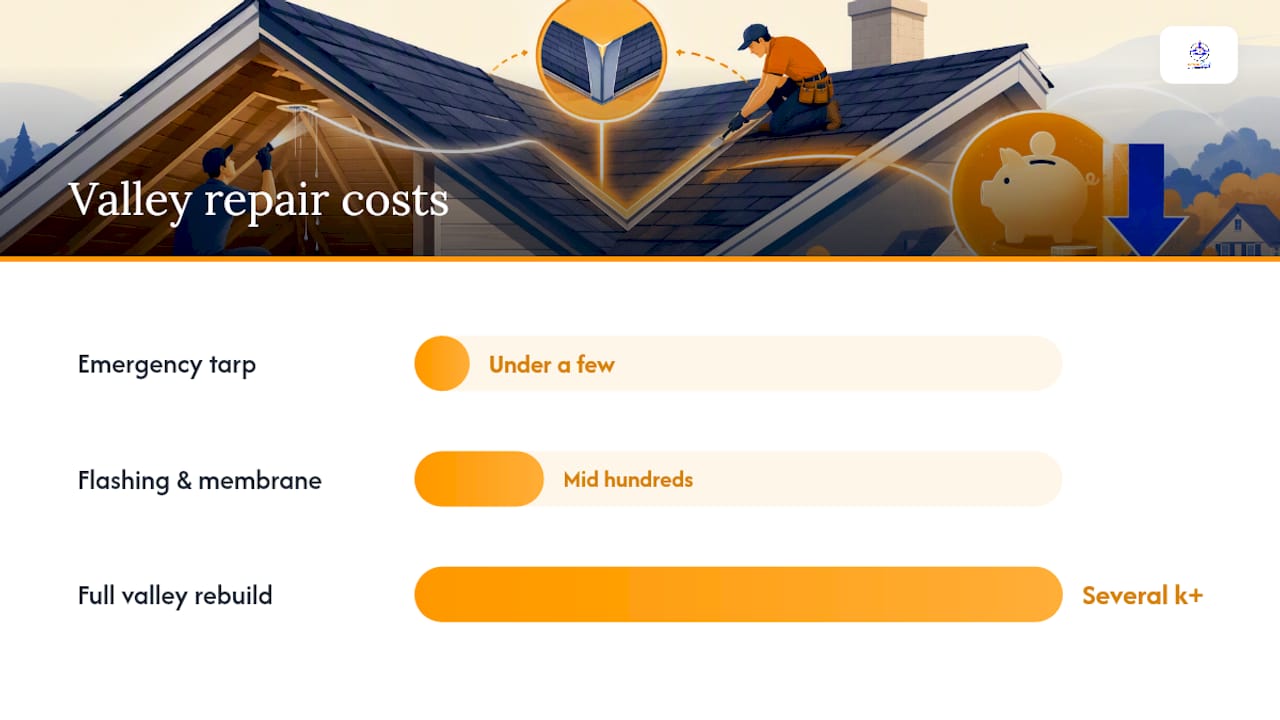
| Repair scope | Typical cost range | Typical timeline |
|---|---|---|
| Emergency tarp or temporary patch | Under a few hundred dollars | Same day |
| Flashing and membrane replacement (sound decking) | Mid hundreds to low thousands | About 1 day |
| Full valley rebuild with decking replacement | Several thousand and up | 1 to 3 days |
A same-day tarp is cheap because it's materials and a short labor call, nothing structural. Flashing and membrane replacement costs more because it involves stripping shingles, installing new underlayment, and re-integrating the roofing correctly, though it stays contained if the decking underneath is still solid. The number that actually moves is decking replacement. Rotted plywood adds demolition, disposal, new sheathing, and extra labor hours, which is why two "valley leak" estimates from two different roofs can land thousands of dollars apart even though the symptom looked identical from the ceiling.
Ask any contractor for an itemized quote that separates flashing, membrane, decking, and shingle costs. A lump-sum number without that breakdown makes it impossible to know what you're actually paying for.
Where to Draw Your Own DIY Line
Homeowners can handle more of a valley repair than most people assume. Clearing debris, running a water test, tarping an active leak, even swapping a few damaged shingles on a low-pitch roof, all fall within reasonable DIY territory if you've got the right tools and a decent head for heights.
Where I'd draw the line is decking. Once you've pulled shingles and found soft, discolored plywood, the job has changed. That's structural work, and a mistake there doesn't just leak again, it can sag or fail under snow load. Document what you find with photos, get a second set of eyes from a licensed contractor, and treat the sealant tube as a stopgap, never a solution.
— Ebben
Get a Professional Look at Your Valley Before It Gets Worse
A sealant tube and a Saturday afternoon can buy you time, but they won't stop a valley leak that's already reached the decking. Professional contractors handle the parts of this job that require a trade license: roof repair, emergency tarping, and insurance-claims assistance backed by HAAG-certified inspectors who know what an adjuster needs to see.

If you're staring at a ceiling stain and you're not sure whether it's a five-minute patch or a full valley rebuild, that uncertainty is exactly what a proper inspection resolves. Request a same-day response or schedule a detailed roof repair assessment, and ask for an itemized quote before any work starts. Whoever you hire, insist on proof of licensing and insurance first. That single question filters out most of the trouble before it starts.
Sources
For readers who want the deeper technical detail behind the steps above, the step-by-step membrane and flashing sequence is covered in more depth by RapidRepair's permanent valley fix guide, and Rescreening Masters' prevention checklist expands on seasonal maintenance timing. Homeowners dealing specifically with flashing-origin leaks can also review Exterior Genie's flashing leak breakdown for a closer look at how common that failure point really is.
- Roofingcalc
- Roof Leak in Valley: Causes, Detection, and Repair for Homeowners – New England Metal Roof
- Rapidrepair
- Leaking Roof Valley Repair: How to Diagnose, Fix, and Prevent Roof Valley Leaks – Rescreening Masters
FAQ
What Is the First Sign of a Roof Valley Leak?
A ceiling stain near where two roof slopes meet is the most common first sign, though the actual entry point is often higher up the valley than the stain suggests. Musty attic odors and darkened insulation are earlier warning signs than visible ceiling damage.
Can I Fix a Roof Valley Leak Myself?
You can safely handle debris clearing, a water test, and temporary patching if the roof is dry and you have proper fall protection. Permanent repair involving membrane and metal flashing replacement usually requires roofing experience, especially once decking damage is involved.
How Do I Know if It's Flashing or Underlayment Causing the Leak?
An attic inspection combined with a controlled water test starting at the bottom of the valley and moving uphill isolates the source. Rust or visible gaps point to flashing, while staining that appears even without obvious flashing damage often points to a failed underlayment.
How Much Does a Roof Valley Repair Cost?
Emergency tarping runs under a few hundred dollars, flashing and membrane replacement typically falls in the mid hundreds to low thousands, and a full rebuild with decking replacement can reach several thousand dollars. The price depends heavily on how much decking needs replacing, so get an itemized quote before committing.
Does Exterior Genie Offer Emergency Roof Leak Repair?
Yes. Exterior Genie provides emergency tarping along with permanent roof repair and insurance-claims assistance for storm-related valley damage. Current pricing details are available directly through the company's site rather than published as a flat rate.