
Roof vent repair is the process of fixing leaks, cracks, or damage in roofing vent components, primarily pipe boots, flashing, and sealant, to restore a watertight seal and maintain proper attic ventilation. Most homeowners don't realize that a single cracked rubber boot around a plumbing stack can silently funnel water into the attic for months before any ceiling stain appears. The components involved are straightforward: EPDM rubber pipe boots, galvanized or aluminum flashing collars, and roofing sealant products like Geocel or Karnak. Understanding what roof vent repair covers, and when to act, is the difference between a $30 fix and a $10,000 structural repair.
What causes roof vent damage and how to spot it
Cracked rubber pipe boots cause 80 to 90% of roof leaks related to pipe penetrations, typically after 8 to 15 years of UV exposure. UV photo-oxidation breaks down the EPDM polymer chains in the rubber collar, causing it to crack, shrink, and pull away from the pipe. That gap becomes a direct water entry point every time it rains.
Beyond UV degradation, several other factors accelerate vent damage:
- Flashing failure: Metal flashing around box vents and ridge vents can loosen from wind, rust from moisture, or separate from the roof deck as the structure shifts seasonally.
- Sealant deterioration: Roofing caulk and lap sealant break down over time, especially when exposed to freeze-thaw cycles in climates like the Carolinas.
- Storm impact: Hail and wind can physically dislodge vent caps, crack plastic power vent housings, or drive debris under flashing edges.
- Biological growth: Algae and mold accumulate around vent bases, trapping moisture and accelerating rot in the surrounding shingles and decking.
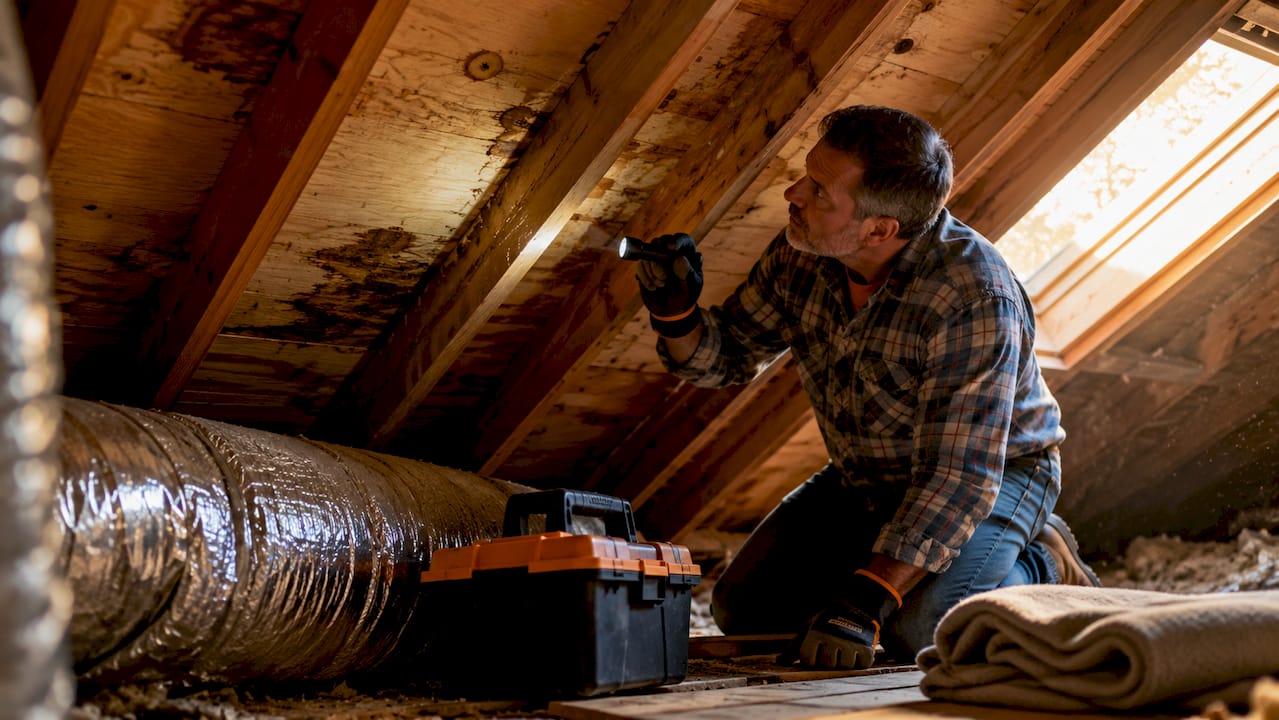
The signs of roof vent damage are visible if you know where to look. Inside the attic, water stains on the sheathing directly below a vent pipe are the clearest indicator. On the roof surface, look for a chalky or cracked rubber collar, rust streaks running down from metal flashing, or lifted shingle edges near the vent base. Inspect roof vents at least twice a year, in spring and fall, and always after a severe storm. Catching a cracked boot early costs you an afternoon. Missing it costs you a ceiling.
How to repair a roof vent yourself: methods, costs, and safety
Three repair methods cover the majority of DIY pipe boot situations: full boot replacement, slip-on Perma-Boot installation, and sealant reapplication. Each has a different cost, difficulty level, and durability profile.
Full boot replacement is the most durable fix. It involves removing the surrounding shingles, pulling the old boot, and installing a new EPDM or silicone boot with proper flashing overlap. DIY pipe boot repairs cost between $15 and $50 in materials and take 30 to 60 minutes. That cost difference compared to ignoring the problem is significant: unaddressed vent leaks can cause $5,000 to $15,000 or more in structural damage within two years.
Slip-on Perma-Boot repairs slide a new rubber collar over the existing pipe without removing shingles. This method works well in cold weather because asphalt shingles become brittle below 50°F, and removing them risks cracking. Perma-Boot is faster and safer in winter but offers slightly less long-term seal integrity than a full replacement.
Sealant reapplication is the lowest-cost option but also the least reliable. Applying a bead of Geocel 2300 or similar roofing sealant around a cracked collar buys time but does not address the underlying rubber failure. Relying solely on thick sealant layers traps moisture and accelerates rot. Use sealant as a secondary barrier, not a primary fix.
For a full boot replacement, follow this sequence:
- Remove the nails from the surrounding shingles and lift them carefully without cracking.
- Pull the old boot free from the pipe and clean the pipe surface.
- Slide the new boot down over the pipe and position the flange flat against the roof deck.
- Nail the flange to the deck, then overlap shingles correctly: the upper flange goes under upslope shingles, the lower flange over downslope shingles.
- Apply a thin bead of roofing sealant along the upper flange edge only.
- Fasten flashing screws to the correct tension. Overtightening flashing screws distorts the metal and creates new leak points.
Safety is non-negotiable on any roof project. Over 500,000 ladder fall injuries occur annually in the U.S. Use a ladder stabilizer, wear rubber-soled shoes, and never work on a wet or icy roof. If your roof pitch exceeds 6:12, or the vent is on a second story, stop and call a professional.
Pro Tip: Never work alone on a roof. Have someone on the ground to stabilize the ladder and call for help if needed. The cost of a professional repair is far less than an emergency room visit.
Professional roof vent repair: when to hire and what to expect
Professional vent repair costs between $150 and $400, depending on the vent type, roof accessibility, and extent of damage. That price includes labor, certified materials, and in most cases a workmanship warranty. The cost difference from DIY is real, but so is the value.
| Repair type | Typical cost | Best for |
|---|---|---|
| DIY boot replacement | $15 to $50 | Single-story, low-pitch roofs, confident DIYers |
| Professional vent repair | $150 to $400 | Complex damage, high roofs, multiple vents |
| Full vent replacement | $200 to $500+ | Severely corroded or outdated vent systems |
Certified contractors bring tools and materials that most homeowners don't stock, including HAAG-certified inspection protocols, commercial-grade EPDM boots, and proper flashing systems. More importantly, they assess the surrounding shingles, decking, and attic ventilation as part of the repair. A licensed roofing contractor will catch secondary damage that a focused DIY repair often misses entirely.
Hire a professional when the roof pitch exceeds 6:12, when the damaged vent is on a second story or above, when multiple vents show damage simultaneously, or when you see rot or soft spots in the decking around the vent base. Those conditions push a straightforward repair into territory where a mistake causes more damage than the original leak.
Pro Tip: Ask any contractor for proof of HAAG certification and a written workmanship warranty before signing. Certified inspectors identify damage patterns that untrained eyes miss, and a warranty protects you if the repair fails within the coverage period.
Maintenance tips to extend roof vent life and prevent leaks
Consistent maintenance is what separates a roof vent that lasts 20 years from one that fails at 10. The schedule is simple: inspect twice a year, in spring and fall, plus after any storm that produces hail, wind above 50 mph, or heavy debris.
During each inspection, check for these specific conditions:
- Rubber boot collars that appear chalky, cracked, or have pulled away from the pipe
- Flashing edges that are lifted, rusted, or have visible gaps at the roof surface
- Sealant that is cracked, peeling, or missing from flashing seams
- Debris or mold accumulation around vent bases that could trap moisture
- Ridge vent end caps that are cracked or missing, which allow water infiltration at the most vulnerable point
Cleaning matters more than most homeowners expect. Debris packed around a vent base holds moisture against the rubber and metal components, accelerating degradation. A stiff brush and a garden hose handle most cleaning jobs without damaging shingles.
Temperature timing affects repair quality directly. Asphalt shingles become brittle below 50°F, so schedule any repair requiring shingle removal for late spring through early fall. If you discover a leak in January, use a slip-on boot or a temporary sealant patch to stop the water entry, then complete the full repair when temperatures rise.
Avoid the common mistake of stacking multiple sealant layers over old applications. Each layer traps the moisture underneath, and the combined mass eventually cracks and separates as a unit. Strip old sealant before reapplying, and use only a thin, continuous bead along flashing seams.
Pro Tip: After cleaning a ridge vent, hold a flashlight inside the attic and look for daylight showing through the vent. Any visible light gap that shouldn't be there indicates a failed end cap or damaged baffling that needs immediate attention.
Comparing roof vent types and their repair challenges
Repair methods must match the vent type to avoid recurring leaks. Many homeowners treat all roof vents as interchangeable, which leads to wrong repair approaches and repeated failures.
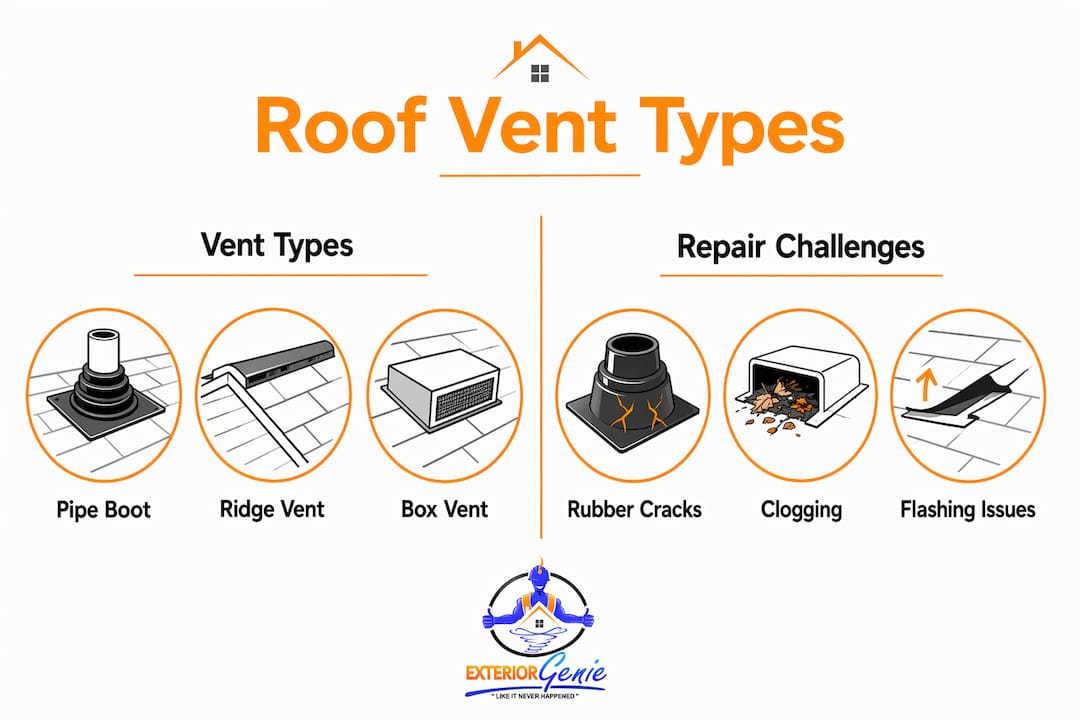
| Vent type | Common failure mode | Primary repair approach |
|---|---|---|
| Pipe boot | Cracked EPDM rubber collar | Full boot replacement or slip-on Perma-Boot |
| Ridge vent | Clogged intake, cracked end caps | Cleaning, end cap replacement, sealant at seams |
| Box vent | Loose or rusted flashing, cracked housing | Reflash or replace housing unit |
| Power vent | Motor failure, cracked housing, flashing gaps | Motor replacement or full unit swap |
Pipe boots are the most frequently repaired vent type because rubber degrades faster than metal or plastic. The repair is focused entirely on the rubber collar condition and the flashing overlap sequence around the pipe.
Ridge vents present a different challenge. Clogged or damaged ridge vents affect the entire attic ventilation system, not just a single penetration point. A blocked ridge vent traps heat and moisture in the attic, which drives up energy costs and accelerates shingle degradation from the underside. Cleaning the vent channel and replacing cracked end caps restores function without a full replacement.
Box vents and power vents share a common vulnerability: the flashing collar where the vent housing meets the roof surface. Applying a slip-on collar designed for a pipe boot to a corroded box vent base will not seal correctly. Each vent type requires its own flashing profile and repair sequence.
Key takeaways
Roof vent repair prevents minor rubber and flashing failures from becoming thousands of dollars in structural water damage, and the right repair method depends entirely on the vent type and roof conditions.
| Point | Details |
|---|---|
| Primary failure cause | Cracked EPDM pipe boots cause 80 to 90% of vent-related leaks after 8 to 15 years of UV exposure. |
| DIY cost vs. risk | DIY repairs cost $15 to $50, but ignored leaks can cause $5,000 to $15,000 in structural damage. |
| Correct installation sequence | Upper boot flange goes under upslope shingles; lower flange over downslope shingles to prevent leaks. |
| Inspection schedule | Inspect twice yearly in spring and fall, plus after any storm, to catch damage before it escalates. |
| Match repair to vent type | Pipe boots, ridge vents, box vents, and power vents each require different repair methods and materials. |
What I've learned after years of watching homeowners get this wrong
The most expensive roof vent repairs I've seen weren't caused by storms or age. They were caused by delay. A homeowner notices a small water stain on the ceiling, assumes it's condensation, and waits six months to investigate. By then, the sheathing is rotted, the insulation is saturated, and what started as a $40 boot replacement has become a $7,000 decking repair.
The second most common mistake is sealant overuse. I understand the instinct. Caulk is cheap, it's fast, and it looks like it's working. But thick sealant layers trap moisture and create a false sense of security. The underlying rubber or metal is still failing. You've just hidden it.
On the DIY versus professional question, I think most homeowners underestimate both the risk and the value of professional work. A single-story, low-pitch roof with one cracked boot is a reasonable DIY project for someone comfortable on a ladder. But the moment you're dealing with a steep pitch, a second story, or multiple damaged vents, the common roofing mistakes that cost homeowners thousands are exactly the ones made under pressure on an unfamiliar roof. The $150 to $400 professional repair cost is not just paying for labor. It's paying for a full assessment, certified materials, and someone who will catch the damage you didn't know to look for.
Early detection and the right repair method are the two variables that determine whether a roof vent issue stays minor. Everything else follows from those two decisions.
— Ebben
Get expert roof vent repair from Exteriorgenie
If your inspection turned up cracked boots, failed flashing, or water stains you can't explain, Exteriorgenie's team in Lexington, SC is ready to help. As a veteran-owned company with 25 years of roofing experience and HAAG-certified inspectors on staff, Exteriorgenie handles everything from single boot replacements to full roof repair services with written workmanship warranties.

For urgent leaks that can't wait, Exteriorgenie offers 24/7 emergency roof repair so water damage stops before it spreads. If cost is a concern, roofing financing options are available to make repairs affordable without delaying work that protects your home. Contact Exteriorgenie today for a transparent inspection and repair estimate.
FAQ
What is roof vent repair exactly?
Roof vent repair is the process of fixing damaged or leaking vent components, including pipe boots, flashing, and sealant, to restore a watertight seal around roof penetrations and maintain proper attic ventilation.
How do I know if I need roof vent repair?
Look for water stains in the attic directly below a vent pipe, cracked or chalky rubber collars on pipe boots, lifted or rusted flashing edges, or visible gaps between the vent base and the roof surface.
How much does roof vent repair cost?
DIY repairs using a replacement boot or slip-on Perma-Boot typically cost $15 to $50 in materials. Professional repairs run $150 to $400 and include labor, certified materials, and a workmanship warranty.
Can I repair a roof vent myself?
Yes, on a single-story home with a low-pitch roof and a single cracked pipe boot, DIY repair is manageable. Avoid DIY on steep pitches, second-story roofs, or when multiple vents show damage at the same time.
How often should I inspect my roof vents?
Inspect roof vents at least twice a year, in spring and fall, and after any storm with high winds or hail. Early detection prevents minor wear from becoming costly structural water damage.