

Exterior repair materials are the products used to restore damaged siding, trim, wood, stucco, brick, and masonry to their original structural and weather-resistant condition. Choosing the wrong material is the single most common reason repairs fail early. Ignoring small visible damage often leads to moisture intrusion, hidden rot, and restoration costs that dwarf the original repair. The right exterior repair material options match the substrate, the damage scale, and the climate. Exteriorgenie has spent 25 years watching homeowners waste money on mismatched products. This guide cuts through the confusion.
1. Exterior repair material options: the four core filler types
Four filler categories cover the vast majority of exterior repair situations. Knowing which one fits your damage type saves time, money, and repeat repairs.
Epoxy systems are two-component products that mix a resin with a hardener. They bond to wood fibers at a molecular level, resist shrinking, and hold fasteners after curing. Two-part epoxy fillers bond and resist shrinking, making them the right call for structural wood restoration. Use epoxy systems for large rotted sections, damaged window sills, and porch columns where structural integrity matters.
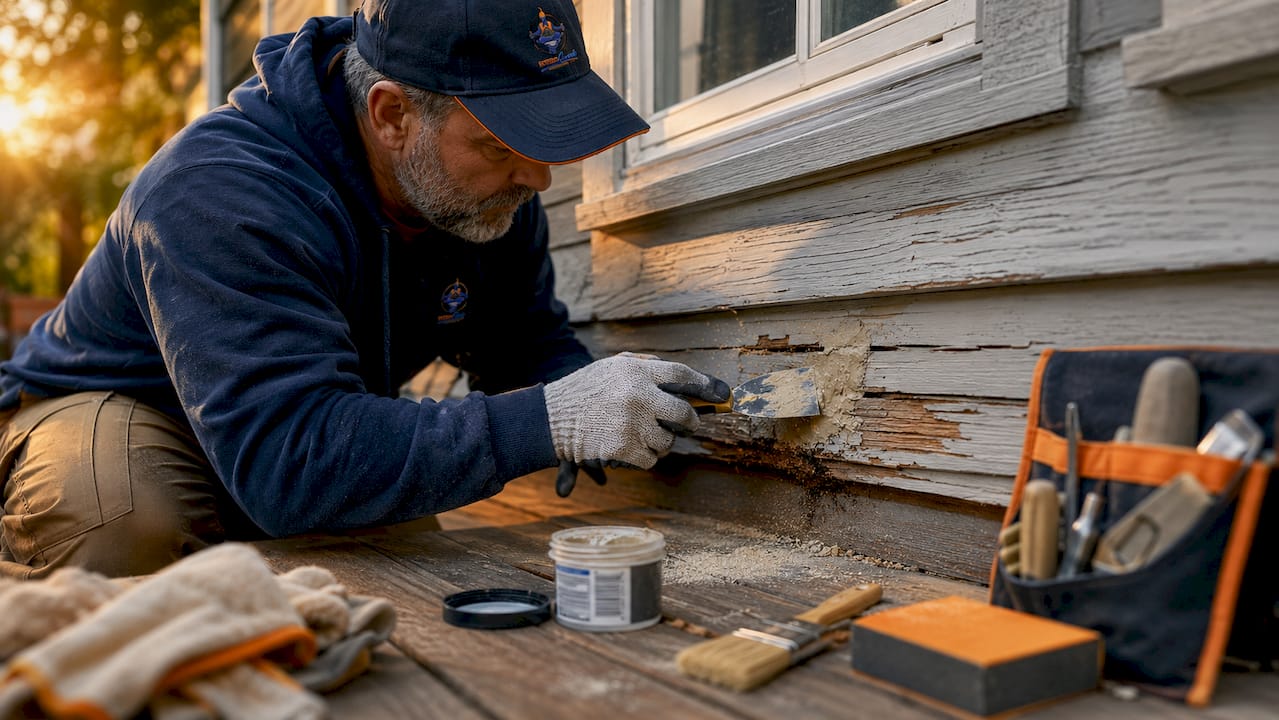
Two-part polyester fillers cure fast, sand easily, and cost less than epoxy. They work well for medium repairs such as deep holes and gouges in wood trim. They are not waterproof on their own, so proper priming and painting after application is non-negotiable.
Ready-mixed acrylic fillers come pre-blended in a tub or tube. They are best for cosmetic surface cracks, small gaps, and shallow divots. They shrink slightly as they dry, so overfill slightly and sand flush once cured.
Wood hardeners are not fillers. They are liquid consolidants that penetrate soft, punky wood and bind loose fibers before you apply any filler. Skipping this step on rotted wood causes filler to pop out within a season.
Pro Tip: Always apply wood hardener first on any soft or spongy wood, then follow with a two-part epoxy filler. Reversing that order is the most common DIY mistake Exteriorgenie sees on service calls.
2. Repair materials by siding type: what works on each surface
The substrate determines the material. A patch compound that works perfectly on fiber cement will crack off stucco within a year.
Vinyl siding
Vinyl repairs use color-matched vinyl patch kits or replacement panels. Repair costs for vinyl run $150–$500 per 100 square feet, making it the most affordable exterior repair option. Small cracks respond well to vinyl adhesive caulk in a matching color. Larger damage requires cutting out the damaged panel and snapping in a replacement.
Wood siding
Wood siding accepts epoxy fillers, two-part polyester fillers, and wood hardeners depending on damage depth. Wood siding repairs cost $400–$1,200 per 100 square feet. Successful wood repair also requires feathering primer and blending texture across a wider area to avoid visible patch lines.
Fiber cement
Fiber cement uses manufacturer-approved patch compounds and corrosion-resistant nails. Costs run $500–$1,500 per 100 square feet. Never use standard wood filler on fiber cement. The expansion and contraction rates differ, and the patch will crack at the edges.
Stucco
Stucco repair uses pre-mixed stucco patch or site-mixed Portland cement compounds. Costs range from $600–$1,800 per 100 square feet. Matching the original texture is the hardest part. Stucco repairs also require addressing any failed flashing behind the surface before patching, or the crack will return.
Brick and stone veneer
Brick and stone veneer repairs use mortar matched to the original joint color and profile. Costs can reach $2,500 or more per 100 square feet. Tuckpointing replaces deteriorated mortar without touching the masonry units. Full brick replacement is necessary only when the units themselves are spalling or cracked through.
| Siding type | Best repair material | Cost per 100 sq. ft. | DIY difficulty |
|---|---|---|---|
| Vinyl | Color-matched vinyl patch kit | $150–$500 | Low |
| Wood | Epoxy or two-part polyester filler | $400–$1,200 | Medium |
| Fiber cement | Manufacturer patch compound | $500–$1,500 | Medium |
| Stucco | Portland cement stucco patch | $600–$1,800 | High |
| Brick/stone veneer | Matched mortar, tuckpointing | $2,500+ | High |
Pro Tip: Matching patch texture and paint sheen to the surrounding surface is as important as the filler itself. A perfect structural repair that looks like a bandage drops curb appeal and resale value.
3. Sealant options for durable exterior repairs
Sealants are the most misunderstood product category in exterior repair. Homeowners routinely grab the cheapest tube at the hardware store and apply it to joints that demand a completely different chemistry.
Siliconized acrylic sealants are the right choice for general trim, window frames, and siding seams. Siliconized acrylics stretch 200–500% and accept paint within 1–2 hours. That paintability makes them the practical default for most residential joints.
Polyurethane and hybrid sealants handle high-movement joints. Polyurethane sealants allow plus or minus 50% movement for joints in stucco, concrete, and areas subject to thermal expansion. They take longer to cure and are harder to tool, but they last far longer in demanding conditions.
The cost of getting this wrong is real. Using acrylic latex on a high-movement joint causes failure within two years. A hybrid polyurethane in the same joint can last a decade. That is an eight-year difference in maintenance cycles from one product decision.
Joint prep matters as much as product selection. Clean the joint of old sealant, dust, and oil. Use a backer rod in joints wider than a quarter inch to control sealant depth. Apply sealant in temperatures between 40°F and 90°F for proper adhesion. For garage door perimeter seals and similar high-movement exterior joints, weather seal replacement follows the same movement-compatibility logic.
- Remove all old sealant before applying new product.
- Match sealant chemistry to joint movement requirements, not just substrate color.
- Never apply sealant over wet or dirty surfaces.
- Tool the bead within the product's open time to get full contact with both sides of the joint.
4. When to repair and when to replace
Repair is the right call for isolated, contained damage. Replacement becomes necessary when damage is widespread or when the underlying system has failed. Repair is advisable for isolated small cracks and patches. Full replacement is the better choice when moisture intrusion is widespread or the system has reached the end of its service life.
Material lifespan shapes this decision directly. Vinyl siding lasts 20–40 years. Fiber cement reaches 50 years. Wood ranges from 20–60 years depending on maintenance. A 35-year-old wood siding system with widespread rot is a replacement candidate regardless of how good the epoxy filler is.
Moisture is the deciding factor in most cases. Visible surface damage is manageable. Hidden moisture behind the surface is not. Repair failures commonly arise from patching visible damage without addressing failed flashing or house wrap. That approach produces the same crack in the same spot within a year.
Signs that favor repair with the right materials:
- Damage is isolated to one or two panels or sections.
- The surrounding material is structurally sound and dry.
- The siding system is less than halfway through its expected lifespan.
- No moisture is present behind the surface.
Signs that favor full replacement:
- Damage spans multiple elevations or large continuous areas.
- Moisture readings show saturation behind the surface.
- The material is at or past its expected service life.
- Repeated repairs on the same area have already failed.
Understanding how roofers determine replacement vs. repair uses the same logic. Scope, moisture, and remaining lifespan drive the decision, not just what is visible from the street.
5. DIY vs. professional repair: where the line sits
DIY repairs work well for small, isolated damage and simple materials like vinyl. Complex substrates and structural damage require professional assessment and execution. That line is not about skill. It is about access to the right diagnostic tools and materials.
A homeowner can snap in a vinyl replacement panel with basic tools and a tutorial. That same homeowner attempting to diagnose moisture behind stucco without a moisture meter is guessing. Guessing on moisture leads to repeated costly repairs instead of durable fixes.
Proper preparation, including compatible materials and flashing corrections, is more critical to repair success than filler choice alone. A professional brings the diagnostic step that most DIY guides skip entirely.
Key takeaways
The most effective exterior repair starts with identifying the substrate, assessing moisture, and matching the repair material to both the damage scale and the surface chemistry.
| Point | Details |
|---|---|
| Match material to substrate | Epoxy for wood, stucco patch for stucco, vinyl kits for vinyl. Wrong product means early failure. |
| Address moisture first | Patch over active moisture intrusion and the repair will fail within one season. |
| Sealant chemistry matters | Use polyurethane for high-movement joints. Acrylic latex fails in two years on those joints. |
| Repair vs. replace threshold | Widespread moisture or end-of-lifespan material means replacement beats repeated patching. |
| DIY has real limits | Small vinyl and cosmetic repairs are DIY-friendly. Structural and moisture issues need a pro. |
What I've learned after 25 years of exterior repairs
The homeowners who spend the least money on exterior repairs over a decade are not the ones who buy the cheapest materials. They are the ones who inspect thoroughly before touching a single tube of filler.
The most expensive call I take is from someone who patched a crack three times in three years and now has rot behind the wall. Every one of those repairs used decent material. None of them addressed the failed flashing two feet above the crack. The filler was never the problem.
Moisture management is the discipline that separates a repair that lasts from one that fails. I tell every homeowner the same thing: before you buy anything, probe the surrounding wood, check the flashing, and look at the caulk joints above the damage. If any of those are compromised, fix them first.
The upfront cost of a professional inspection feels like an expense. Skipping it and patching blind is the actual expense. I have seen $200 repairs turn into $8,000 replacements because the root cause was never found.
My honest advice: do the small stuff yourself when the material is simple and the damage is contained. Call a professional the moment moisture is involved or the damage spans more than a couple of panels. That is not a sales pitch. That is 25 years of watching the math play out.
— Ebben
Exteriorgenie's exterior repair services for Lexington homeowners
Exteriorgenie is a veteran-owned exterior repair company serving Lexington, SC, with 25 years of field experience and HAAG-certified inspectors on staff. When damage goes beyond a DIY patch, the team handles everything from material assessment to full restoration, with 24/7 emergency availability for storm events.

Financing is available for homeowners who need to address larger repairs without paying everything upfront. Exteriorgenie's roofing financing options make it easier to choose the right material and scope without cutting corners on quality. For a full overview of exterior repair and roofing services, or to schedule a professional assessment, reach out to the Exteriorgenie team directly.
FAQ
What is the best filler for exterior wood repair?
Two-part epoxy filler is the best choice for structural wood repairs because it bonds to wood fibers, resists shrinking, and holds fasteners after curing. Always apply a wood hardener first on any soft or rotted areas before filling.
How do I choose the right exterior repair material?
Match the material to the substrate and damage scale. Vinyl needs color-matched vinyl patch kits, wood needs epoxy or polyester fillers, and stucco needs Portland cement compounds. Moisture assessment comes before any product selection.
What sealant should I use for exterior joints?
Use siliconized acrylic sealant for general trim and siding seams. Use polyurethane or hybrid sealant for high-movement joints like stucco seams and concrete transitions, where acrylic latex will fail within two years.
When should I replace siding instead of repairing it?
Replace siding when moisture intrusion is widespread, when the material is at or past its expected service life, or when the same repair has failed more than once. Isolated, dry damage on material under halfway through its lifespan is a repair candidate.
Are exterior repairs DIY-friendly?
Small vinyl panel swaps and cosmetic crack fills are well within DIY range. Structural damage, moisture-related failures, and complex substrates like stucco or fiber cement require professional diagnosis and execution to avoid repeat failures.