

If your roof was damaged, do this now: document everything, stop further damage, file your claim, get an independent contractor inspection before the adjuster arrives, and show up to that adjuster meeting with your evidence in hand.
Your first 72-hour checklist:
- Photograph and video every damaged area, including gutters, vents, and any interior leaks, and pull a NOAA storm report to timestamp the event
- Tarp any exposed decking or active leak points within 48 hours to prevent additional damage that your carrier could deny
- Call your insurer to open the claim and get a claim number in writing
What not to do in the first 72 hours: Do not start permanent repairs. Do not sign any forms the adjuster hands you on-site. Both moves can cap your settlement before you know the full scope.
Table of Contents
- What are the roof damage insurance claim steps from discovery to final payout?
- What do RCV, ACV, deductibles, and exclusions mean for your payout?
- Exactly what should you photograph, video, and collect as evidence?
- How should you prepare for and handle the insurance adjuster visit?
- What emergency repairs are you required to make, and what gets reimbursed?
- How do you file a supplement or appeal if the carrier underpays or denies your claim?
- What does a typical roof claim timeline and payment flow look like?
- Why does soft-metal damage give you the strongest evidence in a hail claim?
- When should you call Exteriorgenie, and what do they provide?
- Key Takeaways
- Exteriorgenie's claim assistance: what you get and how to start
What are the roof damage insurance claim steps from discovery to final payout?
Follow these steps in order. Skipping or reordering them is the most common reason homeowners leave money on the table.
Step 1: Confirm safety first (Day 1) Stay off the roof unless you are trained to work at height. Walk the perimeter from the ground, check the attic for daylight or moisture, and move belongings away from active drips.
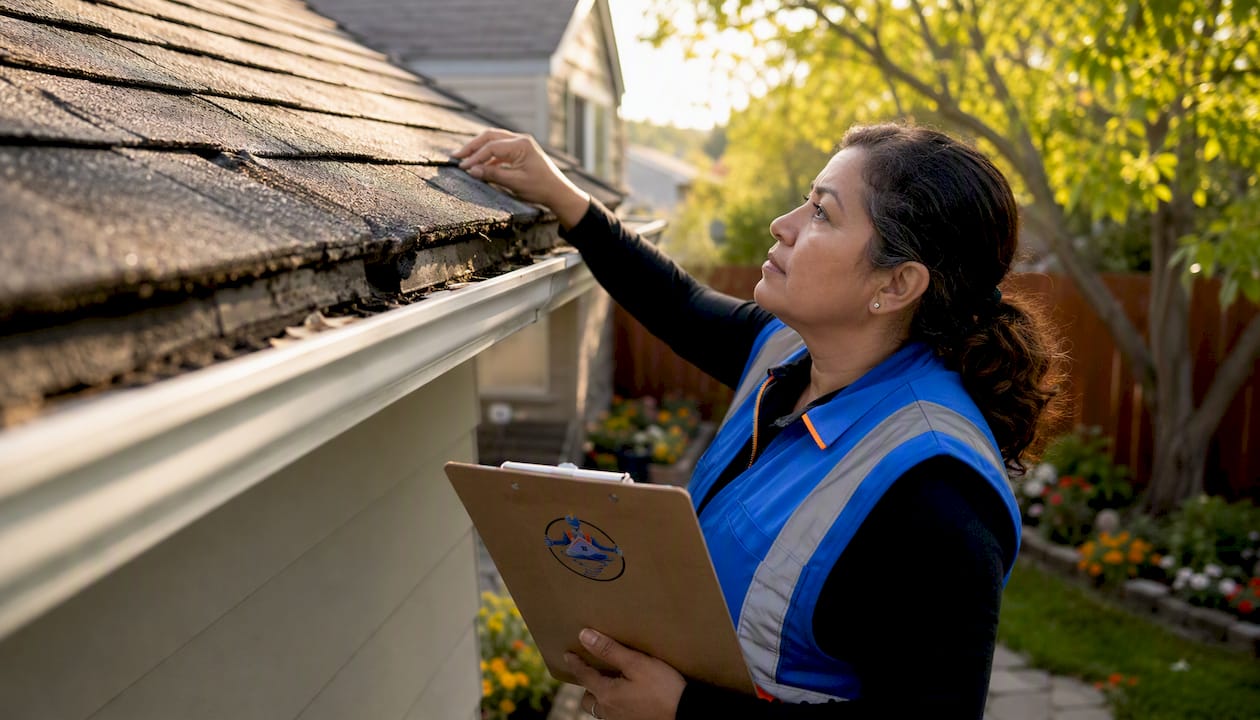
Step 2: Document all damage within 72 hours (Day 1–3) Photograph wide-angle context shots, close-ups with a coin or ruler for scale, interior attic damage, dented gutters, bent HVAC fins, and any yard debris from the storm. Shoot a narrated video walkthrough with timestamps on. Pull your NOAA storm report at weather.gov to lock in the date, wind speed, and hail size for your area.
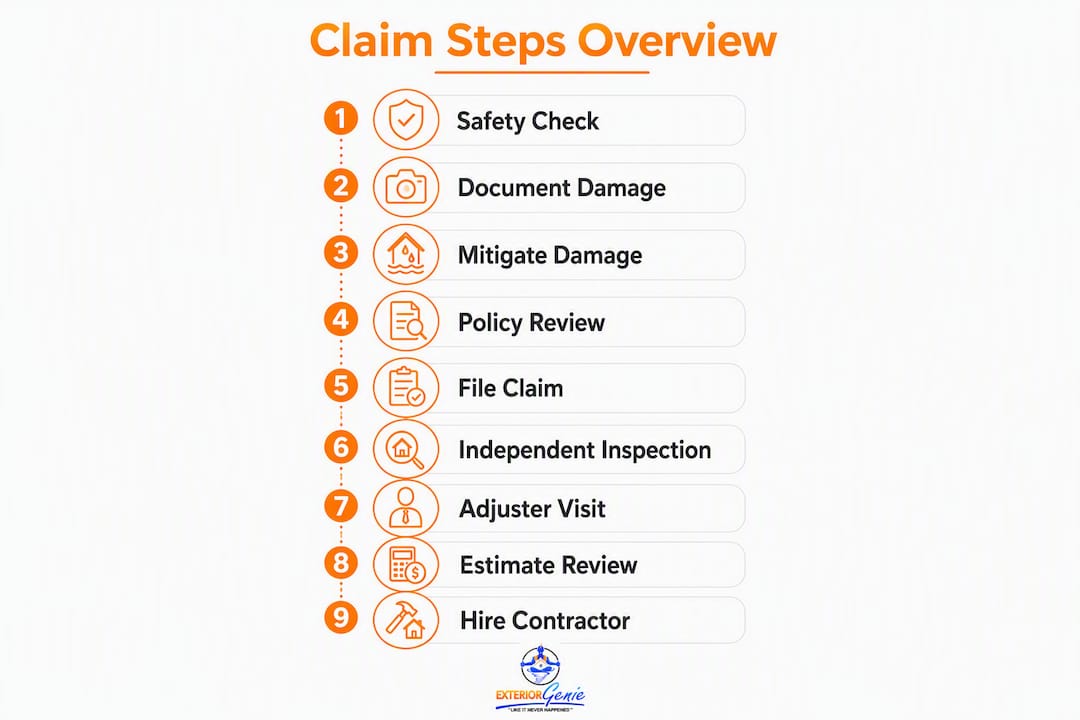
Step 3: Mitigate further damage within 48 hours (Day 1–2) Tarp exposed deck sections and board up any broken skylights or windows. Keep every receipt. Your policy requires you to prevent additional damage, and documented mitigation costs are typically reimbursable.
Step 4: Review your policy before you call (Day 1–3) Pull your declarations page. Confirm whether you have Replacement Cost Value or Actual Cash Value coverage, note your deductible type and amount, and flag any exclusions for cosmetic damage or named storms.
Step 5: File the claim promptly (Within 7 days) Call your carrier's claims line or file online. Most policies require "prompt" notice, and many set a 30–60 day window. Give the claim representative the storm date, a brief description of damage, and your claim number. Do not give a recorded statement about pre-existing conditions.
Step 6: Get an independent contractor inspection before the adjuster (Within 1 week) Scheduling a contractor inspection before the adjuster arrives creates a documented baseline. You do not need it to open a claim, but having a written report with 10×10 test square counts, annotated photos, and Xactimate line items significantly strengthens your position and makes supplements far easier to win.
Step 7: Prepare for and attend the adjuster visit (Within 7–21 days) Bring your contractor's written estimate. Walk every slope with the adjuster. Note where they chalk test squares and ask them to photograph each one. Do not sign any on-site forms.
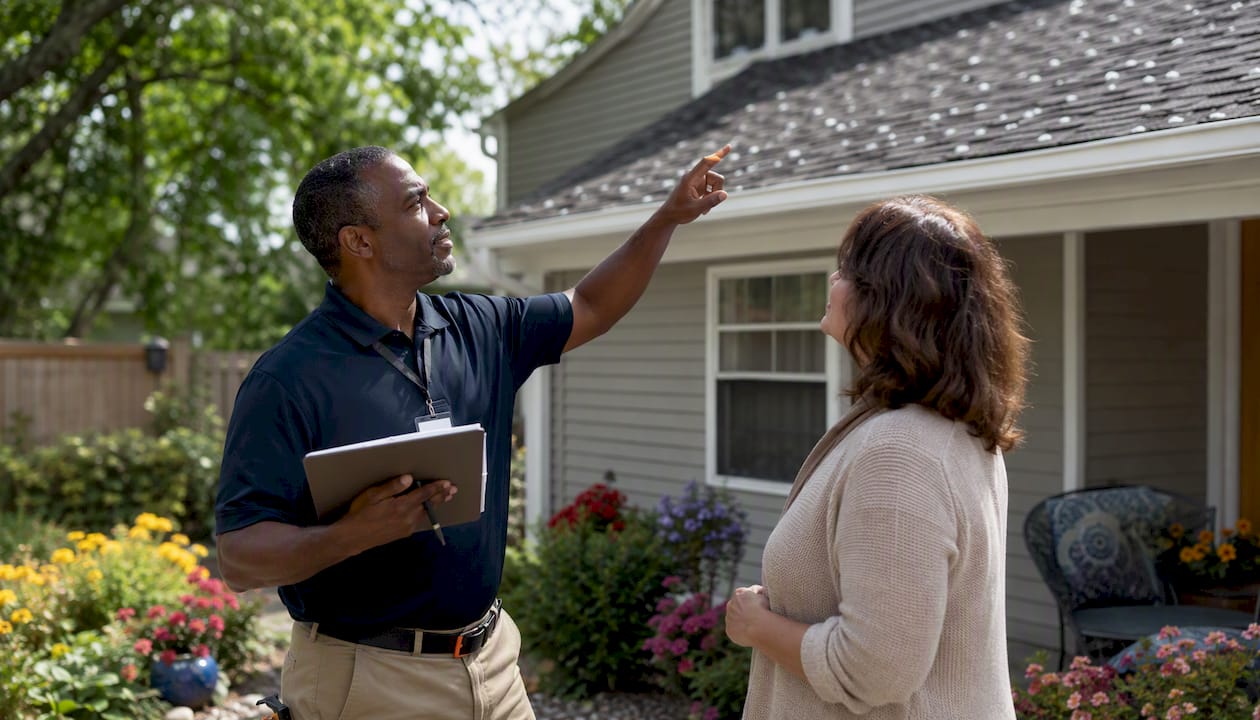
Step 8: Review the adjuster's estimate line by line (Within 30 days) Compare it against your contractor's Xactimate estimate. Flag missing line items: decking replacement, drip edge, code-required ice-and-water shield, and permit fees are commonly omitted. If items are missing, prepare a supplement.
Step 9: Hire your contractor and complete repairs (30–90 days) Choose a licensed, insured contractor experienced with insurance claims. Confirm they will pull permits and handle any code upgrades the carrier owes. Keep all invoices.
Step 10: Submit final invoices and collect recoverable depreciation (After work is complete) Send your carrier the final invoice showing the agreed scope was completed. If you have RCV coverage, this triggers the release of the depreciation holdback, which is often a substantial second payment.
Documents to attach when you file:
- Time-stamped photos and video from within 72 hours of the storm
- NOAA or local storm report showing date, hail size, and wind speed
- Contractor's written estimate with Xactimate line items
- Pre-loss photos (real-estate listing, phone camera roll, or prior inspection report)
- Receipts for any temporary repairs or tarping
- Prior maintenance records showing the roof was in serviceable condition
Pro Tip: Bring your contractor's written estimate to the adjuster meeting and hand them a copy. Adjusters who see a competing scope on paper are more likely to document their own test squares carefully, which creates a record you can use in a supplement.
What do RCV, ACV, deductibles, and exclusions mean for your payout?
Your policy's coverage type determines how much money you actually receive, and the math is not obvious until you work through it once.
Replacement Cost Value (RCV) pays the full cost to replace your roof with like materials at today's prices, minus your deductible. The catch: carriers split this into two payments. The first check covers the Actual Cash Value, which is the replacement cost minus depreciation. Once your contractor completes the work and submits a final invoice, the carrier releases the withheld depreciation as a second payment. RCV policies are more expensive to carry but almost always worth it for roofs.
Actual Cash Value (ACV) pays only the depreciated value of your existing roof. A 15-year-old roof on a 20-year shingle may receive a fraction of replacement cost. There is no second payment. What you get is what you get.
A simple example: Suppose your roof replacement costs $18,000. Your policy has a $2,000 deductible and the carrier calculates $5,000 in depreciation.
- ACV payout: $18,000 minus $5,000 depreciation minus $2,000 deductible = $11,000 total
- RCV payout: $11,000 first check, then $5,000 released after work is complete = $16,000 total
The $5,000 difference is why confirming your coverage type before filing matters.
Deductibles come in two forms. A flat-dollar deductible (say, $2,000) applies to every claim. A percentage deductible, common for hurricane or named-storm events in coastal states, is calculated as a percentage of your home's insured value. On a $400,000 home with a 2% hurricane deductible, you owe $8,000 before the carrier pays anything. For more detail on how deductible types affect your settlement, review your declarations page carefully before assuming a flat amount applies.
Common exclusions to watch for:
- Cosmetic-only damage: Some policies exclude claims where shingles are dented but not functionally breached. Document any water intrusion, granule loss, or cracked tabs to rebut this.
- Wear and tear / maintenance neglect: Carriers can deny claims by arguing damage was pre-existing. Counter with maintenance records, prior inspection reports, and pre-loss photos.
- Named-storm or hurricane exclusions: Separate policies or endorsements may be required in high-risk states.
- Age-based depreciation caps: Some policies cap coverage on roofs over a certain age.
Pro Tip: Pull your declarations page before the adjuster arrives. Highlight your coverage type (RCV or ACV), your deductible amount and type, and any cosmetic-damage exclusion language. Knowing these three things in advance prevents surprises when the first check arrives.
Exactly what should you photograph, video, and collect as evidence?
The quality of your documentation often determines whether a supplement gets approved or denied. Carriers and adjusters rely on objective evidence, and vague photos of "damaged shingles" rarely move the needle.
Photo protocol:
- Wide-angle shots of each roof slope showing the full surface and surrounding context
- Close-ups of individual damage points with a coin, ruler, or tape measure in frame for scale
- Dented or dimpled gutters, downspouts, vent caps, and HVAC fins (these are your best objective evidence for hail size)
- Interior attic shots showing daylight, staining, wet insulation, or damaged decking
- Yard debris: tree branches, stripped bark, dented patio furniture, damaged window screens
Video protocol:
- A slow, narrated walkthrough of each slope, calling out specific damage points by location
- Sustained panning shots rather than quick sweeps, so individual hits are visible on playback
- Enable location and timestamp metadata on your phone before you start
Documentation to collect beyond photos:
- NOAA storm report or a certified weather data report from a service like WeatherSTEM or DTN, showing storm date, hail diameter, and wind speed at your address
- Municipal or county incident logs if a storm event was officially declared
- Pre-loss photos from your phone's camera roll, a real-estate listing, or a prior inspection report
- Maintenance records: receipts for prior repairs, gutter cleaning, or annual inspections
What a HAAG-certified contractor report should include:
A HAAG-certified inspector's report goes well beyond a general contractor's walk-and-talk. It documents 10×10 test square locations on each slope with hit counts, includes annotated photos tied to specific Xactimate line items, and provides dated measurements for decking, drip edge, and accessory damage. That level of detail is what makes a supplement defensible.
Evidence timeline:
- Within 72 hours: All photos, video, and NOAA report
- Within 1 week: Contractor inspection report and written estimate
- Before any permanent repairs: All documentation must be complete; repairs can destroy evidence
For a detailed walkthrough of storm damage documentation steps, including sample submission checklists, the linked resource covers the full workflow.
How should you prepare for and handle the insurance adjuster visit?
The adjuster visit is where most claims fail. Adjusters work for the carrier, not for you, and their estimate is a starting point, not a final verdict.
Before the visit:
- Confirm the appointment date and the adjuster's name, license number, and direct email
- Have your contractor's written estimate ready to hand over
- Print your NOAA storm report and pre-loss photos to reference on-site
- Walk the property yourself the morning of the visit so you know exactly where every damage point is
During the visit — do's:
- Walk every slope with the adjuster; do not let them inspect alone
- Note where they chalk 10×10 test squares and ask them to photograph each one
- Point out soft-metal damage (gutters, vent caps, AC fins) and ask them to document it
- Ask for their email address before they leave so you have a direct line for follow-up
During the visit — don'ts:
- Do not sign any on-site forms, scope agreements, or release documents
- Do not volunteer information about prior repairs or the roof's age unless directly asked
- Do not agree verbally to a scope or dollar amount
Scripted phrases that protect your claim:
- "I'd like to note this for the record" (before pointing out damage they haven't marked)
- "Can you photograph that test square before moving on?"
- "I'll review the written estimate before signing anything"
How adjusters document damage: Most carriers use 10×10 test squares chalked on each slope. The adjuster counts functional hail hits within each square. Many carriers use 8–10 hits per 100 square feet as the threshold to authorize full slope replacement. If multiple slopes meet that threshold, a full roof replacement may be approved. Knowing this threshold lets you direct the adjuster's attention to the slopes most likely to qualify.
Where to press for supplements: Compare the adjuster's written scope against your contractor's Xactimate estimate line by line. Common gaps include missing drip edge replacement, no ice-and-water shield line item, omitted decking replacement, and no permit or code-upgrade allowance. Each missing line is a supplement opportunity.
Pro Tip: Ask the adjuster to photograph every test square before they move to the next slope. Those photos become part of the claim file and are your strongest evidence if you need to request a reinspection or escalate to appraisal.
What emergency repairs are you required to make, and what gets reimbursed?
Your policy almost certainly includes a duty-to-mitigate clause. That means you are required to take reasonable steps to prevent additional damage after a storm. Failing to do so gives the carrier grounds to deny damage that occurred after the event.
Immediate mitigation steps:
- Place tarps over any exposed decking or open penetrations as soon as it is safe to do so
- Board up broken skylights, windows, or siding sections that could allow water intrusion
- Move furniture, electronics, and valuables away from active leak zones
- Place buckets or absorbent materials under interior drips to limit secondary water damage
Documentation for reimbursement:
- Photograph every tarp placement before and after installation, including the damaged area it covers
- Keep all receipts for tarps, lumber, fasteners, and any labor you hire
- If you call an emergency tarping service, get an itemized invoice and photograph their work
Most carriers reimburse reasonable temporary repair costs as part of the claim. "Reasonable" generally means materials and labor at local market rates, not a premium emergency surcharge. If a contractor charges significantly above market, document why (after-hours call, storm surge demand) to support the reimbursement request.
When to call an emergency tarping service: If the damage is extensive, the roof pitch is steep, or you have no roofing experience, call a professional. Exteriorgenie offers 24/7 emergency roof tarping in the Lexington, SC area. Getting a professional on-site quickly also creates a documented record of the damage state before any permanent work begins.
Safety notes:
- Never climb a wet or storm-damaged roof without proper fall protection
- Avoid walking on areas where decking may be compromised
- If structural damage is suspected, keep everyone out of the affected rooms until a professional assesses the situation
How do you file a supplement or appeal if the carrier underpays or denies your claim?
Underpayment is common. The adjuster's first estimate frequently misses hidden damage, code-required upgrades, or full material replacement costs. A supplement is not a dispute; it is a normal part of the claims process, and properly documented supplements are approved at a high rate when submitted with itemized evidence.
Step-by-step supplement process:
- Compare your contractor's Xactimate estimate against the adjuster's scope line by line
- List every item present in your contractor's estimate but absent from the carrier's scope
- For each missing item, attach: a close-up photo, the Xactimate line item code, and a one-sentence justification citing the damage evidence or applicable building code
- Write a cover letter addressed to your claim handler that lists the claim number, the date of loss, and each missing item with its dollar amount
- Send the package by email to the adjuster's direct address and follow up in writing within 5 business days
Cover letter outline:
- Claim number and date of loss
- Brief statement: "The following items were present in the independent contractor inspection but absent from the carrier's estimate dated [date]"
- Itemized table: line item description, Xactimate code, dollar amount, supporting photo reference
- Closing request: "Please review and advise whether a reinspection is required"
If the supplement is denied or ignored:
- Request a formal reinspection in writing
- Invoke the appraisal clause if your policy includes one (both parties select an appraiser; they agree on a neutral umpire to resolve disputes)
- Hire a public adjuster, who works on your behalf for a percentage of the settlement, typically when the gap between your estimate and the carrier's is large enough to justify the fee
- File a complaint with your state's Department of Insurance if the carrier is acting in bad faith or violating prompt-payment statutes
Communication log: Keep a running log of every call, email, and letter. Record the date, the name of the person you spoke with, their title, and a one-sentence summary of what was said or agreed. This log is your primary evidence if the claim escalates to appraisal or litigation.
Pro Tip: Never accept the first check as the final settlement without confirming whether recoverable depreciation is still owed. Cashing an ACV check does not waive your right to the depreciation holdback under an RCV policy, but some carriers include release language in the check endorsement. Read it before you sign.
What does a typical roof claim timeline and payment flow look like?
| Stage | Typical Timing |
|---|---|
| Damage discovery and documentation | Day 1–3 |
| Claim filed with carrier | Day 1–7 |
| Adjuster visit scheduled | Day 7–21 after filing |
| Adjuster's written estimate delivered | Day 7–30 after visit |
| Initial ACV check issued | Day 7–30 after estimate |
| Contractor hired and work scheduled | Day 30–60 |
| Repairs completed | Day 30–90 |
| Final invoice submitted to carrier | Within 7 days of completion |
| Recoverable depreciation released | Day 7–30 after final invoice |
Routine claims often resolve in 30–90 days; disputed or complex claims can stretch to several months. Filing promptly reduces the risk of evidence degradation and keeps you inside your policy's notice window.
Payment flow explained: The first check from your carrier represents the ACV amount: replacement cost minus depreciation minus your deductible. It is not the full settlement under an RCV policy. The depreciation holdback is released only after you submit a final invoice proving the agreed scope was completed. If your mortgage company is listed on the policy, the check may be made out to both you and the lender, requiring their endorsement before you can deposit it. Contact your mortgage servicer early to understand their endorsement process.
Cost drivers that affect settlement size:
- Roof square footage and pitch (steeper slopes cost more to replace)
- Material type: architectural shingles, metal, tile, and flat membrane all carry different replacement costs
- Decking condition: rotted or damaged OSB adds cost that may not appear in the initial estimate
- Code upgrades: many jurisdictions require updated drip edge, ice-and-water shield, or ventilation when more than a certain percentage of the roof is replaced
- Regional labor pricing and post-storm demand surges
Why does soft-metal damage give you the strongest evidence in a hail claim?
Shingle granule loss is easy to argue. A carrier can claim granules were already loosening from age or foot traffic. Dented metal is harder to dispute.
Soft-metal damage on gutters, vent caps, and AC condenser fins is one of the most objective forms of hail evidence available. Metal dents at a consistent size and pattern that correlates directly with hail diameter. You cannot fake it, and it does not develop gradually from wear. When an adjuster or HAAG-certified inspector sees uniform dent patterns across multiple soft-metal surfaces, the hail event is effectively confirmed.
How to document soft-metal damage properly:
- Photograph each dented surface with a coin or ruler in frame to establish scale
- Capture the full surface first (wide shot), then individual dents (close-up)
- Include a location photo showing which side of the house the surface is on, so the adjuster can correlate it with storm direction
- Link the photos to your NOAA storm report showing hail size at your address on the event date
How adjusters and contractors use this evidence: When a HAAG-certified inspector documents consistent soft-metal dent patterns alongside 10×10 test square hit counts that approach or exceed the carrier's threshold, the combination makes a full slope or total replacement far easier to justify. Soft-metal evidence also strengthens supplements when the adjuster's initial scope only covers partial replacement.
Citation sources to include with a supplement:
- Your NOAA storm report with hail size data
- The contractor's HAAG-certified inspection report with test square counts and annotated photos
- Any manufacturer's hail-damage threshold documentation for your specific shingle product
Pro Tip: Before the adjuster arrives, photograph every soft-metal surface on your property: gutters, downspouts, vent caps, AC fins, and metal flashing. These photos take five minutes and can be the deciding factor in a supplement dispute.
When should you call Exteriorgenie, and what do they provide?
Some claims are straightforward. Others are not, and trying to manage a complex one alone costs homeowners real money.
Situations where calling a professional pays off:
- Your claim was denied or the carrier cited wear-and-tear or cosmetic-only language
- The adjuster's estimate is significantly lower than a contractor's independent scope
- Your roof has multiple slopes, complex penetrations, or hidden decking damage
- You are approaching your policy's supplement or appeal deadline
- You simply do not have time to manage the documentation, adjuster coordination, and follow-up yourself
Exteriorgenie is a veteran-owned roofing company based in Lexington, SC, with 25 years of field experience and HAAG-certified inspectors on staff. HAAG certification is the industry's most recognized credential for forensic roof inspection, and it carries weight with carriers and in appraisal proceedings. Their roof insurance claims assistance service covers the full process: inspection, Xactimate-based written estimate, adjuster coordination, supplement preparation, and repair or replacement once the claim is settled.
Services relevant to your claim:
- HAAG-certified roof inspection with documented test squares, annotated photos, and Xactimate line items
- 24/7 emergency tarping to stop active damage and create a documented pre-repair record
- Full insurance claims assistance from filing through depreciation release
- Permit pulling and code-upgrade handling so nothing gets missed in the final scope
- Residential and commercial roof repair and replacement once the claim is approved
What to expect when you call: Exteriorgenie schedules an inspection, delivers a written report with Xactimate line items, and walks you through how the estimate compares to your carrier's scope. If a supplement is needed, they prepare the documentation package. The inspection report is yours to use regardless of who ultimately does the repairs.
Pro Tip: Having a HAAG-certified inspector present during the adjuster visit, or having their report in hand before the adjuster arrives, is the single highest-leverage move a homeowner can make. Adjusters take HAAG-documented evidence seriously because the methodology is standardized and defensible.
Key Takeaways
Following the roof damage insurance claim steps in order, with documented evidence at every stage, is the single most reliable way to reach a full and fair settlement.
| Point | Details |
|---|---|
| Document within 72 hours | Photograph all damage, pull a NOAA storm report, and capture soft-metal evidence before anything is repaired. |
| Know your coverage type | RCV policies pay depreciation after work is complete; ACV policies do not. Confirm which you have before the adjuster arrives. |
| Treat the adjuster's estimate as a starting point | Compare it line by line against an independent Xactimate estimate and file a supplement for any missing items. |
| File promptly and keep a communication log | Most policies require notice within 30–60 days; a written log of every call and email protects you if the claim escalates. |
| Exteriorgenie provides HAAG-certified help | Their HAAG-certified inspectors, 24/7 emergency tarping, and full claims assistance are available in Lexington, SC for homeowners who need professional support. |
One thing most homeowners get wrong about roof claims
The conventional advice is to file quickly and cooperate fully. Both are correct, but they miss the more important point: the adjuster's estimate is not a neutral document. It is the carrier's opening position, written by someone whose job is to scope the claim accurately within the carrier's guidelines, which do not always align with what your contractor will actually charge to do the work right.
The homeowners who get full settlements are not the ones who argue the most. They are the ones who show up prepared. A written contractor estimate, a NOAA storm report, and photos of dented gutters and vent caps do more work than any amount of pushback. Carriers respond to documented evidence, not frustration.
The other thing worth saying plainly: the first check is almost never the last check under an RCV policy. Cashing it and moving on is one of the most expensive mistakes a homeowner can make. The recoverable depreciation holdback can represent thousands of dollars, and it is yours if you complete the work and submit the invoice. Read the check endorsement, confirm the depreciation amount still owed, and keep the claim open until that second payment arrives.
Exteriorgenie's claim assistance: what you get and how to start
When a storm hits and the scope of damage is unclear, the last thing you need is to figure out the insurance process alone. Exteriorgenie gives Lexington, SC homeowners a concrete advantage: HAAG-certified inspectors who document your roof the same way adjusters do, so the evidence speaks the carrier's language from day one.

The process is direct. Exteriorgenie schedules an inspection, delivers a written Xactimate-based estimate with annotated photos and test square data, and helps you compare that scope against whatever the adjuster produces. If the carrier's number comes in low, the supplement documentation is already built. Emergency tarping is available around the clock if you need to stop active damage before the inspection. Financing options are available for out-of-pocket costs and deductibles, so approved repairs do not stall while you wait for the depreciation holdback.
To get started, visit Exteriorgenie's roof insurance claims assistance page or call (803) 999-7663 to schedule your HAAG-certified inspection.
Useful sources for homeowners
The following sources are worth bookmarking for deeper reading and for strengthening any supplement or appeal package:
- NOAA / National Weather Service — Pull official storm reports showing hail size, wind speed, and event date for your address. This is the single most important third-party document in any hail or wind claim.
- FORTIFIED Home Program (IBHS) — Information on building standards and state incentives for storm-resistant roofing upgrades; useful when negotiating code-upgrade line items in a supplement.
- Why document roof damage: a homeowner's guide — A practical third-party resource on photo protocols and evidence collection for roof damage claims.