

Roof patch repair is the targeted fix of an isolated damaged area on your roof to stop leaks and restore your home's weather barrier without replacing the entire roof. Professionally, a patch costs $150–$500 and can last 5–15 years when done correctly. DIY patching runs $20–$100 using materials like roofing cement, rubberized sealants, or peel-and-stick flashing tape. The key distinction in roofing is between a temporary patch, which buys you time, and a permanent patch, which restores structural integrity. Knowing which one you need, and how to apply it right, is what separates a solved problem from a recurring one.
What is roof patch repair and what types exist?
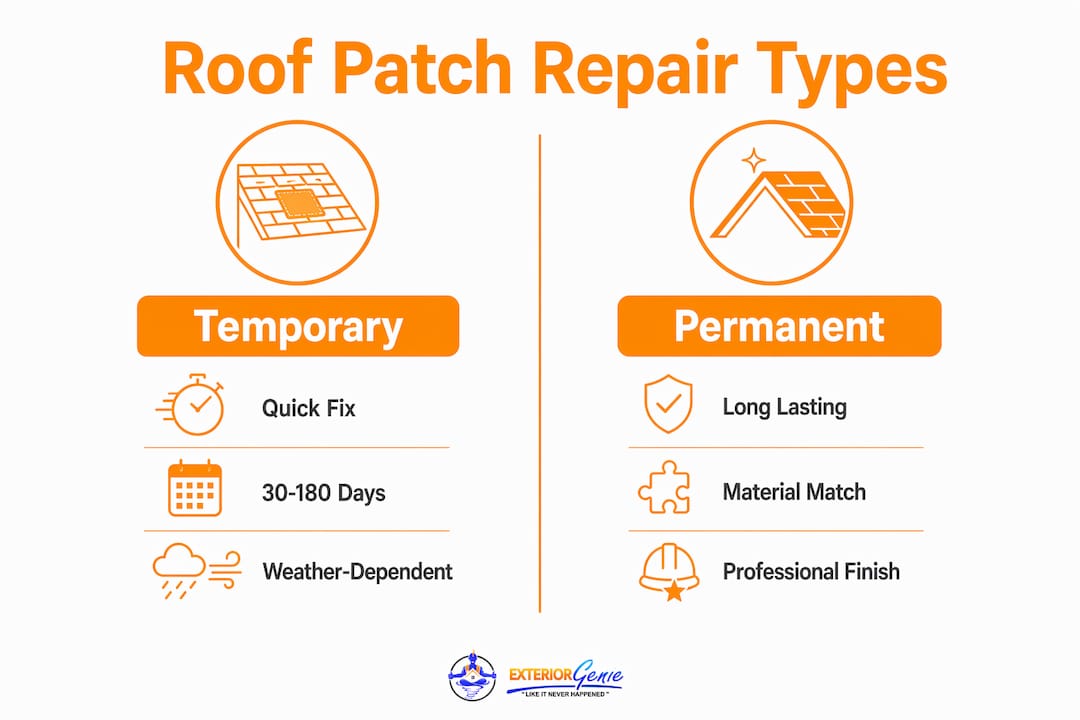
Roof patch repair covers two distinct categories: temporary patching and permanent patching. Each serves a different purpose, uses different materials, and has a different lifespan. Choosing the wrong type for your situation wastes money and can make future repairs harder.
Temporary roof patching
Temporary roof patching is an emergency stop-gap measure designed to prevent water intrusion until a permanent fix is possible. Temporary patches last 30–180 days, with tarps needing replacement every 30–90 days depending on weather exposure. That short lifespan matters because many homeowners treat a temporary fix as a solved problem and forget about it.
Common temporary patching materials include:
- Polyethylene tarps: Fast to deploy after storm damage, secured with wood battens or sandbags
- Peel-and-stick flashing tape: Products like Grace Ice and Water Shield bond directly to damaged areas and resist water immediately
- Roofing cement (asphalt-based): Applied with a trowel to seal cracks or lifted shingles quickly
- Rubberized spray sealants: Brands like Flex Seal provide a short-term waterproof coating on small cracks or gaps
Temporary patches are appropriate when you are waiting on an insurance adjuster, when weather prevents permanent repairs, or when you need to stop active water intrusion within hours of a storm.
Pro Tip: Before filing an insurance claim, photograph all damage thoroughly. DIY patches can affect claims if the original damage is not documented, so take photos before touching anything.
Permanent roof patching
Permanent patches use materials that match your existing roof system. For asphalt shingle roofs, that means replacing damaged shingles with matching ones, re-nailing, and sealing edges with roofing cement. For flat roofs, it means cutting out the damaged membrane section and bonding in a new piece of EPDM or TPO. For metal roofs, it means cutting a patch from matching metal stock and sealing with urethane caulk. Using incorrect materials can void your manufacturer warranty and complicate future professional repairs. Match your patch material to your roof type every time.
Roof repair vs. patch: when should you replace instead?
The roof repair vs. patch decision comes down to three factors: the age of your roof, the percentage of surface damaged, and whether the damage is isolated or systemic. Getting this wrong is expensive.
Here is how to evaluate your situation:
- Check roof age. Roofs older than 15–20 years with significant damage are usually better candidates for full replacement than repeated patching. Asphalt shingles have a rated lifespan of 20–30 years, so patching a 22-year-old roof is often a short-term fix on a long-term problem.
- Estimate damage coverage. If damage affects more than 30% of your roof surface, replacement is more cost-effective than patching. That threshold exists because widespread damage signals that the entire roof system is degrading, not just one spot.
- Look for systemic failure signs. Brittle shingles that snap when you try to lift them signal systemic deterioration. Patching over brittle shingles causes the patch to fail quickly because the surrounding material cannot hold fasteners or bond with sealants.
- Count your past patches. Roofers consistently warn that repeatedly patching the same area signals that full replacement is likely needed soon. Each patch is a data point, not just a repair.
| Situation | Best Action |
|---|---|
| Isolated damage, roof under 15 years old | Permanent patch repair |
| Damage under 30% of surface area | Patch repair with professional assessment |
| Roof over 20 years old, multiple leak points | Full roof replacement |
| Brittle or granule-shedding shingles | Replacement, not patching |
| Storm damage with insurance claim pending | Temporary patch, then professional repair |
Pro Tip: Check your attic before you check your roof. The true leak source is often several feet away from the ceiling stain because water travels along rafters before dripping. Patching the wrong spot wastes time and money.
How to patch a roof: step-by-step methods
Patching a roof correctly requires the right tools, the right materials, and a clear inspection before you touch anything. Skipping the inspection is the most common mistake homeowners make.
Tools and safety gear you need:
- Non-slip roofing boots and a safety harness
- Roofing nails and a hammer or nail gun
- Roofing cement or compatible sealant for your roof type
- Pry bar for lifting damaged shingles
- Utility knife for cutting membrane or shingles
- Replacement shingles or patch material matched to your roof
Inspection checklist before patching:
- Walk the exterior and mark all visible damage points
- Check the attic for wet insulation, water stains on sheathing, and daylight showing through
- Identify the actual water entry point, not just where it drips inside
- Look for signs of emergency repair needs like sagging decking or multiple failure points
Steps for a permanent shingle patch:
- Remove the damaged shingles by lifting the edges of surrounding shingles and pulling the nails.
- Inspect the roof deck (the wood underneath) for rot or soft spots. Replace any damaged decking before patching.
- Slide the new shingle into position, aligning it with the surrounding course.
- Nail it at the top edge using four roofing nails, then seal the nail heads with roofing cement.
- Press the overlapping shingles back down and apply a thin bead of roofing cement under their edges to re-seal them.
For flat roofs using EPDM rubber, cut out the damaged section in a clean square, clean the substrate, and bond a new EPDM patch using EPDM primer and contact cement. For metal roofs, cut a patch from matching metal, apply urethane caulk around the perimeter, and screw it down with self-tapping screws.
Pro Tip: Asphalt-based sealants crack within 3–6 months in hot climates due to thermal expansion. In South Carolina's heat, use a rubberized or polymer-modified sealant for any repair you want to last beyond one season.
Knowing common residential repair types for your specific roof material helps you select the right patch approach from the start.
How to maintain your roof after a patch repair
A patch repair is not the end of the job. What you do in the months after determines whether that repair holds or fails early. These maintenance steps directly extend the life of any patch.
- Clean your gutters every three months. Clogged gutters cause water backup under shingles, which accelerates damage to the roof structure near your patch. In areas with heavy tree cover, clean them monthly in fall.
- Inspect the patched area after every major storm. Wind and hail can lift patch edges or crack sealants. Catching a failed patch within days prevents interior water damage.
- Schedule a professional inspection twice a year. Spring and fall inspections catch issues before summer heat and winter moisture cycles stress the repair. Routine professional inspections identify developing problems early and save significant money over time.
- Apply UV-protective roof coating over patched flat roof areas. Products like Henry 587 or Karnak 97 White Elastomeric Coating reflect heat and protect EPDM and TPO patches from UV degradation.
- Trim overhanging tree branches. Branches that scrape your roof during wind storms abrade shingle granules and can dislodge patch edges. Keep branches at least six feet from the roof surface.
If you notice water stains near a patched area after rain, do not wait. Water damage spreads quickly into wall cavities and insulation, turning a $300 patch job into a $3,000 remediation project.
Key takeaways
Roof patch repair is the most cost-effective solution for isolated damage, but only when the roof is under 15 years old, damage covers less than 30% of the surface, and the right materials are matched to the roof type.
| Point | Details |
|---|---|
| Patch vs. replace threshold | Replace when damage exceeds 30% of surface or roof is older than 15–20 years. |
| Temporary patch lifespan | Temporary fixes last 30–180 days and require follow-up with a permanent repair. |
| Inspection before patching | Always check the attic first; the true leak source is often not below the ceiling stain. |
| Material compatibility | Using the wrong sealant or patch material can void warranties and cause early failure. |
| Maintenance after patching | Clean gutters, inspect after storms, and schedule professional checks twice a year. |
What i've learned after years of roof patch repairs
The biggest mistake I see homeowners make is patching based on where the ceiling is wet. Water travels. It enters at one point and drips somewhere completely different. I have seen patches applied three feet from the actual leak because no one checked the attic first. That patch does nothing except give the homeowner false confidence.
The second mistake is treating a temporary fix as permanent. A tarp or a tube of roofing cement is not a repair. It is a delay. Homeowners who skip the follow-up permanent repair often call back six months later with twice the damage and a much larger bill.
Here is my honest take on DIY patching: it works well for simple shingle replacements on roofs under ten years old with clearly isolated damage. Beyond that, the risk of using incompatible materials, missing hidden damage, or voiding your warranty makes professional help the smarter financial decision. A $300 professional patch that holds for ten years beats a $50 DIY fix that fails in one season every time. When you are uncertain about the scope of damage, get a professional roof inspection before you spend a dollar on materials.
— Ebben
Get expert roof patch repair help in lexington, SC
Exteriorgenie has delivered reliable roof repair services in Lexington, SC for 25 years, backed by HAAG-certified inspectors and military-grade attention to detail. Whether you need a same-day emergency patch after a storm or a thorough assessment to decide between repair and replacement, Exteriorgenie handles it with transparent pricing and no guesswork.

Exteriorgenie also provides personalized insurance claims assistance so your documentation is airtight from day one. If cost is a concern, roofing financing options are available to make repairs affordable without delay. Call Exteriorgenie today for a professional assessment and stop a small patch problem before it becomes a full replacement.
FAQ
What is roof patch repair exactly?
Roof patch repair is a targeted fix for a small, isolated area of roof damage designed to stop leaks and restore the weather barrier. It costs $150–$500 professionally and lasts 5–15 years when done with the correct materials.
How long does a temporary roof patch last?
Temporary patches last 30–180 days depending on materials and climate conditions. Tarps typically need replacement every 30–90 days, while rubberized sealants may hold slightly longer in mild weather.
When should i patch instead of replacing my roof?
Patch repair is the right choice when damage is isolated, covers less than 30% of the roof surface, and the roof is under 15–20 years old. If multiple areas are failing or shingles are brittle, replacement is more cost-effective.
Can i patch my roof myself?
DIY patching works for simple shingle replacements on newer roofs with clearly isolated damage. Using incorrect materials can void manufacturer warranties and complicate insurance claims, so document all damage with photos before starting any repair.
How often should i inspect a patched roof area?
Check the patched area after every major storm and schedule a professional inspection twice a year, in spring and fall. Early detection of patch failure prevents interior water damage and keeps repair costs low.