
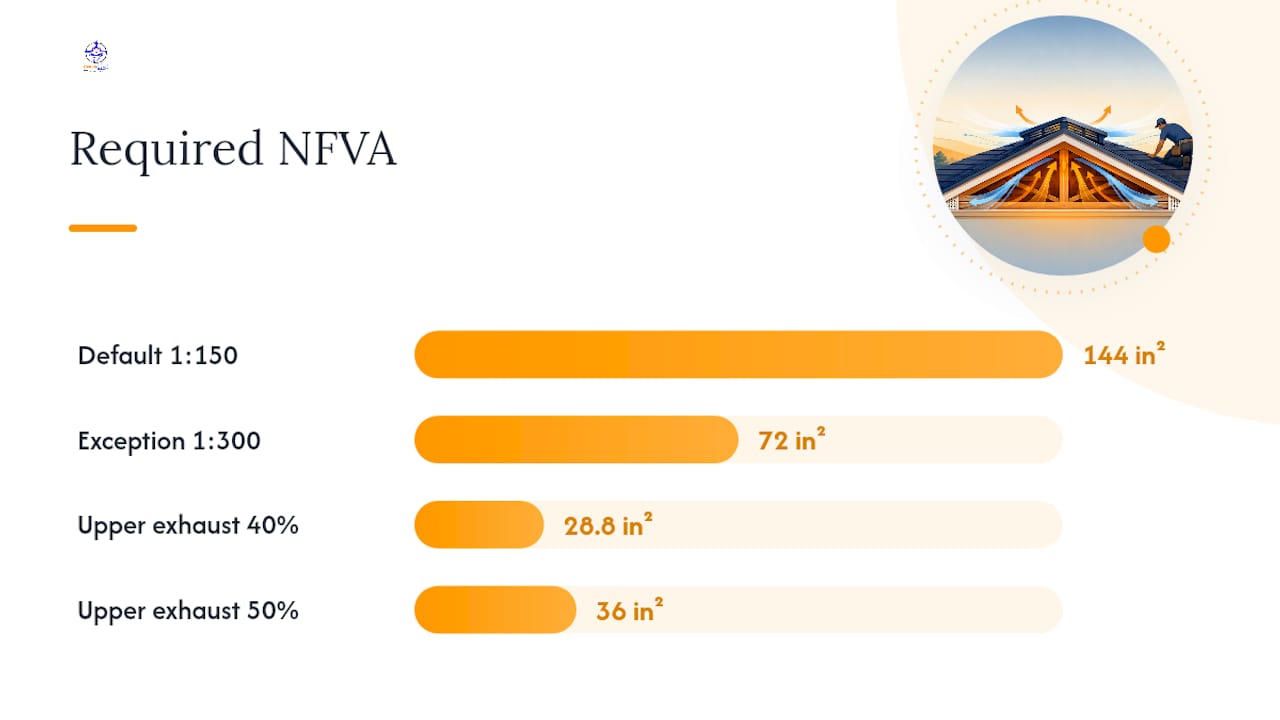
For a new roof, you need 1 square foot of net free ventilation area (NFVA) for every 150 square feet of attic floor. That's the baseline rule under IRC Section R806. If you install a Class II vapor retarder and split your vents so at least 40% of NFVA sits in upper exhaust positions, you can cut that ratio to 1:300. Start by measuring your attic's projected floor area, then run the calculation in the next section before touching a single vent.
A few things to understand before you calculate:
- Net free ventilation area (NFVA) is the actual open area air passes through, not the vent's frame size. A 16×8-inch soffit vent may carry only 55 square inches of NFVA. Always pull the manufacturer's datasheet.
- The 1:150 ratio is the default for most new installations. No vapor retarder? Use this number.
- The 1:300 exception cuts the required area in half but demands two conditions: a balanced intake/exhaust split and a qualifying vapor retarder on the warm side of the ceiling.
Proper attic ventilation reduces ice-dam formation and summer heat buildup while preventing the deck condensation that rots sheathing and degrades shingles prematurely. Get the math right before the shingles go on.
Key Takeaways
Proper attic ventilation requires 1 sq ft of NFVA per 150 sq ft of attic floor under IRC R806, reducible to 1:300 only with a Class II vapor retarder and a balanced intake/exhaust split of 40–50% upper exhaust.
| Point | Details |
|---|---|
| Default ratio is 1:150 | Divide attic floor area by 150 to get required NFVA in square feet; multiply by 144 for square inches. |
| 1:300 exception has two hard conditions | You need a Class II vapor retarder AND at least 40% of NFVA in upper exhaust positions. |
| NFVA beats nominal size every time | Always use the manufacturer's rated NFVA from the datasheet, not the vent's frame dimensions. |
| Intake plus exhaust equals a system | Soffit intake and ridge exhaust must both be sized correctly; a ridge vent with no intake below it does nothing. |
| Exteriorgenie delivers permit-ready plans | HAAG-certified inspectors handle NFVA calculations, baffle installation, and full permit submittal in Lexington, SC. |
Table of Contents
- What do new roof ventilation requirements actually mean in code?
- How to calculate required ventilation for your attic
- Which vent types and placements actually meet code?
- When can you skip ventilation and use an unvented attic. This is not a loophole but a legitimate alternative that performs well in certain climates and roof geometries.
- Installation best practices and what fails inspections
- When should you hire a roofing professional?
- What actually matters when you specify ventilation for a new roof
- Get a permit-ready ventilation plan from Exteriorgenie
- Sources
What do new roof ventilation requirements actually mean in code?
The governing framework for residential attic ventilation is IRC Section R806 (International Residential Code), with commercial buildings falling under IBC Section 1202. Most jurisdictions in the United States have adopted the IRC, though some states run one or two code cycles behind. Always verify which edition your local building department enforces.
UpCodes summarizes the core IRC language clearly: the minimum NFVA equals 1/150 of the vented attic floor area. The 1/300 exception applies only when two conditions are both met: at least 40% of the required NFVA is provided by upper vents (ridge or upper-third placement), and a Class I or Class II vapor retarder is installed on the warm-in-winter side of the ceiling.
Net free ventilation area vs. nominal vent size
This distinction trips up more homeowners than any other part of the code. A vent's nominal size is its frame dimensions. Its NFVA is the actual open area after accounting for screens, louvers, and baffling inside the product. The two numbers can differ by 40–60%. ARMA's ventilation guidance is explicit: use manufacturer-rated NFVA for all calculations, never nominal dimensions.
The flow path requirement
Ventilation only works when air has a continuous, unobstructed path from intake to exhaust. Soffit vents pull cool outside air in at the eaves; that air travels up through the rafter bays and exits at the ridge or upper exhaust vents. Block any point in that path and the system fails, regardless of how many vents are installed.
ENERGY STAR's attic ventilation guidance adds an important nuance: rafter baffles keep the intake airway open at each eave bay, but they don't substitute for sealing ceiling penetrations. Air sealing the ceiling plane is what prevents warm, moist interior air from reaching the cold roof deck in winter.
Pro Tip: Inspectors treat rafter baffles and a sealed ceiling plane as part of the ventilation system, not accessories. Missing either one is a common reason installations fail their first inspection.
How to calculate required ventilation for your attic
This is a five-step process you can complete with a tape measure and a calculator.
- Measure your attic's projected floor area. Use the footprint of the conditioned space below, not the sloped roof surface. A 40×30-foot house has 1,200 square feet of attic floor area.
- Choose your ratio. Use 1:150 unless you can confirm both exception conditions (balanced vents + Class II vapor retarder). When in doubt, use 1:150.
- Calculate required NFVA in square feet. Divide attic floor area by 150 (or 300 if the exception applies).
- Convert to square inches. Multiply the square-foot result by 144. Most vent datasheets list NFVA in square inches.
- Split intake and exhaust. ARMA's white paper on steep-slope asphalt roofs recommends 50–60% of total NFVA at intake (soffit) and 40–50% at exhaust (ridge or upper vents).
Worked examples
Using online calculators
Two manufacturer calculators are widely used and free:
- Owens Corning Ventilation Calculator: Enter your attic's square footage and the calculator outputs required NFVA and recommends vent quantities. It also flags whether your planned product mix meets the balanced intake/exhaust split. Screenshot the results and attach them to your permit submittal.
- Lomanco Ventilation Calculator: Works similarly. Lomanco's tool lets you select specific vent models and confirms whether the combined NFVA meets code. It's particularly useful for comparing ridge vent linear footage against soffit vent counts.
Both tools ask for attic floor area and your chosen ratio. Neither replaces reading the manufacturer's NFVA datasheet for each product you plan to install, but they give you a fast sanity check and a printable summary that plan reviewers appreciate.
Which vent types and placements actually meet code?
Vent selection and placement determine whether your system performs or just looks compliant on paper.
Intake vents: soffit is the standard
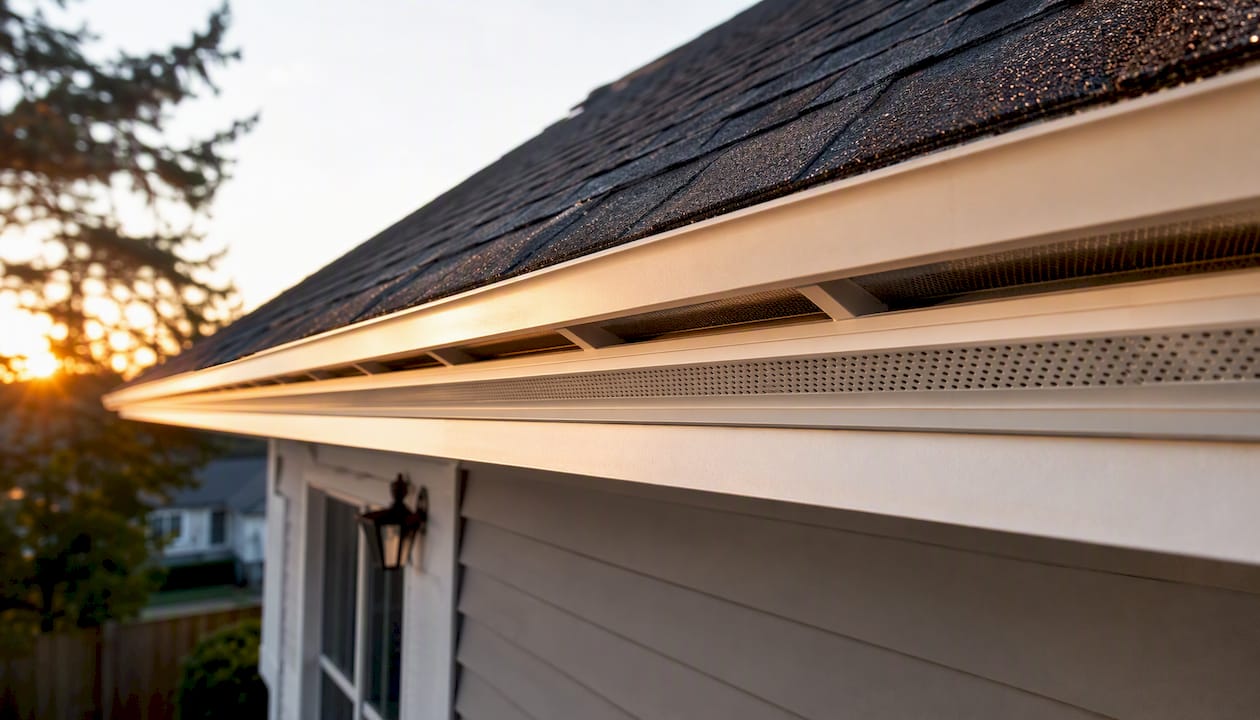
Soffit vents are the correct intake location because they sit at the lowest point of the attic airspace. Continuous soffit vents (a perforated strip running the full eave length) distribute intake more evenly than individual round or rectangular vents. Individual vents work fine on shorter eave runs, but you need to count their combined NFVA carefully.
The intake must be low. Placing intake vents on the upper portion of the roof wall or near the ridge defeats the stack effect that drives passive airflow.
Exhaust vents: ridge is the preferred choice
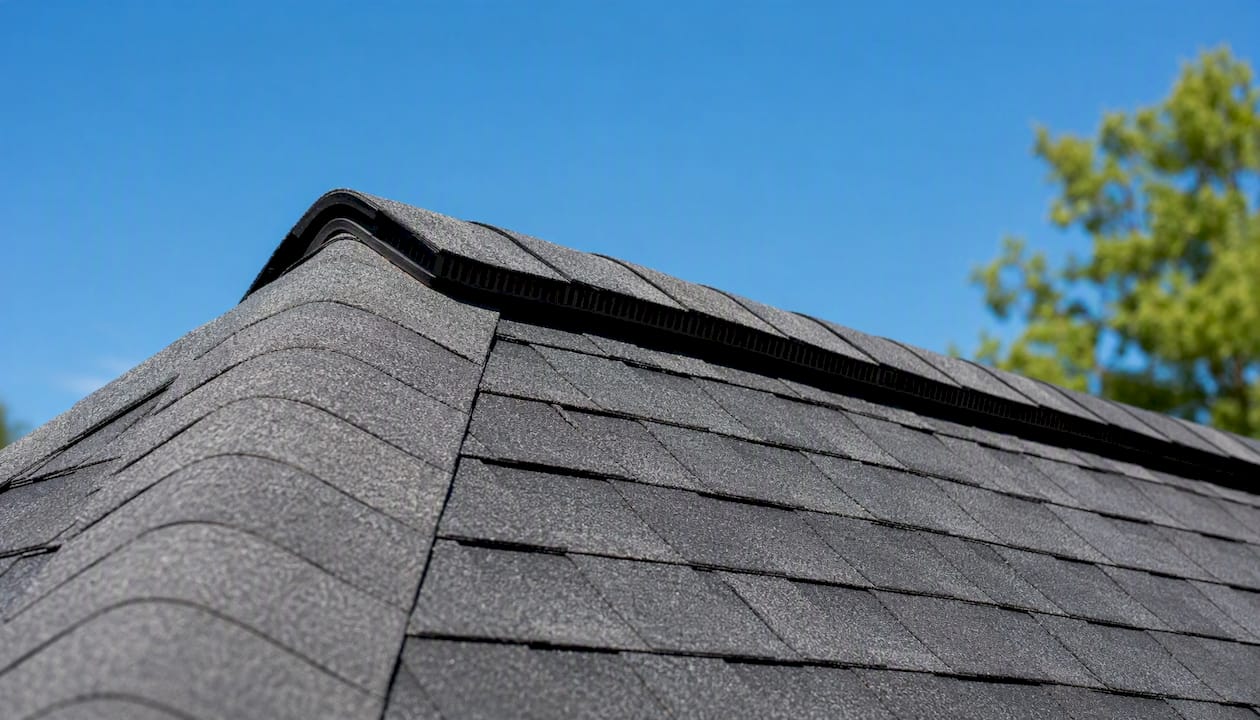
Ridge vents run the full length of the peak and provide the most uniform exhaust distribution. Box vents (also called low-profile or static vents) work on roofs where a continuous ridge vent isn't practical, but you need more of them to hit the same NFVA. Turbine vents add wind-driven exhaust capacity but require wind to function; they're not a substitute for a properly sized passive system.
Gable vents are a cross-ventilation approach, not a stack-effect system. They can work on simple gable roofs but create airflow problems on complex hip or intersecting rooflines.
The false-balance failure: mixing exhaust types
Combining ridge vents with gable vents is one of the most common field failures. The ridge vent, being closer to the gable opening than to the soffits, draws air from the gable rather than from the intake below. The result is a short-circuit: the lower attic space gets no airflow at all. ARMA's guidance identifies this as a leading cause of ventilation systems that pass visual inspection but fail to control moisture or heat.
Pick one exhaust method and size it correctly. Ridge vent plus soffit intake is the cleanest, most code-friendly combination for most residential roofs.
Power attic ventilators: use with caution
Powered fans can move more air than passive systems, but they carry real risk. An oversized power ventilator can depressurize the attic enough to pull conditioned air through ceiling penetrations, raising energy costs and creating moisture problems. Professional contractors treat power attic ventilators as high-risk unless carefully sized and controlled; passive systems are generally preferred. If you're considering a powered unit, review HVAC airflow fundamentals before specifying fan capacity.
Pro Tip: Install rafter baffles at every eave bay before the insulation goes in. A baffle holds a 1-inch minimum airspace between the insulation and the roof deck, keeping the intake airway open. Without baffles, blown-in insulation routinely blocks soffit vents entirely.
When can you skip ventilation and use an unvented attic. This is not a loophole but a legitimate alternative that performs well in certain climates and roof geometries.
IRC R806.5 permits unvented (conditioned) attic assemblies when specific conditions are met. This is not a loophole; it's a legitimate alternative that performs well in certain climates and roof geometries.
The core requirement: air-impermeable insulation (typically closed-cell spray polyurethane foam) must be applied directly to the underside of the roof deck, with no vented airspace between the insulation and the sheathing. The insulation must meet minimum R-value thresholds that vary by climate zone.
When unvented assemblies make sense
- Complex roof geometry: Hip roofs, intersecting valleys, and dormers make continuous soffit-to-ridge airflow difficult. Spray foam eliminates the need for a flow path entirely.
- HVAC equipment in the attic: Ducts and air handlers in a vented attic lose efficiency to the extreme temperatures. Moving the attic into conditioned space solves this directly.
- Hot-humid climates: In Climate Zones 1–3 (most of the Southeast, including South Carolina), unvented assemblies with vapor-open insulation can reduce moisture risk compared to vented attics that draw humid outdoor air in through the soffits.
When to stick with a vented attic
- Snow country (Climate Zones 6–8): Ice dams form when heat escapes through the roof deck and melts snow that refreezes at the eaves. A well-ventilated attic keeps the deck cold and uniform. Building Science Corporation recommends a vented airspace above the insulation layer in extreme snow regions.
- Simple gable roofs: Straightforward geometry makes a vented system easy to design and inspect.
- Budget constraints: Spray foam costs significantly more than batt insulation plus standard vents.
Decision checklist: Complex geometry or HVAC in attic? Consider unvented. Hot-humid climate with simple roof? Either works; consult a building-performance pro. Snow country? Vented is safer. Tight budget, simple roof? Vented with correct NFVA math.
Installation best practices and what fails inspections
Getting the math right on paper is only half the job. These are the mistakes that produce inspection callbacks.
- Using nominal vent size instead of NFVA. A 16×8 soffit vent is not 128 square inches of ventilation. Pull the datasheet. Inspectors routinely fail installations where manufacturer NFVA ratings were not used, or where soffit intake is blocked by insulation because rafter baffles were omitted.
- Installing a ridge vent with no soffit intake. A ridge vent with no intake below it is decorative. Air has nowhere to come from.
- Placing upper exhaust vents below the upper-third threshold. Exhaust vents need to sit in the upper third of the attic space (or at the ridge) to qualify for the 1:300 exception and to drive effective stack-effect airflow.
- Mixing ridge and gable vents (see the false-balance section above).
- Improperly controlled power attic vents that run continuously and depressurize the living space below.
What to include in your permit submittal
City of Portland's permit office provides a useful template: plan reviewers ask for the attic floor area, the chosen vent rate (1/150 or 1/300), the calculated required NFVA, and the specification of vapor retarder when using the 1/300 exception. Use this as your checklist:
- Total attic floor area (sq ft)
- Chosen ratio and justification (1:150 default, or 1:300 with vapor retarder noted)
- Required NFVA (sq ft and sq in)
- Intake vent locations, model numbers, and individual NFVA values
- Exhaust vent locations, model numbers, and individual NFVA values
- Combined intake NFVA and combined exhaust NFVA (both must meet the split target)
- Rafter baffle specification (material, depth, placement)
- Vapor retarder specification if using the 1:300 exception
Pro Tip: Before the inspector arrives, walk the roof and confirm every soffit vent is unobstructed from below, ridge vent caps are fully nailed, and no rafter bay is missing a baffle. These are the three things an inspector checks first.
When should you hire a roofing professional?
Some ventilation work is genuinely within reach for a capable homeowner. A straightforward soffit vent addition on a single-story gable roof, where the NFVA math is simple and local code allows homeowner permits, is manageable. Everything else on this list warrants a call to a qualified contractor.
- Visible mold, staining, or moisture damage on the roof deck or rafters
- Recurring ice dams despite existing ventilation
- Complex roof geometry (hip roofs, multiple valleys, dormers)
- HVAC equipment or ductwork located in the attic
- Planned conversion from vented to conditioned (unvented) attic
- Any project requiring permit documentation you're not confident preparing
What a pro should bring to the job
A qualified contractor should offer a blower-door test or thermal imaging to diagnose airflow and air-sealing deficiencies before specifying vents. They should produce a written NFVA calculation using manufacturer datasheets, not estimates, and document the intake/exhaust split for the permit submittal.
Questions to ask before signing
Use this roofing contractor vetting guide as a starting point, and add these ventilation-specific questions:
- Can you show me the NFVA calculation and the manufacturer datasheets for the vents you're specifying?
- Will you handle the permit submittal, including the ventilation calculation table?
- Do you have experience with unvented attic assemblies and spray foam application?
- Are your inspectors HAAG-certified, and do you assist with insurance claims if storm damage is involved?
- What's your process if the installation fails its first inspection?
A contractor who can't answer the NFVA question clearly is guessing at your ventilation system.
What actually matters when you specify ventilation for a new roof
Most ventilation failures aren't math errors. They're sequencing errors. A contractor installs the ridge vent, skips the soffit intake because "the old ones are still there," and nobody checks whether those old vents are blocked by the new insulation. The numbers on the permit look fine. The attic doesn't work.
The ceiling plane matters as much as the vents. A perfectly balanced intake/exhaust system with a leaky ceiling is still moving warm, moist air into the attic on every cold night. NRCA guidance frames proper attic ventilation as a performance consideration, not just a code checkbox. That framing is right. Code compliance sets the floor; a continuous, unobstructed airflow path from sealed ceiling to ridge is what actually protects the roof deck over 20 or 30 years.
Permit-ready documentation is the discipline that forces the right decisions. When you have to write down the NFVA of every vent, the intake/exhaust split, and the baffle specification, you catch the gaps before they're buried under shingles. Exteriorgenie's approach to new roof installations in Lexington, SC, starts with that documentation, not as a formality, but because it's the only way to know the system is right before the job closes.
Get a permit-ready ventilation plan from Exteriorgenie

Exteriorgenie is a veteran-owned roofing contractor with 25 years of experience and HAAG-certified inspectors serving Lexington, SC and the surrounding Midlands area. For homeowners navigating new roof ventilation requirements, that combination matters: HAAG certification means inspectors who read manufacturer datasheets and know the difference between nominal vent size and NFVA, and 25 years of permit submittals means fewer inspection callbacks.
Exteriorgenie handles the full ventilation compliance workflow: NFVA calculations using manufacturer data, rafter baffle installation, attic air-sealing, intake/exhaust balance documentation, and complete permit submittal packages. If storm or wind damage is part of the picture, the team also provides insurance claims assistance through the same HAAG-certified inspectors. Financing options are available for homeowners planning a full roof replacement with ventilation upgrades.
Request a site visit and get a permit-ready ventilation calculation before your next roof project starts.
Sources
These are the primary references used throughout this article. Each one serves a specific purpose depending on what you need next.
- IRC 2024 Attic Ventilation: 1-to-150 Ratio, Intake & Exhaust Requirements | R806 | Jaspector
- Importance of proper attic ventilation for roofing systems — Asphalt Roofing Manufacturers Association (ARMA)
- BSD-102 Understanding Attic Ventilation — Building Science Corporation
- Updates to residential roof ventilation submittal requirements — City of Portland
- About attic ventilation — ENERGY STAR
- Attic space ventilation — NRCA