
You can repair a damaged ridge cap in an afternoon by following the same sequence roofers use: secure fall protection, strip the old caps, inspect the ridge vent and underlayment, set a starter cap at the downwind end, and shingle new caps toward the wind at consistent exposure. Here's the short version before you climb anything.
- Set up ladder and fall protection; check the forecast for dry conditions.
- Pry off damaged caps and pull every nail.
- Clean the ridge line and inspect underlayment and vent for tears or rot.
- Cut and place a starter cap at the leeward end.
- Install new caps toward the prevailing wind, keeping exposure and nail placement consistent with the manufacturer's installation instructions.pdf).
- Hand-seal the final cap's exposed nails with roofing cement.
This is a reasonable DIY job if the damage is limited to a few isolated caps and your roof pitch lets you stand and work safely. Call a pro like Exterior Genie if you find rotted decking, a crushed ridge vent, or a run of failures longer than a few feet.
Key Takeaways
Ridge cap repair succeeds when you inspect the vent and decking before nailing, keep exposure consistent, and never nail through the self-seal strip.
| Point | Details |
|---|---|
| Inspect before you install | Pull back damaged caps to check underlayment and the ridge vent for rot or cracks before installing anything new. |
| Start at the downwind end | Set a doubled starter cap with four nails at the leeward end so every following cap laps correctly against wind-driven rain. |
| Match exposure to your product | Confirm exposure on the product wrapper; it ranges roughly 5 to 8 inches depending on the manufacturer. |
| Never nail the self-seal stripe | Keep both nails per cap inside the overlap, roughly 1 inch from each side edge, and seal only the final cap's exposed heads. |
| Call in help for bigger problems | Exterior Genie offers 24/7 emergency repair and HAAG-certified insurance assistance when damage exceeds a simple cap swap. |
Table of Contents
- Tools and Materials for a Ridge Cap Repair
- How Do You Stay Safe During Ridge Cap Repair?
- How Do You Tell If a Ridge Cap Needs Repair or Full Replacement?
- Ridge Cap Repair Step by Step
- Should You Repair or Replace the Ridge Vent While You're Up There?
- What Are the Correct Nailing and Sealing Specs?
- How Long Does This Take and What Does It Cost?
- Post-Repair Checklist and Ongoing Maintenance
- When to Call Exterior Genie Instead
- A Roofer's Notes on Getting the Details Right
- Prefer to Have a Pro Handle Your Ridge Repair?
- Sources
- FAQ
Tools and Materials for a Ridge Cap Repair
Get everything staged before you climb, because trips up and down a ladder eat more time than the actual repair.
Tools: stable extension ladder, roof harness with anchor point, flat pry bar, hammer or a roofing nailer, utility knife, chalk line, tape measure, wire brush, and a bucket for hauling down old nails and torn shingle.
Materials: replacement ridge caps (pre-formed or cut from standard 3-tab shingles), roofing nails, roof cement or sealant, an underlayment patch if the felt or synthetic barrier tore, and at least one starter cap piece.
Galvanized steel nails work fine for most residential jobs; stainless steel costs more but resists corrosion better in coastal or high-humidity regions. Either is acceptable as long as the coating matches what's already on your roof.
Pro Tip: Pre-formed ridge caps cost more per bundle but save you the hassle of cutting and beveling 3-tab shingles by hand, and they match factory color blends better than field-cut pieces cut from a mismatched bundle in your garage.
How Do You Stay Safe During Ridge Cap Repair?
Ridge work sits at the highest, steepest point of the roof, so the margin for error is thinner than on a low-slope repair. Set your ladder on level ground, extend it at least three feet above the roof edge, and have someone foot it if possible.
- Wear a roof harness anchored to a rated point on any pitch steeper than about 6/12.
- Never work on wet, frosted, or icy shingles; granule surfaces get slick fast even when they look dry.
- Keep loose nails and torn shingle pieces off the walking surface as you work; debris underfoot is a leading cause of slips.
- Stop and call a professional if you encounter a damaged ridge vent, a long continuous run of failed caps, soft or rotted decking, or a roof pitch where you can't anchor fall protection safely.
- Skip the repair entirely during high wind advisories, even if the caps themselves look like a quick fix.
The most serious mistakes on ridge jobs are rarely dramatic. An unsecured ladder, a harness left in the truck, or one foot placed on a pile of loose granules causes more injuries than any single tool or technique ever does.
How Do You Tell If a Ridge Cap Needs Repair or Full Replacement?
Start by walking the ridge line from the ground with binoculars, then confirm up close once you're safely anchored. A handful of missing or cracked caps scattered across an otherwise solid ridge is a repair. A continuous failure running several feet, or caps curling and cracking uniformly with age, usually points to replacement.
Pull back a damaged cap and look at what's underneath. Torn underlayment, a crushed or cracked ridge vent, or soft, discolored decking all change the scope of the job.
- Repair if you see isolated missing caps, a few loose nails, or one section with torn self-seal strips but sound decking underneath.
- Replace the ridge run if the vent is cracked or crushed, if several adjacent caps have failed together, or if you find a wide area of missing sealant paired with soft decking.
- When in doubt, treat rotted decking as a stop sign. No cap repair holds up over a compromised deck.
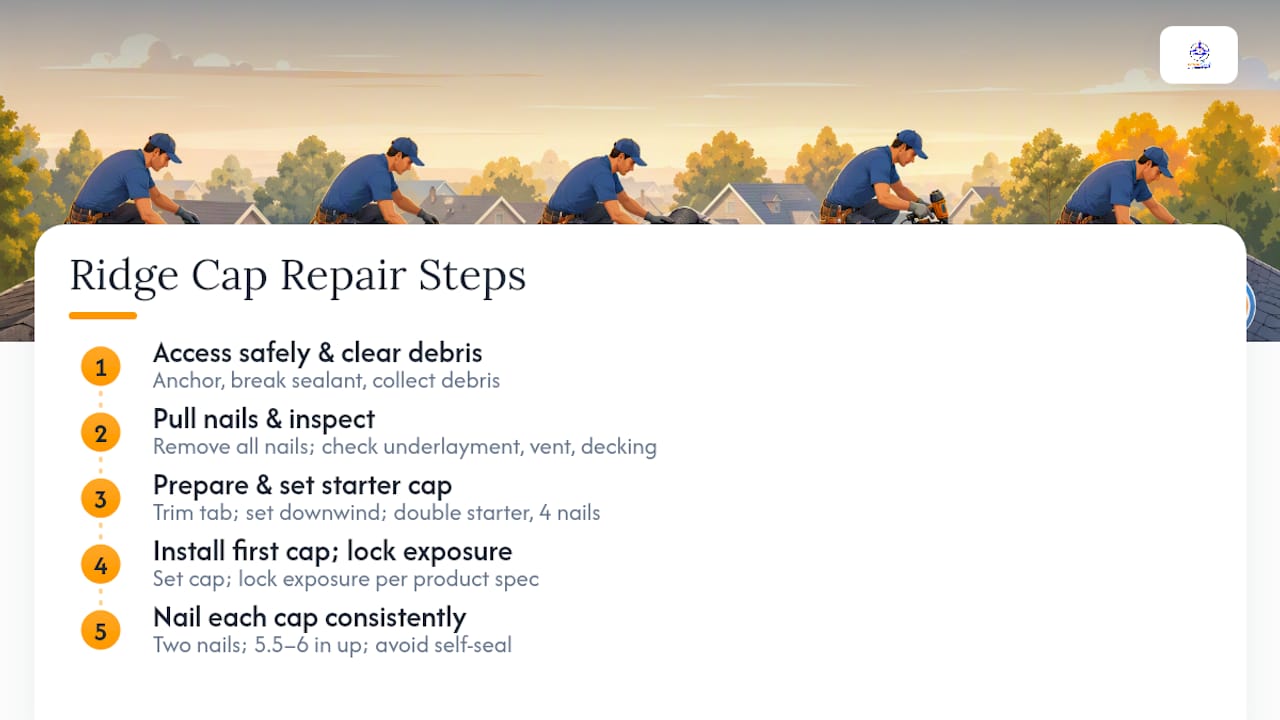
Ridge Cap Repair Step by Step
This is the core sequence, and it borrows directly from how manufacturers and working roofers approach the job. Follow it in order and don't skip the inspection step just because the caps look like the only problem.
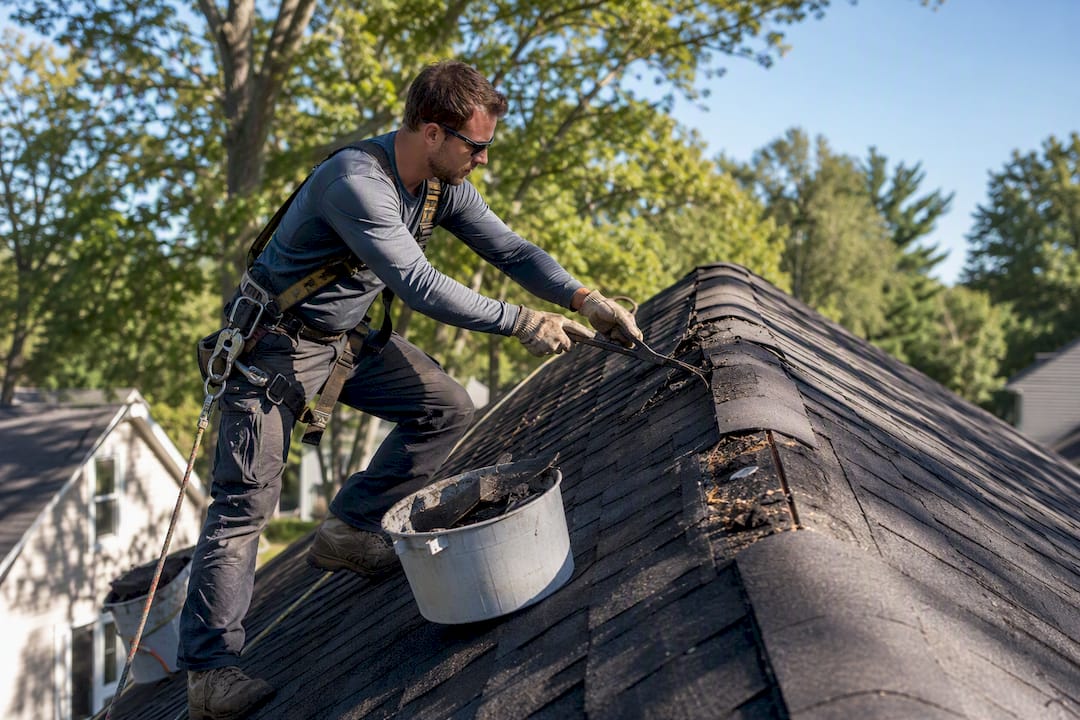
Step 1: Access safely and clear debris. Get anchored, then work your way to the damaged section. Use the flat pry bar to gently break the sealant bond on each cap before lifting it, working slowly so you don't tear the shingle underneath or crack an adjacent cap that's still sound. Drop torn pieces and pulled nails straight into your bucket instead of leaving them on the roof deck.
Step 2: Pull nails and inspect what's underneath. Remove every nail from the damaged section, not just the ones holding loose caps. Leftover nail shanks catch new caps and create high spots that telegraph through the shingle over time. With the ridge exposed, check the underlayment for tears and look closely at the ridge vent for cracks, crushed sections, or missing slots. This is also when you'll spot decking that feels soft underfoot, a sign the repair just got bigger.
Step 3: Prepare and set the starter cap. Cut the exposed tab portion off a standard cap according to your product's install sheet, then set it at the downwind end of the ridge, the end away from your area's prevailing storm direction. Starting downwind means every subsequent cap laps over the one behind it in the direction wind-driven rain travels, which is the entire point of a shingled ridge line. A doubled starter cap secured with four nails gives that leading edge extra grip against uplift.
Step 4: Install the first full cap and establish your exposure. Set the first field cap over the starter, snap a chalk line if the run is long enough to need one, and lock in your exposure measurement now. Manufacturer specs for products like GAF Timbercrest call for an 8 inch finished exposure, while many pre-formed caps and hand-cut 3-tab methods run close to five to six inches. Check the product wrapper before you commit, because guessing here throws off every cap that follows.
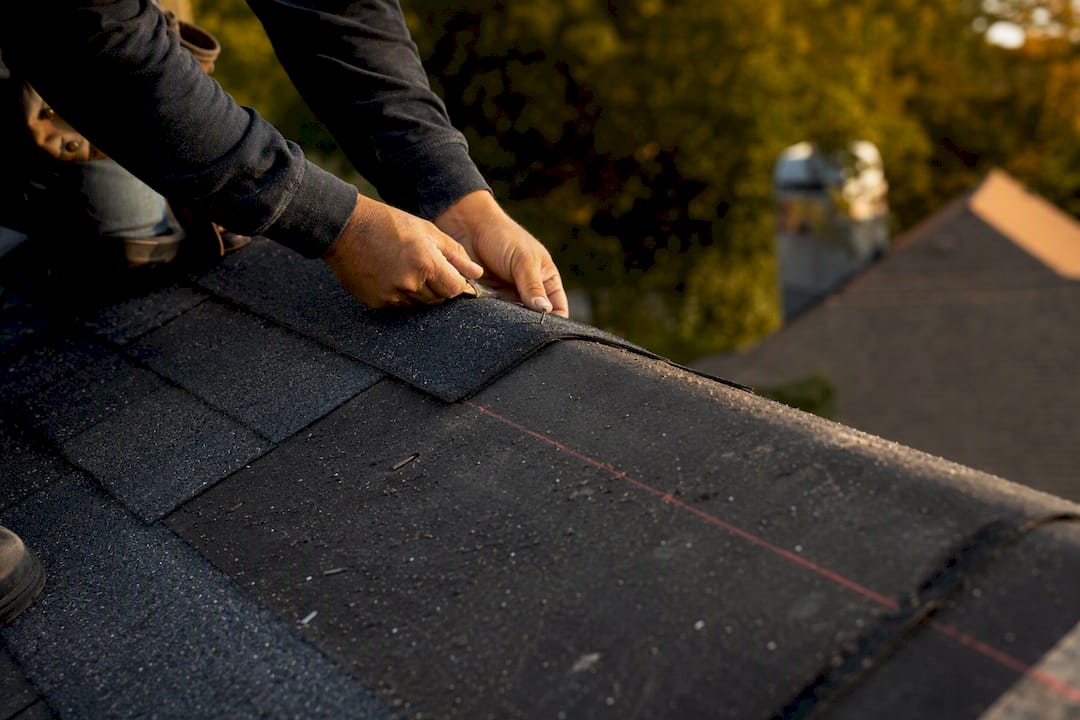
Step 5: Nail each cap with a consistent rhythm. Drive two nails per cap, placed roughly 5.5 to 6 inches up from the leading edge and 1 inch in from each side edge, landing inside the overlap where the next cap will hide them. Never nail through the self-seal strip; a nail through that adhesive line defeats its purpose and opens a path for water. Continue cap after cap, keeping your exposure steady, until you reach the far end of the run.
Statistic Callout: One analysis of ridge cap failures points to incorrect nail placement and exposed nail heads below the exposure line as the single most common installation mistake, allowing years of slow water entry that homeowners rarely notice until a ceiling stain shows up.
Step 6: Finish and seal the final cap. The last cap in the run has nowhere to hide its nails under an overlapping shingle, so hand-seal the exposed heads with a bead of roofing cement and press the cap down firmly. Do the same at any hip-end caps you replaced. Sweep the ridge clean of granules and nail shavings, then do a walk-through inspection while you're still up there.
Pro Tip: Cold weather keeps factory sealant strips inactive until sun warms them, so if you're repairing caps in fall or winter, run a thin bead of roofing cement under the overlap by hand to hold everything down until solar heat finishes the job.
Should You Repair or Replace the Ridge Vent While You're Up There?
With the old caps off, you get a rare, clear look at the ridge vent, and it's worth five extra minutes before you close everything back up. Run your hand along the vent length feeling for crushed sections, and look for hairline cracks or slots packed shut with granules and debris.
- Minor nail holes from the original install are fine to reuse; patch them with a dab of sealant and move on.
- Cracked, crushed, or partially collapsed vent sections need replacement, not a patch, because a compromised vent stops moving attic air the way it's designed to.
- Check flashing at hip ends and ridge terminations too; if it's lifted, rusted, or gapped, add sealant or replace the section before you cap over it.
Reusing a sound vent saves both time and money. Covering up a damaged one just buries a problem you'll be chasing again in a year or two, and worth flagging to a roofing professional if you're unsure whether a section is salvageable.
What Are the Correct Nailing and Sealing Specs?
Get the fasteners wrong and everything else about the job stops mattering. Manufacturer guidance for products like Timbercrest calls for zinc-coated steel or aluminum nails in 10 to 12 gauge, long enough to penetrate at least 3/4 inch into solid wood decking, not just the sheathing surface.
- Place nails 1 inch in from each side edge of the cap, inside the double-layer portion where the next cap will cover them.
- Use two nails per standard field cap; the doubled starter cap at the downwind end gets four.
- Never drive a nail through the factory self-seal stripe. That adhesive band is what locks caps together against wind uplift, and puncturing it creates a direct water path.
- Hand-seal the final cap's exposed nail heads with roofing cement, since it has no overlapping cap to hide them.
If a nail won't seat flush and bites only sheathing rather than the rafter or decking below, back it out and shift position slightly rather than leaving a proud nail under the next cap.
How Long Does This Take and What Does It Cost?
A single-cap swap runs about 15 to 30 minutes once you're set up on the roof; most of that time is ladder setup and breaking the old seal without damaging neighboring caps. A short run of missing or cracked caps, say six to ten feet of ridge, takes roughly 1 to 3 hours including cleanup. A full ridge replacement on an average single-story home stretches from half a day to a full day, especially if you're also swapping vent sections.
Materials for a small repair (a handful of caps, nails, and a tube of roof cement) stay inexpensive at most hardware stores. Costs climb quickly if you also need vent replacement, flashing, or an underlayment patch, since those require additional materials and more careful tie-in work.
- The cheapest DIY repair becomes expensive fast if you miss rotted decking or a cracked vent hiding under the old caps.
- Budget extra time, not just money, for any section where the underlayment tore during removal.
- If your estimate keeps growing once you're inspecting exposed decking, that's usually the signal to bring in a licensed roofer rather than push through solo.
Post-Repair Checklist and Ongoing Maintenance
Before you climb down for good, confirm the nail lines are hidden under overlaps, the final cap's nails are sealed, the vent sits flush and unobstructed, and no shingle edges are lifted or curling.
- Check the ridge after every major storm for lifted or missing caps.
- Re-seal any spot where roofing cement has cracked or worn thin, usually within a few years in hot climates.
- Sweep granules and debris off the ridge line during your seasonal gutter cleaning.
- Schedule a professional roof inspection every few years, or immediately after hail or high wind events, even if nothing looks obviously wrong from the ground.
When to Call Exterior Genie Instead
Exterior Genie is a veteran-owned roofing company with 25 years in the field, offering 24/7 emergency repairs and HAAG-certified inspectors who handle insurance claims directly. Some ridge problems just aren't worth the ladder trip yourself.
- Call if you find rotted decking, a crushed or cracked ridge vent, or a failure running several feet or more.
- Call if the pitch is too steep to anchor fall protection safely, or storm damage looks widespread.
- Exterior Genie can provide a full inspection, temporary tarping to stop leaks immediately, and a complete repair backed by insurance assistance when the damage qualifies.
A Roofer's Notes on Getting the Details Right
Three habits separate a repair that lasts from one you'll be redoing next season. Always double the starter cap at the downwind end with four nails instead of two; it's the piece taking the most direct wind load. Mark your first three caps with a pencil line for exposure before you nail anything, because drift compounds fast over a twenty-foot run. And never skip hand-sealing the final cap. It has no overlap to protect it, and it's the spot inspectors check first.
None of this is complicated. It just rewards patience over speed, which is true of most roofing work.
Prefer to Have a Pro Handle Your Ridge Repair?
If climbing a ladder with a pry bar and a bucket of nails doesn't sound like your Saturday, Exterior Genie handles the entire job for you, and does it with the same starter-cap discipline and manufacturer-spec nailing this guide walks through, minus the risk of you finding rotted decking mid-repair with no plan for it.

A service call typically includes a full ridge and vent inspection, the actual repair or replacement, and HAAG-certified insurance claims help if the damage traces back to a storm. For most Midlands, South Carolina homeowners, that's less total cost and risk than a DIY job that turns into a bigger project once the old caps come off. Get a professional roofing inspection scheduled, and if wind or hail caused the damage, ask about insurance claims assistance in the same visit.
Sources
FAQ
What are the common problems with ridge cap shingles?
The most frequent issues are cracked or curling caps from age, torn self-seal strips, nails that back out below the exposure line, and crushed or cracked ridge vents underneath.
How do you fix a shingle ridge cap?
Pry off the damaged cap, pull the old nails, set a new cap with the correct exposure for your product, drive two nails inside the overlap on each side, and hand-seal the final cap's nail heads with roofing cement.
Where do you nail a ridge cap shingle?
Nail placement depends on the product, but a common pattern is two nails per cap, about 1 inch in from each side edge and roughly 5.5 to 8 inches up from the leading edge, always inside the overlap area and never through the self-seal stripe.
How do you finish off the end of a ridge cap?
The final cap has no overlap to hide its nails, so hand-seal the exposed heads with roofing cement and press the cap firmly into place, along with sealing any adjacent hip-end flashing.
Is ridge cap repair a job I should DIY, or call Exterior Genie?
Isolated cap damage on a safe, low pitch is a reasonable DIY project; call Exterior Genie if you find rotted decking, a damaged vent, storm-related failure, or a pitch too steep to anchor fall protection.