
Emergency roof repair is the prompt, temporary stabilization of roof damage to stop water intrusion and prevent further structural harm to your home. The industry term for this work is "emergency tarping and triage," though most homeowners simply call it emergency roof repair. A storm rolls through Lexington, SC, a tree limb punches through your shingles, and suddenly you have hours, not days, to act. This guide covers what emergency roof repair involves, what it costs, how to work your insurance claim, and the exact steps to take right now.
What is emergency roof repair, exactly?
Emergency roof repair is rapid, temporary work performed immediately after a damaging event to protect your home until a permanent fix is possible. The goal is not to restore your roof to full condition. The goal is to stop the bleeding: seal the breach, prevent water from reaching your ceilings and walls, and stabilize any structural sections at risk of collapse.
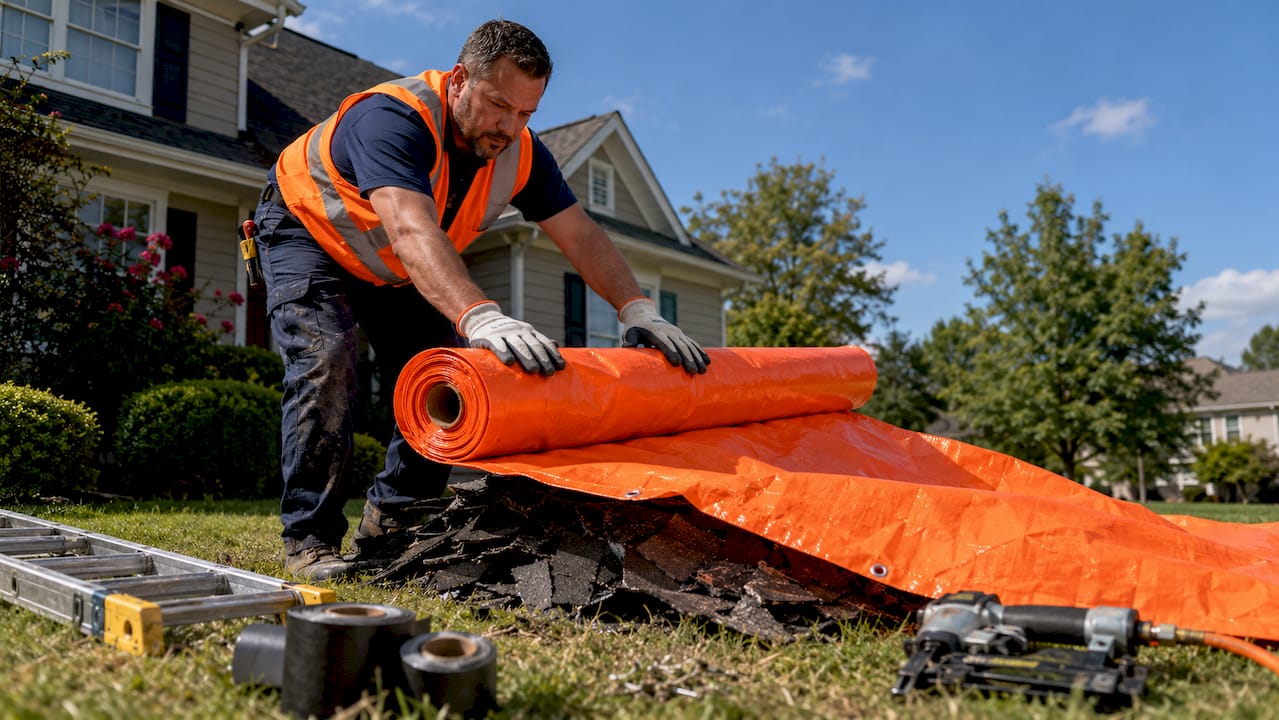
Common methods include heavy-duty polyethylene tarping, foam or caulk patching over cracked flashing, and temporary board-up of open sections. These fixes are not cosmetic. A properly installed tarp can hold for 60–90 days until a licensed contractor completes permanent repairs. That window gives you time to work through insurance and schedule the right crew.
What causes a roof emergency?
Most roof emergencies fall into four categories, and knowing which one you are dealing with shapes every decision that follows.
- Storm damage. High winds strip shingles, hail fractures decking, and fallen trees punch clean through the roof structure. Wind damage and hail damage are the two most common triggers for emergency calls in South Carolina.
- Active leaks and water intrusion. A bulging or stained ceiling, dripping water, or wet insulation in the attic all signal that water is already inside. Bulging ceilings are especially dangerous because the pooled water adds significant weight.
- Structural damage or missing sections. If a section of decking is exposed or a rafter is visibly cracked, the roof cannot support normal loads. This is a structural emergency, not just a cosmetic one.
- Safety hazards. Downed power lines near the roofline, exposed wiring inside the attic, or partially collapsed sections create immediate life-safety risks that require professional response, not a homeowner with a ladder.
One detail most homeowners miss: water leaks travel along rafters and decking before dripping through a ceiling. The drip point you see inside is rarely directly below the roof breach. A professional traces the water path back to the actual entry point. Fixing only the drip location leaves the real breach open.
Pro Tip: Before the contractor arrives, look for water stains that trail horizontally across ceiling joists. That trail tells you the leak entry point is uphill from the stain, often by several feet.
What happens during a professional emergency repair?
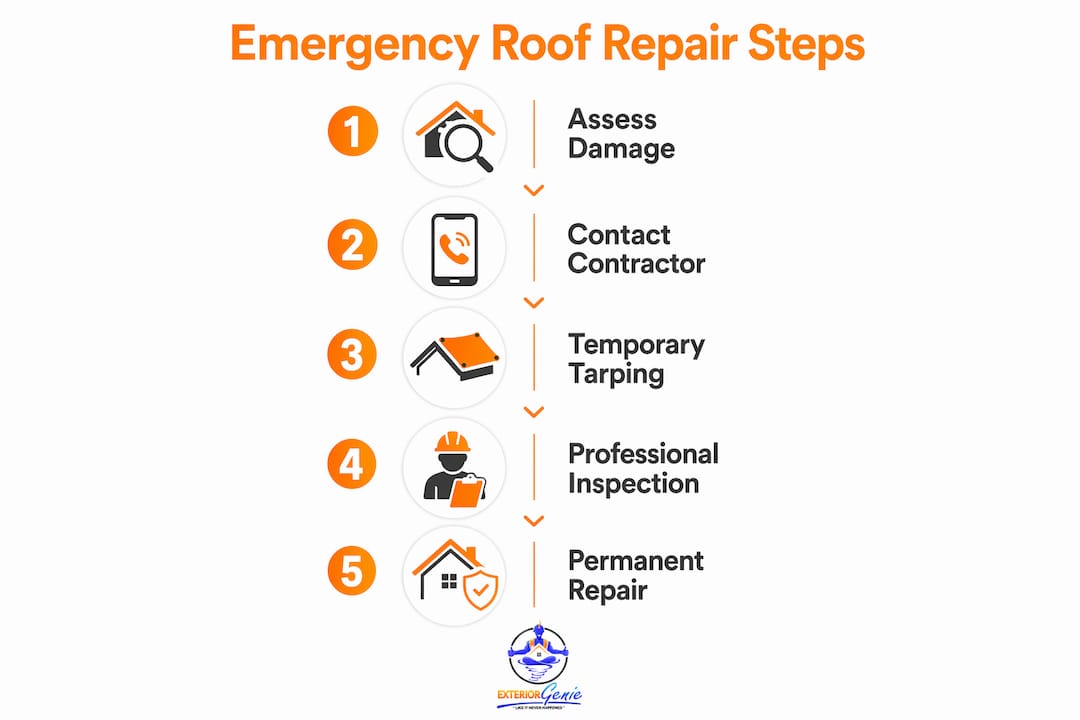
Understanding the process removes the stress of not knowing what to expect. Here is the standard sequence a qualified emergency roofing contractor follows:
- Arrival and safety assessment. Reputable emergency roofing teams target a 2-hour arrival after your call. The first task is identifying any immediate safety hazards: unstable sections, electrical risks, or structural compromise.
- Damage triage. The contractor inspects the full roofline, not just the obvious damage. This step determines the scope of temporary work needed and documents conditions for your insurance claim.
- Temporary tarping or patching. Heavy-duty tarps are secured over the damaged area, weighted and fastened to prevent wind uplift. This is the primary deliverable of an emergency visit.
- Homeowner briefing. A good contractor explains what was done, what permanent repairs are needed, and what your next steps are with your insurer.
- Written documentation. You should receive a written report of the damage found and the temporary work completed. This document is critical for your insurance claim.
One firm warning: DIY temporary patches rarely seal properly and can actually hide damage from a later professional inspection, complicating your claim and your repair. Leave the roof work to licensed contractors, especially in wet or windy conditions.
Pro Tip: Ask the contractor to photograph every damaged section before tarping. Those photos, timestamped and detailed, are your strongest evidence when the insurance adjuster arrives.
How much does emergency roof repair cost?
Emergency roof repair costs more than standard scheduled repairs, and you should plan for that from the start.
| Damage Type | Typical Cost Range |
|---|---|
| Minor leak or single shingle section | $850–$1,200 (service call) |
| Standard storm damage (partial roof) | $1,500–$5,000 |
| Major structural damage | $5,000–$12,000+ |
| Emergency tarp installation only | $300–$700 |
Emergency service premiums run 25%–50% above standard repair rates due to after-hours dispatch and immediate mobilization. That premium is real, but it is far less expensive than the interior damage that accumulates from an unsealed roof over even 48 hours. Mold remediation alone can cost more than the roof repair itself.
Cost drivers include the time of day you call, the extent of structural damage, local permit requirements, and material availability after a widespread storm event. After a major weather event hits a region, material prices and contractor availability both tighten quickly.
Financing is available for homeowners who cannot cover emergency costs out of pocket. Exteriorgenie offers roofing financing options specifically for urgent repair situations, so cost alone should not delay your call.
How does insurance cover emergency roof repairs?
Insurance covers emergency roof repairs in most cases, but the process requires careful handling to avoid common mistakes that reduce or eliminate your payout.
- Report damage promptly. Delaying your claim gives insurers grounds to classify the damage as neglect or pre-existing wear, which can result in full denial. File within 24–48 hours of the event.
- Get a HAAG-certified inspection first. A HAAG-certified inspection before you file gives you an independent damage report. This protects you from accepting a lowball adjuster estimate and helps you make an informed decision about whether to file at all.
- Document everything. Photograph all damage before any cleanup or tarping. Save every receipt, including tarping costs. Emergency tarping expenses are generally reimbursable but count toward your total settlement, so documentation keeps your numbers straight.
- Review the adjuster's scope carefully. Insurance adjusters frequently omit code-required items such as drip edge, starter strips, ridge caps, and ice and water shields. If those items are missing from the estimate, push back in writing.
- Do not accept the first offer automatically. The initial adjuster estimate is a starting point, not a final number. A trusted contractor or public adjuster can help you negotiate a complete and accurate settlement.
Understanding why insurance denies roof claims before you file puts you in a much stronger position throughout the process.
Emergency roof repair checklist: steps to take right now
Follow this sequence from the moment you discover damage. Every step matters for both your safety and your insurance claim.
- Stay off the roof. Do not climb up during rain, wind, or darkness. Wet surfaces and unstable decking are a serious fall risk.
- Shut off electricity near the leak. If water is dripping near light fixtures, outlets, or your electrical panel, cut power to that circuit at the breaker immediately.
- Relieve ceiling bulges. If your ceiling is bulging from trapped water, poke a small hole in the center of the bulge and drain the water into a bucket. This prevents a sudden ceiling collapse.
- Move valuables and place buckets. Protect furniture, electronics, and documents. Use plastic sheeting to cover what you cannot move.
- Document all damage before cleanup. Take photos and video of every affected area, including the attic, ceilings, walls, and exterior roofline.
- Call a licensed emergency roofing contractor. Look for contractors with 24/7 availability, verifiable licensing, and HAAG certification. Review what to look for in an emergency contractor before you call.
- Notify your insurance company. Report the event promptly and reference your documentation when you call.
- Keep all receipts and written communication. Every expense and every conversation with your insurer or contractor should be recorded.
Key takeaways
Emergency roof repair requires immediate professional action, thorough documentation, and careful insurance claim management to protect both your home and your finances.
| Point | Details |
|---|---|
| Act within hours, not days | Delaying emergency repairs accelerates interior damage and can trigger insurance claim denial. |
| Temporary tarps buy real time | A properly installed tarp lasts 60–90 days, giving you time to plan permanent repairs. |
| Emergency costs run 25%–50% higher | Budget $1,500–$5,000 for standard storm damage; major structural repairs can exceed $12,000. |
| HAAG inspection protects your claim | Get an independent inspection before filing to avoid accepting an incomplete adjuster estimate. |
| Document before you clean up | Photos, receipts, and written contractor reports are your strongest tools in any insurance negotiation. |
What 25 years in the field taught me about roof emergencies
The homeowners who come out of a roof emergency in the best shape share one trait: they called a professional within the first two hours and documented everything before touching a single shingle. The ones who struggle are the ones who waited, tried a DIY patch, or accepted the first adjuster number without question.
Here is what I have seen repeatedly. A homeowner patches a leak with roofing cement from a hardware store. It holds for a week. Then the next rain event pushes water under the patch and into the wall cavity. By the time a professional gets on the roof, there is mold in the wall framing and the repair scope has tripled. That DIY fix did not save money. It multiplied the damage.
The other pattern I see is homeowners who do not realize how far water travels before it shows up as a ceiling stain. They point the contractor to the drip and assume that is the problem. A trained inspector follows the water path back to the actual breach, which is often three to five feet away from where the ceiling shows damage. That distinction changes the entire repair scope.
My honest advice: treat a roof emergency the way you would treat a medical emergency. You would not self-diagnose a broken bone. Do not self-diagnose a structural roof breach. Call a professional, get the right documentation, and let the process work. The cost of acting fast is almost always lower than the cost of waiting.
— Ebben
Exteriorgenie is ready when your roof is not
When a storm hits Lexington, SC and your roof takes the hit, Exteriorgenie responds. As a veteran-owned company with 25 years of field experience, Exteriorgenie offers 24/7 emergency response with a target arrival time of two hours. Every emergency inspection is performed by HAAG-certified inspectors who document damage accurately and support your insurance claim from the first call to final settlement.

Whether you are dealing with storm damage roof repair after a major weather event or need help with roof insurance claims assistance, Exteriorgenie handles both the physical repair and the paperwork. Financing options are available so cost does not stand between you and a protected home. Call Exteriorgenie now and get a licensed professional on your roof before the next rain.
FAQ
What qualifies as a roof emergency?
A roof emergency is any damage that creates immediate risk of water intrusion, structural failure, or safety hazard. Active leaks, missing roof sections, fallen trees on the roof, and storm damage that exposes decking all qualify.
How fast should i call a contractor after storm damage?
Call within the first few hours. Professional emergency teams target a 2-hour arrival, and prompt reporting to your insurer within 24–48 hours protects your claim from denial.
Does homeowners insurance cover emergency tarping?
Yes, emergency tarping costs are generally reimbursable under most homeowners policies, but they count toward your total settlement amount. Keep all receipts and document the work in writing.
Should i attempt a DIY patch while waiting for a contractor?
No. Amateur patches rarely seal properly and can hide damage from professional inspectors, which complicates both the repair and your insurance claim.
What is a haag-certified inspection and why does it matter?
HAAG certification is an industry credential for roof damage assessment. A HAAG-certified inspection produces an independent damage report that helps you negotiate a complete and accurate insurance settlement rather than accepting the first adjuster estimate.