
Exterior wood rot repair is the process of removing decayed wood, stabilizing remaining fibers with epoxy consolidants, and rebuilding missing sections before sealing and painting. This method preserves original materials when damage is localized and the surrounding wood is still structurally sound. What is exterior wood rot repair in practical terms? It is the difference between a $200 fix and a $2,000 board replacement. The key is knowing when repair works, how to do it correctly, and what prevents rot from coming back.
What is exterior wood rot repair and when does it apply?
Exterior wood rot repair is suitable only for localized, non-structural damage surrounded by sound wood where moisture problems have been corrected. If a board sags, feels spongy across its full width, or shows rot that has spread behind the wall cavity, replacement is the right call. Repair works best on fascia boards, window trim, door casings, and decorative exterior elements where damage is confined to one area.
The industry standard for repair eligibility is clear: moisture content must fall below 19% before any filler or paint goes on. Wood above that threshold traps moisture inside the repair and causes failure within months. This is why moisture testing is not optional. It is the first gate every repair must pass through.
Rot is also a symptom, not a material failure. Moisture-related design or drainage flaws cause rot. Repairing wood without fixing the source is masking the problem, not solving it.
How to identify and assess wood rot severity
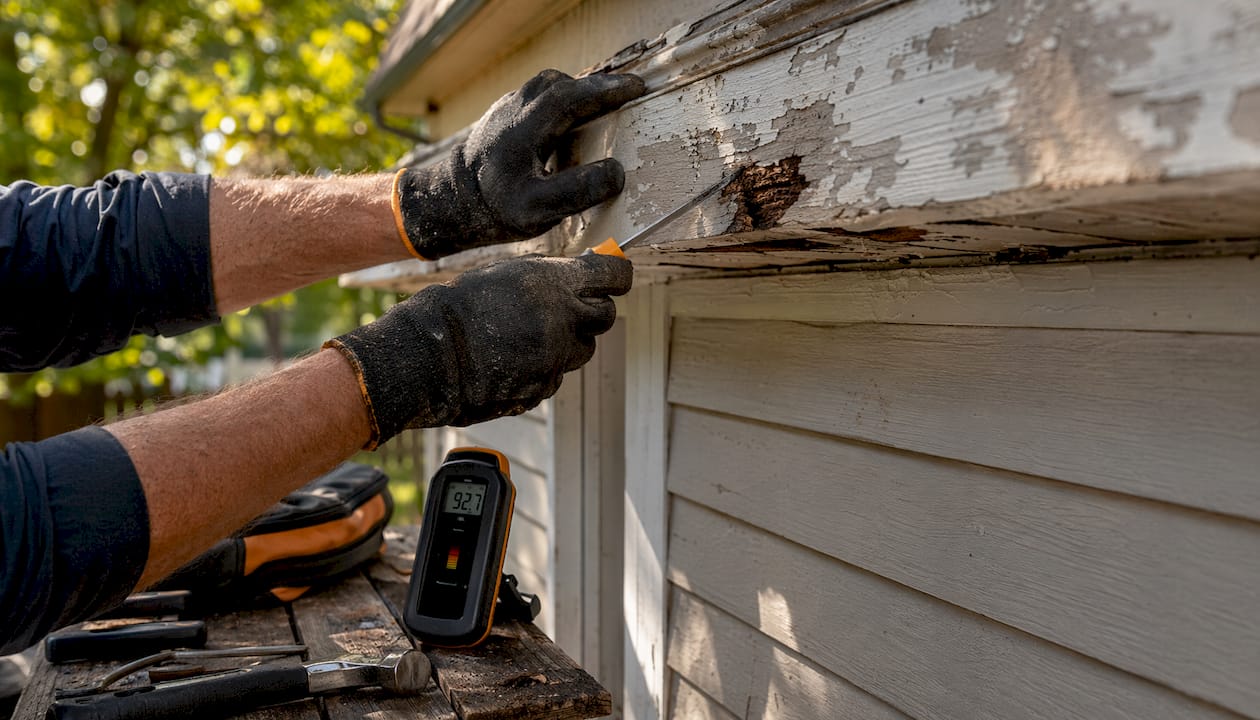
Accurate diagnosis determines whether you repair or replace. Two field tests give you reliable answers fast.
- Screwdriver test: Press a flathead screwdriver firmly into the suspect area. If it sinks in easily, the wood has lost structural integrity and may need replacement rather than repair.
- Tap test: Knock on the wood with your knuckle or a hammer handle. A hollow sound signals decay beneath a surface that looks intact.
- Moisture meter reading: Slide a pin-type moisture meter into the wood. Readings above 19% mean the wood is too wet to repair now.
- Interior inspection: Check the wall cavity behind the suspect board for peeling paint, musty odors, or visible mold. These signs confirm moisture has traveled deeper than the surface.
- Visual boundary check: Probe the edges of the damaged area. Sound wood surrounding the rot confirms the damage is localized and repair is viable.
Pro Tip: Probe at least 6 inches beyond the visible rot boundary. Fungal decay spreads through wood fibers before it shows on the surface, so the damage zone is almost always larger than it looks.
A board that passes the screwdriver test at its edges, reads below 19% moisture, and shows no interior wall damage is a strong candidate for epoxy repair. A board that fails two or more of these checks needs replacement. Knowing which situation you face before buying materials saves time and money. For a broader look at how to diagnose exterior damage, the decision between repair and replacement follows the same logic across most exterior wood components.
How to repair wood rot step by step using epoxy
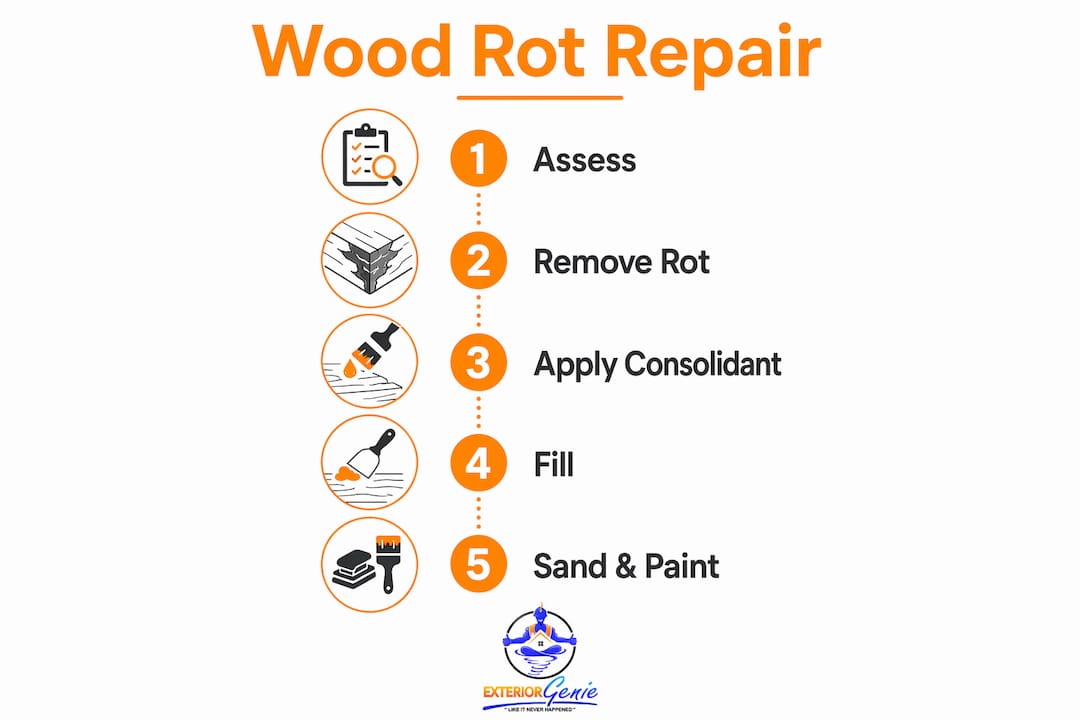
The standard professional repair sequence uses epoxy consolidants and two-part epoxy fillers. Skipping any step in this sequence causes premature failure.
- Fix the moisture source first. Repair a cracked caulk joint, redirect a downspout, or replace failed flashing before touching the wood. No repair lasts if water keeps arriving.
- Let the wood dry completely. Allow the area to dry until a moisture meter confirms readings below 19%. This may take several days depending on weather.
- Remove only the soft material. Chisel or scrape out crumbly, spongy rot. Stop when you hit firm wood. Over-removing soft wood complicates the repair and wastes material. Consolidants can stabilize slightly soft but structurally intact fibers.
- Apply liquid epoxy consolidant. Brush the consolidant onto damaged fibers generously. It penetrates and hardens weakened wood, giving the filler a solid substrate to bond to. Without this step, filler bonds to crumbling material and fails.
- Fill with two-part epoxy filler. Mix the two-part filler according to the manufacturer's instructions. Note that epoxy filler has a 10–15 minute working time and requires temperatures above 50°F to cure properly. Shape the filler slightly proud of the surface so you have material to sand back.
- Allow full cure. Two-part epoxy filler typically cures in 24–48 hours at temperatures above 50°F. Do not sand or paint before full cure.
- Sand to match the original profile. Use 80-grit sandpaper to shape, then finish with 120-grit for a smooth surface.
- Prime with an exterior bonding primer. An exterior-grade acrylic bonding primer applied over cured epoxy seals the repair and prevents moisture from re-entering. Prime all edges and any exposed end grain.
- Apply finish paint. Use a high-quality exterior paint rated for wood surfaces. Two coats give better protection than one thick coat.
Pro Tip: Work in the shade when temperatures are between 60°F and 85°F. Direct sun heats the epoxy too fast, shortening working time and causing air bubbles in the filler.
Common misconceptions that cause repair failures
Most DIY wood rot repairs fail not because the materials are wrong, but because homeowners skip steps or misunderstand what the repair actually does.
- Skipping moisture correction. Failure to fix the moisture source causes rot to return within 2–4 years. The repair looks fine on the surface while decay continues underneath.
- Using inexpensive fillers without consolidants. Cheap fillers alone shrink, crack, and bond poorly to damaged wood. Two-part epoxy fillers expand and contract at a rate similar to wood, which is why they last.
- Over-removing wood. Aggressive chiseling removes fibers that consolidant could have saved. This creates a larger void, requires more filler, and increases the chance of a visible repair line.
- Skipping primer or using interior primer. Interior primers do not block moisture. An exterior bonding primer is what actually seals the repair long-term. The longevity of a wood rot repair depends more on the quality of the primer and finish coat than on the epoxy itself.
- Repairing in cold weather. Epoxy applied below 50°F cures incompletely. The repair may look solid but will fail under the first freeze-thaw cycle.
Fascia boards behind gutters are a specific failure zone. Chronic moisture from clogged or mis-pitched gutters means these boards often rot again even after a technically correct repair. Comprehensive moisture management, not just board repair, is required in that location. Moisture also creates conditions that attract wood-destroying insects, so addressing drainage is a dual-purpose fix. Wood-destroying insect activity often follows prolonged moisture exposure in exterior wood.
How to prevent wood rot from coming back
Prevention is cheaper than repair. A consistent maintenance routine keeps moisture away from wood and extends the life of any repair you have already made.
- Clean gutters twice a year. Clogged gutters overflow and saturate fascia boards and siding. Spring and fall cleanings are the minimum.
- Inspect and replace caulk annually. Caulk around windows, doors, and trim joints fails within 5–7 years. Cracked caulk is an open door for water.
- Check flashing at roof-to-wall transitions. Failed flashing is one of the most common hidden moisture sources in residential exteriors.
- Keep landscaping away from wood siding. Mulch, soil, and plants held against wood siding trap moisture and accelerate decay. Maintain a 6-inch clearance.
- Do a seasonal walk-around. A 20-minute inspection each spring and fall catches early rot signs before they become full repairs. Look for soft spots, paint bubbling, and discoloration.
- Prime all six sides of any replacement wood. Applying primer to all surfaces, including cut ends, prevents water from wicking into the grain.
Pro Tip: After completing a repair, mark the date on the back of the board with a paint marker before reinstalling it. During future inspections, you will know exactly how old each repair is and when to check it more carefully.
For repeated failure areas, consider upgrading to rot-resistant exterior materials such as PVC trim boards or fiber cement siding. These products eliminate the rot risk entirely in high-moisture zones. Regular exterior maintenance including gutter cleaning, caulk replacement, and paint upkeep prevents rot from recurring after a successful repair.
Key Takeaways
Exterior wood rot repair succeeds only when moisture is corrected first, epoxy consolidant stabilizes remaining fibers, and an exterior-grade primer seals the finished repair against future water infiltration.
| Point | Details |
|---|---|
| Repair vs. replacement threshold | Repair works when damage is localized, surrounding wood is sound, and moisture content is below 19%. |
| Moisture correction is non-negotiable | Fixing the water source before repair prevents rot from returning within 2–4 years. |
| Consolidant before filler | Liquid epoxy consolidant hardens damaged fibers so the filler bonds to a solid substrate. |
| Primer determines longevity | An exterior-grade acrylic bonding primer, not the epoxy itself, is what keeps moisture out long-term. |
| Prevention beats re-repair | Seasonal inspections, gutter cleaning, and caulk replacement stop rot before it requires professional work. |
What I have learned after years of exterior repair decisions
My honest view on DIY wood rot repair is this: early rot is one of the best DIY opportunities a homeowner has. The materials are affordable, the process is forgiving at small scale, and catching damage early keeps costs low. A soft spot on a window sill the size of your fist is a Saturday morning project. A fascia board that has been wet for three seasons is a different conversation entirely.
Where I see homeowners consistently go wrong is in diagnosing the moisture source. They fix the visible wood and call it done. Six months later the rot is back, and now they are frustrated with the repair method when the real problem was never addressed. I have seen this pattern repeat on fascia boards behind gutters more times than I can count. The gutter was clogged or pitched wrong, water sat against the board for years, and no amount of epoxy was going to solve that without fixing the drainage first.
My rule of thumb: if you can identify and fix the moisture source yourself, and the damage is smaller than your hand, repair it yourself. If the moisture source is unclear, if the damage spans more than one board, or if you find rot inside the wall cavity, bring in a professional for a proper assessment. The cost of a professional inspection is almost always less than the cost of a failed DIY repair that hides a larger problem. Knowing when replacement beats repair is a skill that saves real money over time.
— Ebben
Exteriorgenie can help with your exterior wood rot repair
Wood rot on your home's exterior rarely stops at one board. If you have found soft fascia, damaged trim, or signs of moisture behind your siding, a professional assessment tells you the full picture before you spend money on materials.

Exteriorgenie brings 25 years of exterior repair experience to homeowners in Lexington, SC. The team identifies moisture sources, assesses rot extent, and delivers repairs that are built to last. For homeowners concerned about cost, financing options are available to make repairs affordable without delay. Contact Exteriorgenie to schedule an inspection and get a clear, honest assessment of what your exterior actually needs.
FAQ
Can wood rot be fixed without replacing the board?
Yes. Localized rot on fascia, trim, or decorative boards can be repaired with epoxy consolidant and two-part filler when surrounding wood is sound and moisture is corrected first.
What are the signs of wood rot on exterior surfaces?
Soft spots that compress under finger pressure, paint bubbling or peeling, discoloration, and a musty smell near the wall are the most reliable signs. The screwdriver test confirms whether the wood has lost structural integrity.
What are the best wood rot repair products for homeowners?
Two-part epoxy filler paired with a liquid epoxy consolidant delivers the most durable results. An exterior-grade acrylic bonding primer applied over cured epoxy is required to seal the repair against future moisture.
How much does exterior wood rot repair cost?
DIY epoxy repair materials for a small area typically cost $30–$80. Professional repair costs vary based on damage extent, location, and whether moisture source correction is included. Leaving rot untreated always costs more than early repair.
How long does a wood rot repair last?
A correctly sequenced epoxy repair, with moisture corrected and exterior primer applied, can last the life of the surrounding wood. Repairs that skip consolidant or primer typically fail within 2–4 years.