

Tapered insulation roof systems create the slope a low-slope commercial roof needs to achieve positive drainage and prevent ponding. A tapered insulation board is a rigid insulation panel manufactured with opposing edges at different thicknesses, producing a sloped face that directs water toward drains and scuppers without restructuring the deck. Per PIMA Technical Bulletin TB108, tapered systems are the standard solution for achieving positive drainage on low-slope roofs, and they can be combined with flat fill boards, crickets, and sumps to handle complex drain layouts.
For contractors and designers: always verify actual deck slope and deflection before finalizing a tapered layout. Structural slope is rarely what the drawings show once the deck is loaded.
Quick action items before you specify:
- Confirm drain locations, parapet heights, and rooftop equipment placement in the field before ordering panels.
- Plan sump and cricket locations on the roof plan as primary drainage devices, not afterthoughts.
- Consult TB108 or a manufacturer's tapered design group for complex layouts, thick insulation heights, or retrofit constraints.
Pro Tip: Order a field survey before the tapered layout is drawn. Deck deflection and as-built drain elevations routinely differ from construction documents by enough to shift the entire panel layout.
Key Takeaways
A properly specified tapered insulation roof system eliminates ponding, meets IBC positive-drainage requirements, and raises average assembly R-value above the code minimum at the drain.
| Point | Details |
|---|---|
| Design for drainage first | Treat tapered insulation as a drainage strategy; locate drains, sumps, and crickets before specifying panels. |
| Size sumps to insulation thickness | Use a 4x4 ft sump when insulation near the drain is 2 in. or less; use an 8x8 ft sump when it reaches approximately 3 in. or more. |
| Specify net R at the thinnest point | The drain location controls code compliance; verify the minimum thickness meets the required assembly R-value. |
| Coordinate curbs before ordering | Measure every curb height against the finished insulation surface; extensions may be required to maintain the 8 in. minimum above the roof. |
| Use manufacturer design support | For complex layouts, GAF and IKO tapered design groups provide pre-cut panels and pre-labeled shipments that reduce waste and installation errors. |
| Exteriorgenie for commercial projects | Exteriorgenie provides HAAG-certified inspections, tapered installation, and reroof services in Lexington, SC with an inspection-first approach that prevents change orders. |
Table of Contents
- What is a tapered insulation roof system?
- Why does tapered insulation outperform a flat assembly?
- Materials used in tapered insulation systems
- How do you design a tapered insulation layout?
- How do you specify thickness, slope, and R-value?
- How do you install tapered insulation correctly?
- What are the key retrofit and reroof considerations?
- Which roofing membranes are compatible with tapered insulation?
- What drives cost and schedule on a tapered insulation project?
- What standards and resources should you reference?
- Field checklist for contractors installing tapered insulation
- A contractor's perspective on tapered insulation systems
- Exteriorgenie's commercial tapered roofing services
- Sources
- FAQ
What is a tapered insulation roof system?
A tapered insulation board is a rigid panel where one edge is thicker than the opposite edge, creating a slope across its face. Standard slopes are 1/8 in./ft, 1/4 in./ft, and 1/2 in./ft. Panels are typically manufactured from polyisocyanurate (polyiso), EPS, or XPS, and they ship in 4x4 ft or 4x8 ft sizes with the taper cut at the factory.
In a complete roof assembly, tapered boards sit above the structural deck and any air or vapor control layer, and directly below the roofing membrane. Flat "fill" boards are used alongside tapered panels to build up the base thickness and to create a continuous sloped plane across the field. The tapered layer handles the geometry; the fill boards handle the thermal mass and base elevation.
Tapered insulation systems are effective solutions for achieving positive drainage and can be combined with flat fill boards and accessories such as crickets and sumps to address complex roof geometries. TB108: Tapered Insulation Systems
Where the roof drains, a sump panel (a pre-cut recessed panel) drops the insulation surface to create a low point that funnels water into the drain bowl. Crickets, sometimes called saddles, are triangular or wedge-shaped insulation assemblies placed behind curbs and rooftop equipment to divert water around obstructions and prevent ponding in valleys.
Assembly sequence from deck up:
- Structural deck (steel, concrete, or wood)
- Air/vapor control layer (self-adhered or mechanically fastened)
- Flat fill boards (base layer, if required for R-value or elevation)
- Tapered insulation panels (slope layer)
- Cover board (optional but recommended for adhered membranes)
- Roofing membrane (TPO, EPDM, PVC, BUR, or modified bitumen)
Why does tapered insulation outperform a flat assembly?
Drainage is the primary driver. Ponding water, defined by NRCA as water that remains on the roof 48 hours after rainfall ends, accelerates membrane degradation, adds structural load, and increases leak risk at seams and penetrations. A properly designed tapered system eliminates ponding without touching the structural frame, which is the single biggest cost advantage over structural slope correction.
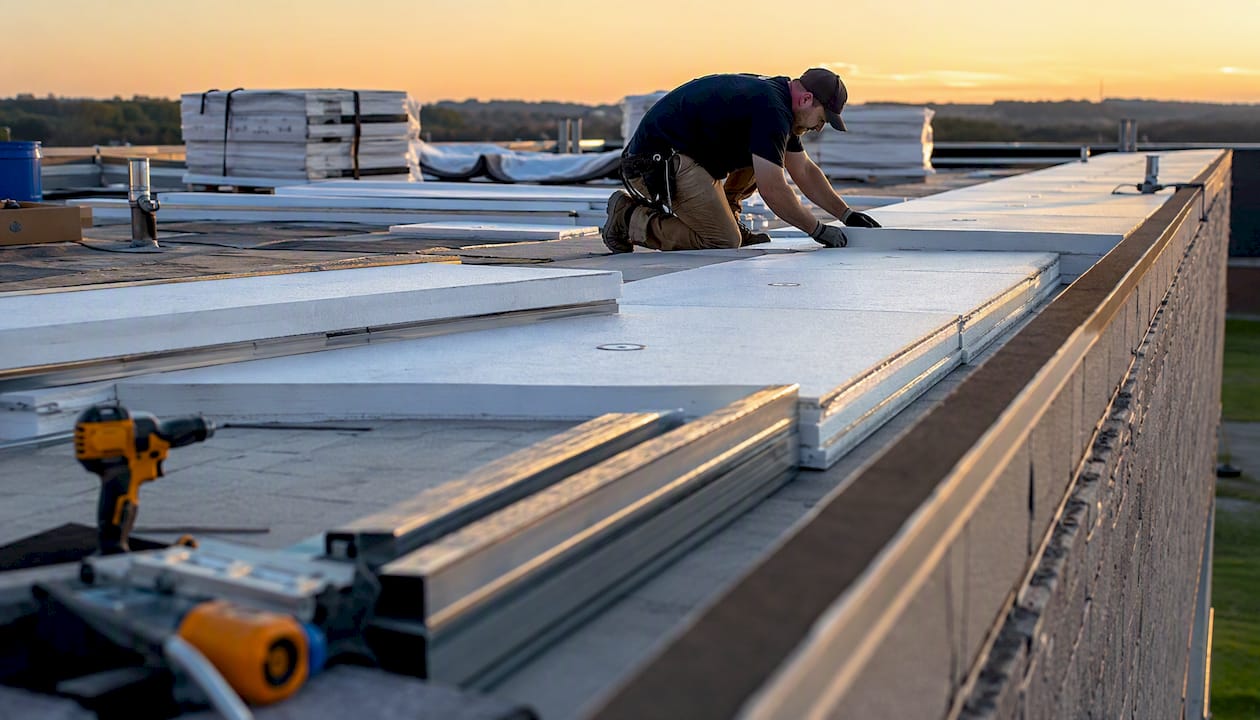
Energy performance follows. Because tapered panels vary in thickness across the field, the net R-value of the assembly is calculated at the thinnest point, typically at the drain. Specifying a minimum thickness that still meets the energy code requirement at that low point is the designer's responsibility, and it often means the field panels carry significantly more insulation than the minimum. That extra thickness at the high points of the field raises the average R-value of the assembly above the code minimum, which is a thermal benefit the flat-assembly alternative cannot match without adding uniform thickness everywhere.
Membrane longevity improves measurably when ponding is eliminated. Standing water softens adhesives, stresses seams under freeze-thaw cycling, and creates hydrostatic pressure at penetrations. Reducing those stressors extends the service life of the membrane and reduces callback frequency for contractors.
Performance benefits at a glance:
- Eliminates ponding without structural modification
- Raises average assembly R-value above the code minimum at the drain
- Reduces membrane stress at seams, laps, and penetrations
- Lowers long-term maintenance costs and emergency call frequency
- Meets IBC and NRCA positive-drainage requirements for new construction and reroofing
Per Construction Specifier, codes require positive drainage that accounts for deck deflection and drains the roof within 48 hours. A tapered system is the most reliable way to meet that requirement on a structurally flat deck.
Materials used in tapered insulation systems
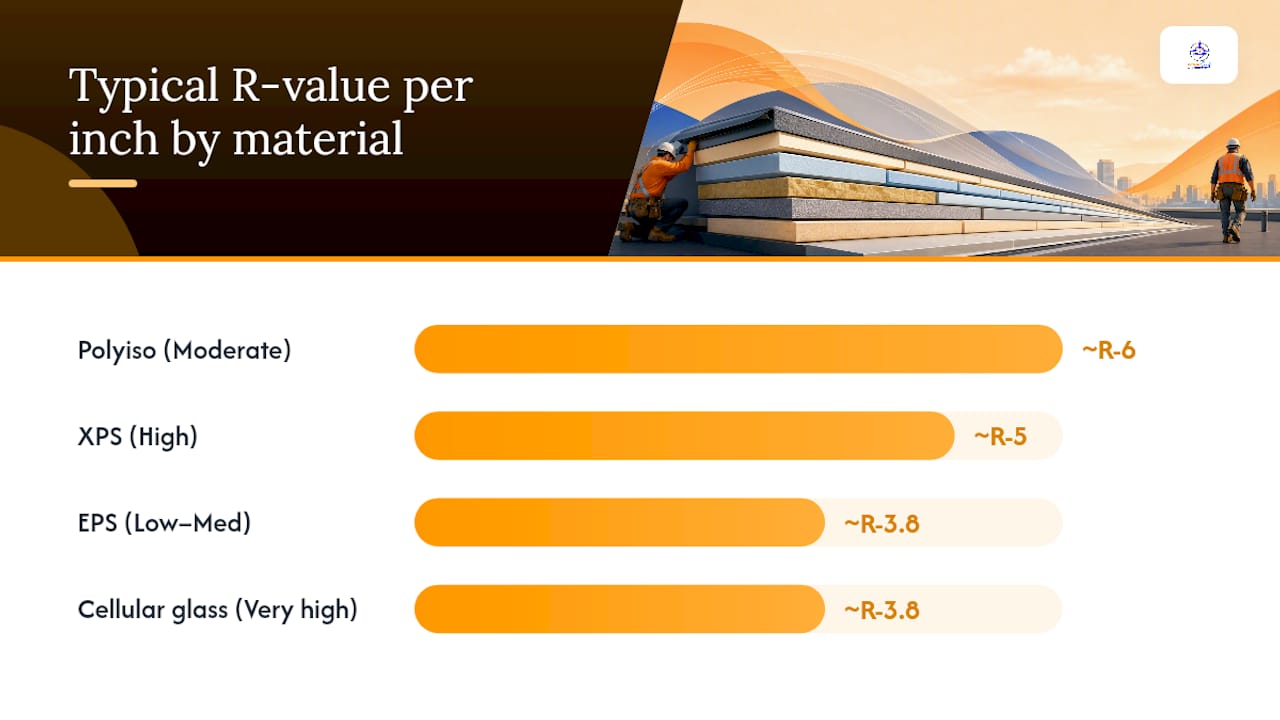
Polyiso (polyisocyanurate) dominates commercial tapered specifications because it delivers the highest R-value per inch of any common rigid board, typically around R-6 per inch at standard temperatures. That density matters on a tapered roof because the thinnest panel at the drain sets the floor for your assembly R-value. Getting more R per inch at that point means less total thickness and lower panel cost overall.
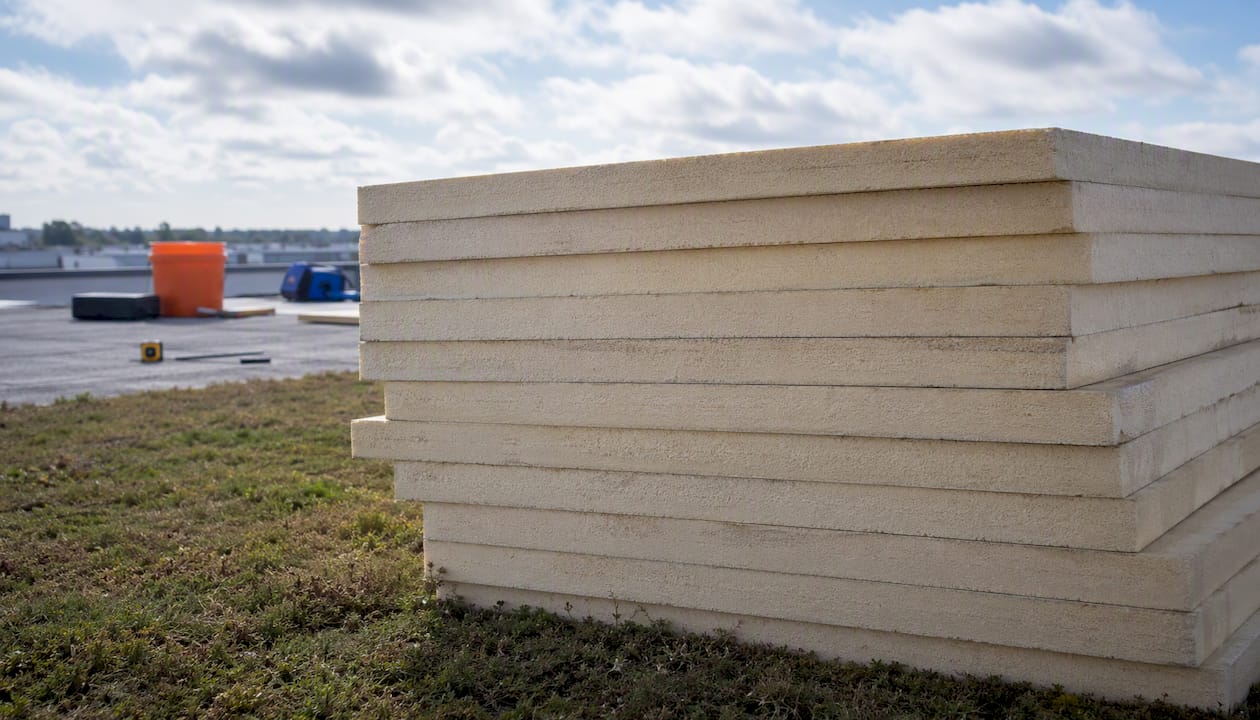
EPS (expanded polystyrene) is the cost-effective alternative. It runs roughly R-3.8 per inch, holds that value across a wide temperature range (unlike polyiso, which loses R-value in cold conditions), and resists moisture absorption better than unfaced polyiso. EPS is a strong choice for cold-climate roofs where polyiso's thermal drift is a concern, and it machines cleanly for factory-cut tapers.
XPS (extruded polystyrene) sits between the two: around R-5 per inch, excellent compressive strength, and very low moisture absorption. It is often specified under ballasted systems or in areas with high foot traffic because of its load-bearing capacity. The tradeoff is cost and the environmental profile of its blowing agents.
Cellular glass is the niche option: zero moisture absorption, extremely high compressive strength, and complete vapor impermeability. It is specified on plaza decks, cold-storage roofs, and anywhere the assembly cannot tolerate any moisture uptake. The cost is substantially higher than polyiso or EPS.
| Material | Typical R/in. | Compressive Strength | Best Use Case |
|---|---|---|---|
| Polyiso | ~R-6 | Moderate (25 psi typical) | Standard commercial tapered, adhered/mechanically fastened |
| EPS | ~R-3.8 | Low to moderate (varies by density) | Cold climates, cost-sensitive projects, ballasted |
| XPS | ~R-5 | High (25 psi) | Ballasted, high-traffic, below-grade adjacent |
| Cellular glass | ~R-3.8 | Very high | Plaza decks, cold storage, vapor-critical assemblies |
Factory-precut panels are available for all four materials. GAF's tapered design group and similar manufacturer programs supply pre-cut hips, valleys, sumps, and crickets with pre-labeled shipments sorted by roof zone, which cuts staging time and reduces field-cut waste on complex layouts.
Pro Tip: For polyiso in cold climates, specify a minimum R-value at the drain that accounts for the installed-condition R-value, not the aged R-value at 75°F. Polyiso's real-world performance in cold weather is lower than its rated value, and energy code compliance depends on the installed condition.
How do you design a tapered insulation layout?
Layout type is the first decision. The three common patterns are:
- One-way (single slope): All panels slope in one direction toward a drain or scupper at the low edge. Simple, low-waste, appropriate for narrow or rectangular roofs with edge drainage.
- Two-way: Panels slope from a high ridge toward drains on two opposite sides. Used on wider roofs with interior drains on two sides.
- Four-way: Panels slope from a central high point toward drains on all four sides. The most common layout for large square or rectangular commercial roofs with interior drains.
Sumps and crickets are not optional accessories. They are primary drainage devices that must appear on the roof plan with dimensions and slopes called out.
Sumps and crickets are key drainage devices that should be called out on the roof plan; their slope and width significantly affect valley slope and performance. Construction Specifier
Sump sizing rule of thumb: If the tapered insulation near the drain is relatively thin, a small sump area is typically sufficient; if the insulation reaches a thicker threshold, a larger sump is usually preferable to provide a gradual slope to the drain. This guidance comes directly from Construction Specifier's tapered insulation design article.
Cricket design follows a related rule: the cricket's surface slope should be greater than the adjacent roof field slope. A cricket that matches the field slope creates a flat valley, which ponds. Per the PRA Tapered Systems Guide, cricket material slope should exceed the roof surface slope, and cricket width is adjusted to achieve adequate valley slope based on the cricket's length-to-width ratio.
Design checklist before drawing the layout:
- Confirm drain locations and rim elevations from as-built drawings or field survey.
- Record parapet heights at all four sides and at any interior curbs.
- Note rooftop equipment curb heights and locations.
- Verify structural deck slope (if any) and expected deflection under full load.
- Identify any existing high points or low points that will affect panel sequencing.
Pro Tip: Verify deck deflection and coordinate drain relocation options before the tapered layout is finalized. A drain that is 1/2 in. higher than the drawing shows can reverse the slope of an entire panel zone.
How do you specify thickness, slope, and R-value?
The minimum thickness at the drain is the controlling dimension. Most tapered systems use a 1/2 in. minimum at the low point, though some manufacturers allow 3/4 in. as a practical minimum for factory-cut panels. That minimum thickness must still meet the energy code's required assembly R-value at the thinnest section.
Standard slopes and when to use them:
- 1/8 in./ft: Minimum positive drainage slope; used when structural slope already provides some pitch or when insulation height is constrained by parapet or curb heights.
- 1/4 in./ft: The most common specification for new commercial construction; provides reliable drainage across typical drain spacing.
- 1/2 in./ft: Used for aggressive drainage, long drain spacing, or when the deck has significant deflection that must be overcome.
Net R-value across a tapered field is the average of the R-values at the high and low points. For a 1/4 in./ft slope across a 20 ft panel run, the thickness difference is 5 in. If the low point is 1/2 in. polyiso (R-3) and the high point is 5.5 in. polyiso (R-33), the average R across that run is approximately R-18. The thinnest section still controls code compliance, so the designer must confirm R-3 meets the minimum assembly R-value or add a flat base layer to raise the floor.
In cold climates, the exterior insulation must represent a sufficient share of the total assembly R-value to keep the dew point outside the vapor-permeable layers. ASHRAE 90.1 and the IBC set minimum continuous insulation requirements by climate zone. For a tapered system, the thinnest panel at the drain is the limiting factor for that exterior-insulation ratio calculation.
Pro Tip: Run the dew-point calculation at the drain, not the field. That is where the exterior insulation is thinnest and where condensation risk is highest in cold climates.
How do you install tapered insulation correctly?
Sequencing matters as much as material selection. A panel installed out of order or with unmatched joints creates a ridge that telegraphs through the membrane and concentrates stress at the high point.
Installation sequence:
- Prepare the deck: sweep clean, verify fastener pull-out values, and confirm drain rim elevations match the layout drawing.
- Install the air/vapor control layer per the membrane manufacturer's requirements, lapping and sealing all seams.
- Place flat fill boards (base layer) if required, staggering joints by at least 6 in. from deck seams.
- Install tapered panels starting at the drain and working toward the high point, following the manufacturer's panel layout drawing.
- Stagger tapered panel joints from fill board joints by at least 6 in. in both directions.
- Install sump panels at each drain before placing field panels; verify sump rim elevation matches drain bowl.
- Apply cover board (if specified) with joints offset from tapered panel joints.
- Install membrane per the system manufacturer's requirements, beginning at the low point.
- Complete flashings at drains, curbs, penetrations, and parapets before final inspection.
Factory pre-cut tapered panels and pre-labeled shipments can reduce jobsite waste, speed installation, and reduce staging errors when coordinated with a tapered design specialist. GAF tapered design resources
Attachment method affects layout sequencing. In a fully adhered system, panels must be placed in the adhesive's open time, which limits how far ahead the crew can stage panels. In a mechanically fastened system, panels can be dry-fit across a larger area before fastening, which makes it easier to verify layout accuracy before committing. Ballasted systems allow the most flexibility in placement but require structural verification for the added weight.
Common installation mistakes:
- Installing panels in the wrong direction (slope running away from the drain)
- Skipping sump panels and relying on field panels to transition to the drain
- Failing to offset joints between layers, creating continuous seams that allow air movement
- Cutting panels in the field without referencing the manufacturer's layout drawing
Pro Tip: Pre-label each panel bundle with the roof zone and installation sequence before the shipment leaves the warehouse. On a large roof, an unlabeled pallet of tapered panels looks identical to every other pallet. Sorting them on the roof costs time and generates waste.
What are the key retrofit and reroof considerations?
The first decision in a reroof is whether to remove the existing assembly or overlay it. Both approaches work, but they carry different risks and costs.
| Factor | Remove and Replace | Overlay |
|---|---|---|
| Weight | Reduces dead load | Adds dead load; requires structural review |
| Flashing integration | Clean tie-in to existing details | Flashings must be extended; curb heights affected |
| Air/vapor control | Full access to deck for new membrane | Existing layers may trap moisture |
| Cost | Higher labor; lower material risk | Lower labor; higher material risk if existing roof is wet |
| Moisture risk | Eliminates existing wet insulation | Wet existing insulation must be identified and removed |
An infrared scan or nuclear moisture survey before the reroof decision is worth the cost. Wet insulation under an overlay will continue to degrade and can void the new membrane warranty.
Retrofit installation steps:
- Conduct a moisture survey of the existing roof; mark and remove all wet sections.
- Verify existing drain rim elevations and parapet heights; document any discrepancies from original drawings.
- Install a new air/vapor control layer over the existing surface, lapping and sealing all penetrations.
- Install tapered insulation in multiple layers with joints staggered between layers and from existing seams.
- Install cover board and membrane per the new system manufacturer's requirements.
- Extend all flashings to accommodate the added insulation height.
Per PNNL's building science guidance, when installing rigid exterior insulation in a retrofit, multiple layers with offset joints and a continuous air/water control layer are required to limit condensation risk. In cold climates, the exterior insulation must represent a sufficient portion of the total assembly R-value to keep the dew point outside the vapor-permeable layers.
Overlay checklist:
- Confirm structural capacity for added dead load before specifying overlay thickness.
- Identify and remove all wet insulation sections before overlaying.
- Verify that new parapet and curb heights will accommodate added insulation thickness.
- Specify staggered joints between all insulation layers.
- Require a continuous air/vapor control layer between the existing roof and new insulation.
Which roofing membranes are compatible with tapered insulation?
All major commercial membrane types work with tapered insulation, but the insulation facer and attachment method affect which combinations perform best.
Polyiso with a glass-fiber facer is compatible with hot-applied BUR and modified bitumen because the facer tolerates the heat of the mop or torch. Foil-faced polyiso is not compatible with torch-applied systems. For TPO roofing, a cover board over the polyiso is standard practice because TPO adhesives can react with some polyiso facers. EPDM adhered systems also typically require a cover board for the same reason.
PVC membranes are compatible with polyiso and EPS but not with XPS or polystyrene-based boards in direct contact, because PVC plasticizers can migrate into polystyrene and cause both materials to degrade. A cover board or separation layer resolves this.
Tapered insulation functions as part of the roofing system to direct water to drains and scuppers and is often used with crickets and sumps to prevent ponding around drains, curbs, and rooftop equipment. RoofersCoffeeShop
Drain detailing: The sump panel must be cut to match the drain bowl diameter and set so the drain rim sits flush with or slightly below the finished insulation surface. Clamping rings must be accessible after the membrane is installed. Never allow the membrane to bridge across the drain bowl; it must be fully adhered into the bowl and terminated at the clamping ring.
Curb detailing: Adding tapered insulation raises the finished roof surface. If the existing curbs are not tall enough to maintain the required 8 in. minimum above the finished roof surface, curb extensions are required before the membrane is installed. This is one of the most common sources of change orders on tapered reroof projects.
Pro Tip: Measure every curb height before the tapered layout is finalized. A curb that is 10 in. above the existing roof surface may drop to 6 in. above the finished surface after a 4 in. tapered overlay, which puts it below code minimum.
What drives cost and schedule on a tapered insulation project?
Material type is the largest single cost driver. Polyiso costs more per board-foot than EPS, and factory-precut panels cost more than field-cut stock. For a complex layout with multiple drain zones, crickets, and sumps, the factory-cut premium is usually recovered in reduced labor and waste.
Cost drivers:
- Material type (polyiso vs. EPS vs. XPS)
- Factory-precut vs. field-cut panels (field cutting generates 10–20% waste on complex layouts)
- Roof complexity: number of drains, crickets, curbs, and penetrations
- Crane or material hoist requirements for multi-story buildings
- Flashing modifications required by added insulation height
- Existing roof removal vs. overlay decision
Typical project timeline stages:
- Field survey and as-built verification: 1–2 days
- Tapered layout drawing and manufacturer review: 3–5 business days
- Panel fabrication and delivery lead time: 2–4 weeks (factory-cut orders)
- Deck prep and air/vapor control installation: 1–3 days depending on roof size
- Tapered insulation installation: 1–4 days
- Membrane and flashing installation: 2–5 days
- Final inspection and drain verification: 1 day
The most common change-order triggers are curb height conflicts discovered after panels are delivered, drain rim elevations that differ from the layout drawing, and wet insulation found during demo that was not identified in the pre-bid survey.
Per commercial roofing insulation guidance, proper insulation specification and installation directly affects long-term building energy costs and roof system durability, making upfront design investment worthwhile.
What standards and resources should you reference?
PIMA TB108 is the primary technical reference for tapered insulation systems. It defines tapered insulation, describes standard system profiles, and provides guidance on slopes, fill boards, sumps, and crickets. Every tapered specification should reference TB108 and require the installer to follow its recommendations.
GAF's tapered design resources include layout tools, pre-cut panel programs, and design support from their tapered design group. For complex layouts, GAF's team can produce a panel layout drawing, a cut list, and pre-labeled shipments sorted by roof zone.
IKO's tapered insulation resources provide similar manufacturer-level design support, including technical data sheets and installation guidance for their polyiso and EPS tapered products.
NRCA and IBC guidance establishes the positive-drainage requirement (draining within 48 hours of rainfall) and the minimum slope standards that tapered systems must meet. The 2021 IBC requires positive drainage that accounts for deck deflection, which means the tapered slope must overcome both the structural slope deficit and the anticipated deflection under load.
When to call a tapered design specialist:
- Roof area exceeds 20,000 sq ft with multiple drain zones
- Insulation height at the high point exceeds 6 in.
- Retrofit constraints limit drain relocation options
- Complex geometry with multiple levels, curbs, or equipment clusters
What to include in a request for information to a specialist:
- As-built deck survey with drain rim elevations
- Parapet heights at all sides and interior curbs
- Rooftop equipment curb heights and locations
- Desired finished R-value and membrane system
- Any existing insulation layers to remain
Pro Tip: Include the manufacturer's tapered layout drawing as a contract document and require the installer to submit an as-built layout drawing after installation. That record is essential for future reroof planning and warranty claims.
Field checklist for contractors installing tapered insulation
Pre-install verification catches the problems that generate change orders. Do not skip it.
Pre-install checklist:
- Conduct a field survey: measure drain rim elevations, parapet heights, and curb heights. Record every dimension.
- Compare field measurements to the tapered layout drawing; flag any discrepancy greater than 1/4 in.
- Verify structural deck condition: no soft spots, missing fasteners, or corrosion that would affect fastener pull-out.
- Confirm drain bowls are clean, functional, and accessible.
- Stage panels by zone using the manufacturer's pre-labeled shipment; keep zones separated on the roof.
- Protect drain bowls with temporary covers during installation to prevent debris entry.
During installation:
- Install sump panels first at each drain; verify rim elevation before placing field panels.
- Follow the manufacturer's panel layout drawing panel-by-panel; do not improvise sequencing.
- Stagger all joints between layers by at least 6 in. in both directions.
- Verify adhesive coverage or fastener pattern at each layer before proceeding to the next.
- Check slope with a level and tape measure at each drain zone after tapered panels are placed.
Post-install inspection:
- Photograph drain locations, sump panels, and curb transitions before membrane installation.
- Document panel layout with overhead photos for the project record.
- Verify all sump rims are at or below the drain bowl rim elevation.
- Confirm no panel joints align between layers.
- Check that all cricket slopes exceed the adjacent field slope per the design drawing.
Per the PRA Tapered Systems Guide, field verification of deck conditions, drain locations, and parapet heights is required before finalizing the tapered layout. Crickets should have a surface slope greater than the roof surface slope.
Pro Tip: Pre-cut, pre-labeled panel shipments from the manufacturer's tapered design group reduce field sorting time and cut waste on complex layouts. Request this service for any roof with more than two drain zones or significant cricket and sump work.
A contractor's perspective on tapered insulation systems
The detail that separates a well-executed tapered roof from a problematic one is almost never the insulation itself. It is the field verification that happens before the first panel is ordered.
At Exteriorgenie, the standard approach on every commercial tapered project starts with a HAAG-certified inspection of the existing deck and drainage conditions. That inspection produces the as-built data the tapered layout actually needs: real drain rim elevations, real parapet heights, and a clear picture of where the deck deflects under load. Without that data, the layout drawing is a guess, and guesses generate change orders.
The veteran-owned operational discipline that runs through every Exteriorgenie project shows up most clearly in the staging and sequencing phase. Panels arrive pre-labeled by zone. The crew works from the drain outward, verifying sump rim elevations before field panels go down. Curb heights are checked against the finished insulation surface before the membrane crew arrives. Those steps are not complicated, but they require the kind of systematic attention that prevents the callbacks that cost property managers real money.
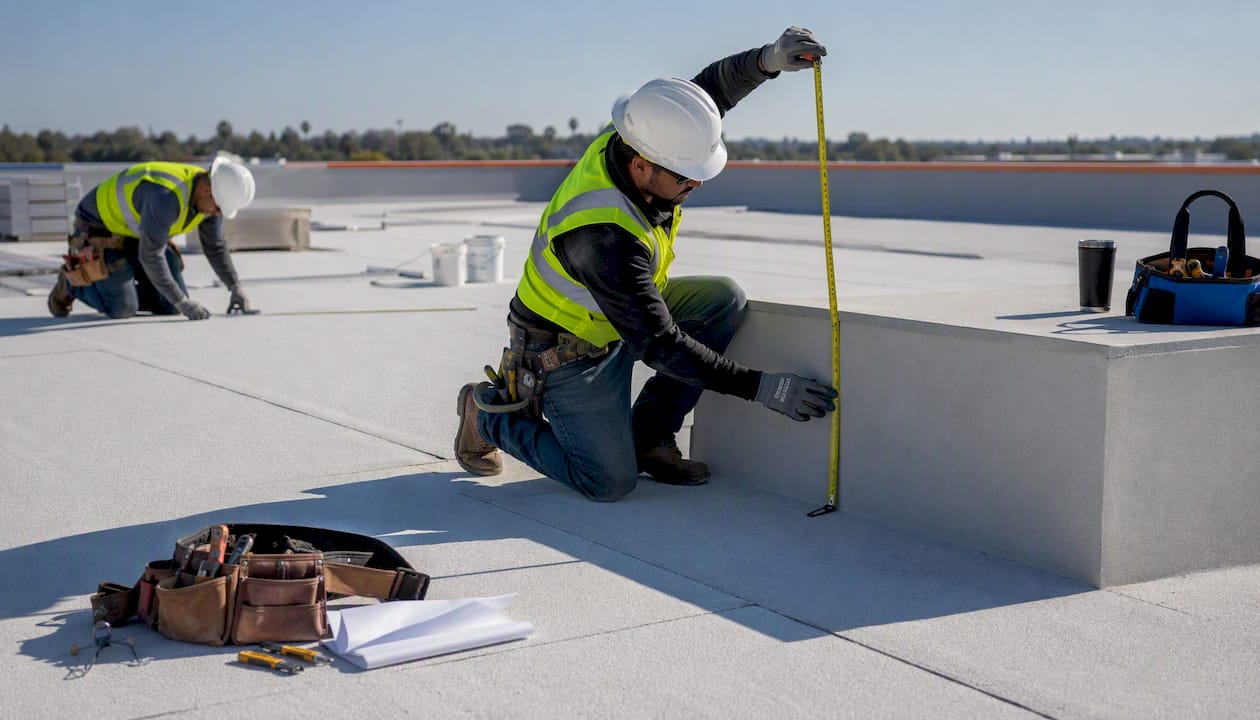
The technical recommendations in this guide, verify deck deflection, size sumps to insulation thickness, coordinate curb heights before panels are ordered, are the same checks Exteriorgenie runs on every project. They are not optional refinements. They are the difference between a roof that drains and one that ponds.
Exteriorgenie's commercial tapered roofing services
Exteriorgenie brings 25 years of roofing experience and HAAG-certified inspection standards to every commercial tapered insulation project in Lexington, SC and the surrounding Midlands area. The difference from a standard roofing contractor is the inspection-first approach: before a panel layout is drawn, a HAAG-certified inspector verifies deck conditions, drain elevations, and curb heights, so the specification matches the actual roof.

Services available for commercial tapered projects include full tapered insulation installation (new construction and reroof), overlay and remove-and-replace reroofing, HAAG-certified pre-bid inspections, insurance claims assistance for storm-damaged commercial roofs, and 24/7 emergency tarping during phased reroof projects. For projects where financing is a consideration, roofing financing options are available to help property managers and building owners manage project cash flow.
For a tapered design consult or a site verification on your next commercial project, contact Exteriorgenie to schedule an inspection. The conversation starts with your drain locations and ends with a layout that drains.
Sources
- TB108: Tapered Insulation Systems
- Tapered insulation systems: The art of roof drainage - Construction Specifier
- Tapered Design Guide_2019_02 Model (1)
- Tapered insulation & tapered design | GAF roofing
- What is tapered roof insulation? — RoofersCoffeeShop®
- Water-managed roof re-roofing and adding insulation over sloped roof
Require manufacturer layout approval for all factory-cut tapered systems and include TB108 and the applicable manufacturer installation guide as referenced documents in the project manual.
FAQ
What is tapered insulation on a roof?
Tapered insulation is a rigid insulation board manufactured with opposing edges at different thicknesses, creating a sloped face that directs water toward drains and scuppers on low-slope commercial roofs. Per PIMA TB108, tapered systems are the standard method for achieving positive drainage without modifying the structural deck.
What is the minimum thickness required for tapered insulation?
Most tapered systems use a 1/2 in. minimum thickness at the drain (the lowest point), though some manufacturers specify 3/4 in. as a practical minimum for factory-cut panels. That minimum section must still meet the energy code's required assembly R-value, which often means adding a flat base layer beneath the tapered boards.
Is tapered insulation expensive?
Tapered insulation costs more than flat insulation of the same material because of the factory-cutting process, but the premium is typically offset by reduced labor, lower waste on complex layouts, and the avoided cost of structural slope correction. Factory-precut, pre-labeled panel shipments from manufacturer design groups like GAF further reduce field labor and waste on large or complex roofs.
What is a tapered insulation system?
A tapered insulation system is the complete assembly of tapered panels, flat fill boards, sump panels, and crickets that creates a continuously sloped surface directing water to drains and scuppers on a low-slope roof. The system sits between the structural deck and the roofing membrane and is designed as a drainage strategy first, with thermal performance addressed by specifying the required R-value at the thinnest section.
When should you use a 4x4 vs. an 8x8 sump?
If the tapered insulation within 4 ft of the drain is 2 in. or less, a 4x4 ft sump is typically sufficient. When insulation near the drain reaches approximately 3 in. or more, an 8x8 ft sump is usually preferable to create a gradual slope to the drain bowl, per Construction Specifier's tapered insulation design guidance.