
Temporary roof repair options are emergency measures that stop water intrusion and protect your home's interior until a licensed contractor can complete permanent work. A leaking roof causes wood rot, mold growth, and ceiling collapse within days, not weeks. The three most effective methods are polyethylene tarps, roofing cement, and self-adhesive rubber patches. Each has a specific use case, cost range, and durability window that determines which one fits your situation. Acting within 24 hours of discovering damage is the difference between a repair bill and a full roof replacement cost.
1. Best temporary repair materials and how they compare
The right material for a temporary fix depends on damage size, surface condition, and how much rain is coming. Below are the five materials homeowners use most often, ranked by durability and ease of application.
Polyethylene tarps are the most versatile option. A standard 6 mil polyethylene tarp lasts about 90 days when correctly installed, while 10 mil and thicker tarps extend protection to 120 to 180 days. Thicker tarps cost more upfront but save you from reinstalling after the first heavy storm.
Roofing cement (also called plastic roof cement or asphalt mastic) costs $8 to $14 per quart and seals small gaps around flashing, pipe boots, and cracked shingles for one to two rain events. It is fast and cheap, but it only bonds to dry surfaces. Apply it on a wet roof and it peels off within days.
Self-adhesive rubber patches (butyl or EPDM tape products like Flex Seal Tape or similar peel-and-stick membranes) bond to most roofing surfaces and last two to four months. They work well on small punctures and cracked flashing joints where cement alone would crack under thermal movement.
Roofing tape (aluminum foil tape or butyl seam tape) handles seams, ridge caps, and flashing joints. It is thinner than a rubber patch but conforms tightly to irregular surfaces. Expect 30 to 60 days of protection depending on UV exposure.
Spray foam sealant fills gaps around penetrations like vents and pipes. It is not a structural fix and degrades quickly in sunlight, so treat it as a last resort when nothing else is available.
| Material | Approx. cost | Lifespan | Best use case |
|---|---|---|---|
| 6 mil polyethylene tarp | $20–$60 | 90 days | Large damage areas, storm damage |
| 14+ mil heavy-duty tarp | $60–$150 | 6+ months | Extended wait for contractor |
| Roofing cement | $8–$14/qt | 1–2 rain events | Flashing gaps, cracked shingles |
| Rubber/butyl patch | $15–$40 | 60–120 days | Small punctures, pipe boots |
| Roofing tape | $10–$25 | 30–60 days | Seams, ridge joints |
Pro Tip: Buy one tarp size larger than you think you need. Undersizing is the most common homeowner mistake, and a second trip to the hardware store costs you time during a storm.
2. How to properly install an emergency roof tarp
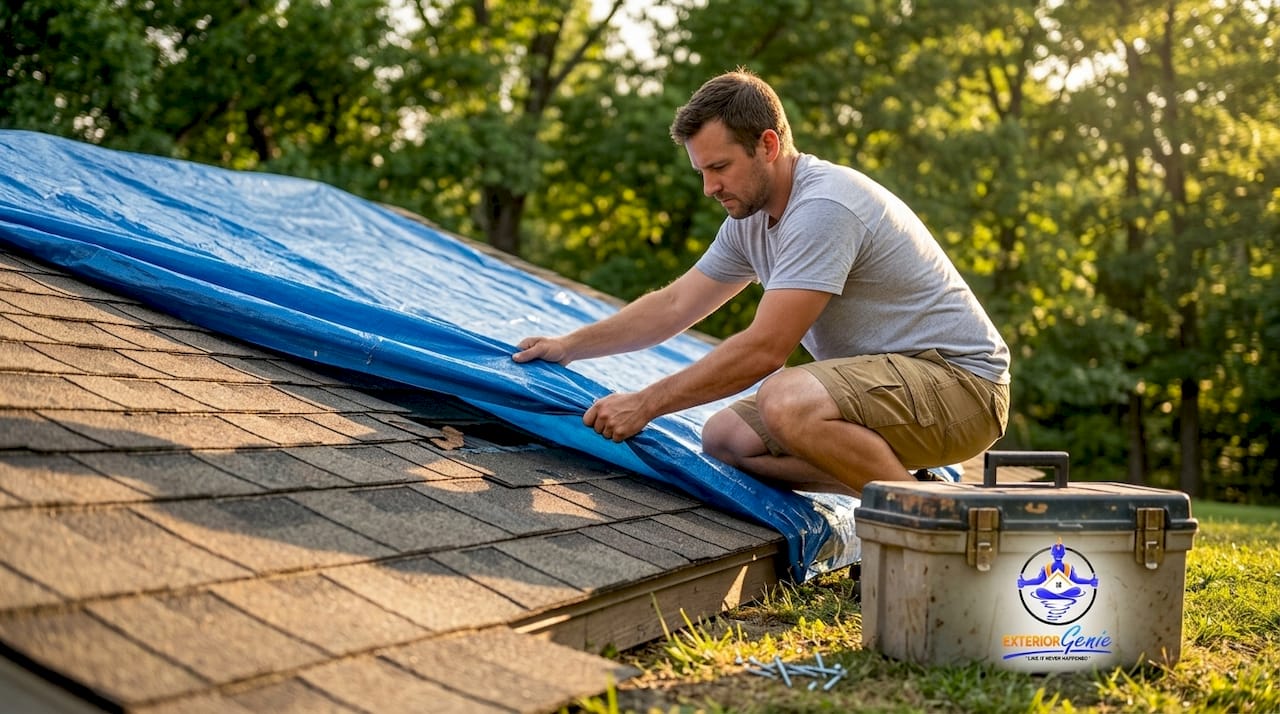
A tarp installed incorrectly fails faster than no tarp at all. Wind-driven rain exploits every loose edge through a process called capillary creep, where water travels upward under a tarp edge due to surface tension and wind pressure. Follow these steps to prevent that.
- Measure the damage first. The tarp must extend at least 4 feet beyond the damaged area on all sides. If the damage is near the ridge, the tarp must drape over the ridge and down the opposite slope.
- Clear debris from the work area. Broken shingles, branches, and granule piles create bumps that lift tarp edges and create water channels.
- Position the tarp upslope to downslope. Emergency tarping works by creating a continuous barrier from the high point to the eave. Water must run over the tarp, never under it.
- Anchor with 2x4 boards, not ropes. Sandwich the tarp edge between two 2x4 boards and drive screws every 12 to 16 inches. Ropes and sandbags alone fail in winds above 30 mph. The board sandwich distributes load evenly and prevents tearing at fastener points.
- Wrap the upslope edge over the ridge board. Fold the tarp over the ridge and secure a second 2x4 on the opposite slope. This prevents wind from lifting the tarp from the top.
- Check overlap on all sides. A minimum 4-foot overlap beyond the damage prevents capillary creep paths that form at tarp edges during wind-driven rain.
- Inspect after every storm. Check that boards are still tight and edges have not lifted. A tarp that shifts even six inches can expose the damaged area completely.
Pro Tip: If you are working alone, pre-roll the tarp around the upslope 2x4 before climbing. Unrolling it on the roof is far safer than dragging a loose tarp up a ladder.
Safety is non-negotiable. Never work on a wet or frost-covered roof. On pitches steeper than 6:12, use a roof harness and anchor system. If you are unsure, professional emergency tarping in Lexington, SC runs $300 to $600 for accessible roofs, with higher costs for steep or complex jobs. That cost is far less than a fall injury or a failed DIY tarp that lets water in for another week.
3. Temporary patching techniques for small leaks and damaged flashing
Small leaks around flashing, pipe boots, and isolated cracked shingles do not always require a full tarp. Targeted patching is faster and less disruptive when the damage area is under two square feet and the surface is dry.
Roofing cement application is the go-to fix for gaps where metal flashing meets a chimney, skylight, or wall. Clean the area with a wire brush, dry it completely (use a heat gun if needed), and press roofing cement into the gap with a putty knife. Feather the edges outward at least two inches. Wet surfaces cause patch failure within days because asphalt-based adhesives cannot cure without a dry substrate.
Aluminum flashing patches work for larger flashing failures. Cut a piece of aluminum flashing two inches larger than the damaged section on all sides, apply roofing cement to the back, press it firmly, and nail the edges. Seal all nail heads and edges with additional cement.
Rubber patch kits (products like Eternabond or similar peel-and-stick membrane tape) are the best choice for cracked rubber pipe boots and small punctures in flat or low-slope sections. They bond without cement and flex with temperature changes, which prevents the cracking that plagues rigid cement patches.
Interior attic-side sealing is an option when exterior roof access is unsafe. Plastic sheeting funneled into a bucket redirects water away from insulation and drywall. Roofing tape applied to the underside of the decking at the leak point slows water entry. However, interior patches only redirect water. Water continues degrading the decking above, so exterior repair must follow as soon as conditions allow.
Pro Tip: Take photos of every patch you apply, including the surrounding area. Insurance adjusters and contractors need to see the original damage, not just your repair. Document before you fix.
A critical warning: small interior patches mislead homeowners into underestimating water ingress risk. The ceiling may stop dripping, but water is still saturating the roof deck above. Schedule an exterior inspection within 72 hours of any interior patch.
4. When to choose each strategy and key safety rules
Choosing between a tarp, a cement patch, or an interior fix comes down to four factors: damage size, surface dryness, weather forecast, and roof pitch.
- Use a tarp when the damaged area exceeds two square feet, when rain is forecast within 24 hours, or when multiple shingles are missing. Tarps work regardless of surface moisture because they do not rely on adhesion.
- Use roofing cement or a patch when the damage is a small gap or crack, the surface is dry, and you have at least 48 hours before the next rain. Choosing between tarp and patch depends largely on surface dryness and the weather forecast.
- Use an interior attic fix only when exterior access is unsafe due to rain, ice, or steep pitch, and only as a bridge to an exterior repair within days.
"A temporary fix that fails in the next storm is worse than no fix at all. Match your method to the conditions, not just to what you have on hand." — Exteriorgenie field team
Safety rules that prevent injuries:
- Never work on a roof with standing water or frost.
- On pitches above 6:12, use a OSHA-compliant fall arrest harness.
- Work with a second person on the ground to stabilize the ladder and call for help if needed.
- Avoid working near power lines during or after a storm.
- If the structure feels soft or spongy underfoot, exit immediately. Saturated decking can fail without warning.
For aging shingle roofs, cost-effective repair steps can extend the life of a roof between emergency events, but they do not replace a professional assessment of the underlying structure.
Key takeaways
Temporary roof repairs work only when the right material is matched to the right conditions. A tarp beats cement in wet weather; cement beats a tarp for precision on small, dry gaps.
| Point | Details |
|---|---|
| Match material to conditions | Use tarps when rain is imminent; use roofing cement only on fully dry surfaces. |
| Size tarps correctly | Extend at least 4 feet beyond damage on all sides and over the ridge when needed. |
| Anchor with lumber, not rope | Secure tarp edges with 2x4 boards and screws every 12 to 16 inches for wind resistance. |
| Interior patches are not enough | Attic-side fixes redirect water but do not stop deck degradation above. |
| Document everything | Photograph damage before and after every repair for insurance and contractor reference. |
What I've learned after 25 years of emergency roof calls
Every homeowner I've worked with who waited more than 48 hours to address a roof leak paid more in the end. Not because the repair got harder, but because water had already reached the insulation, the drywall, or the wall framing. The roof shingle repair options available to you today are genuinely good. A properly installed heavy-duty tarp buys you months, not days. But I've seen too many homeowners apply a thin layer of roofing cement on a wet surface in the rain and call it done. That patch fails before the storm ends.
The repair vs. replace roof decision is one I get asked about constantly. My honest position: a temporary fix is not a substitute for a professional inspection. It is a bridge. Use it as one. If you are replacing a shingle roof section after a storm, the temporary patch you applied correctly will make the contractor's job easier and your insurance claim cleaner. If you skipped documentation, you lose that advantage.
The one thing I'd push every homeowner to do is treat the tarp installation with the same seriousness as the permanent repair. A loose tarp that blows off in the next storm doubles your damage and your stress. Spend the extra 20 minutes on the 2x4 anchoring. It is worth every minute.
— Ebben
Emergency roof help in Lexington, SC
When a storm hits and the damage is beyond what a tarp and a tube of cement can handle, Exteriorgenie is available 24/7 for emergency roof repair in Lexington, SC. The team deploys fast, installs professional-grade tarps, and handles the full scope of storm damage roof repair from first response through permanent fix. HAAG-certified inspectors document every detail for your insurance claim, so you are not navigating that process alone. Transparent pricing and military-grade discipline mean no surprises on the invoice.

If your roof is leaking right now, do not wait for the damage to compound. Contact Exteriorgenie and get a crew on-site fast.
FAQ
What is the fastest temporary roof leak repair?
An emergency polyethylene tarp is the fastest fix for active leaks, covering large areas regardless of surface moisture. For small dry gaps, roofing cement applied with a putty knife stops drips within minutes.
How long does a temporary roof tarp last?
A correctly installed 6 mil tarp lasts about 90 days, while 10 mil and heavier tarps provide 120 to 180 days of protection before UV degradation weakens the material.
Can I use roofing cement on a wet roof?
No. Roofing cement fails on wet surfaces within days because it cannot bond without a dry substrate. Use a tarp instead when rain is present or forecast.
When should I call a professional instead of DIYing?
Call a professional when the roof pitch exceeds 6:12, when structural damage is visible, when the damaged area is larger than a few square feet, or when rain is actively falling. Professional emergency tarping runs $300 to $600 for standard jobs.
Does a temporary repair affect my insurance claim?
Documenting damage with photos before and after any temporary repair protects your claim. Most policies require homeowners to mitigate further damage, so a properly installed tarp or patch demonstrates due diligence to your adjuster.