
Most exterior caulking repairs are a straightforward weekend job: inspect the joint, remove the failed caulk completely, clean and prep the surface, insert backer rod for deep gaps, apply the right caulk chemistry, then tool it and let it cure. A homeowner with basic tools can handle nearly every accessible window, door, or trim joint in an afternoon.
Here's the sequence in order:
- Inspect every joint for cracking, gaps, or peeling
- Remove all old caulk down to bare substrate
- Clean and dry the joint completely
- Add backer rod on gaps deeper than a quarter inch
- Apply, tool, and cure the new bead
Pro Tip: If the job involves a ladder above the second story, active rot under trim, damaged flashing, or water actively coming through a wall, stop and call a professional. Caulk cannot fix a structural leak, and it will fail again in months if the real problem sits underneath it.
Key Takeaways
Exterior caulking repair succeeds when removal is complete, prep is thorough, backer rod fills deep gaps, and the caulk chemistry matches the joint's movement and paint needs.
| Point | Details |
|---|---|
| Remove old caulk fully | Scrape down to bare substrate; never apply new caulk over failing material. |
| Use backer rod on deep gaps | Insert closed-cell foam rod for joints deeper than a quarter to a half inch to prevent three-sided adhesion. |
| Match chemistry to the joint | Choose siliconized acrylic for paintable trim, polyurethane for high-movement masonry, silicone for wet unpainted areas. |
| Tool a concave bead | Finish within the product's tooling window, often 2 to 10 minutes, for a longer-lasting seal. |
| Call a pro for rot or flashing issues | Exterior Genie's HAAG-certified inspectors handle repairs that go beyond a caulk gun's reach. |
Table of Contents
- Tools and Materials for an Exterior Caulking Repair Guide
- Where Should You Inspect Exterior Caulking First?
- How Do You Remove Old Exterior Caulk Safely?
- How Do You Prep a Joint Before Caulking?
- How Do You Apply and Tool Exterior Caulk Correctly?
- What Are the Most Common Exterior Caulking Mistakes?
- How Often Should You Inspect and Reseal Exterior Caulk?
- When It's Time to Call Exterior Genie Instead of DIY
- Sources
- FAQ
Tools and Materials for an Exterior Caulking Repair Guide
The tool list is short, but the caulk chemistry decision is where most DIYers get it wrong. A smooth-rod dripless caulk gun beats a basic ratchet gun for anything longer than a single window, since it stops the bead from oozing after you release the trigger.
Grab these before starting:
- Dripless caulk gun, utility knife, and a razor scraper
- Closed-cell foam backer rod in a few diameters
- Painter's tape, clean rags, and rubbing alcohol
- A caulk finishing tool or a gloved fingertip
Wear gloves and eye protection, especially when scraping overhead or using solvent-based cleaners in tight spaces, and keep the area ventilated. Never lean a ladder against a gutter or trim piece for support.
For chemistry, four categories cover nearly every exterior job: acrylic latex and siliconized acrylic handle low-movement, paintable trim, pure silicone wins on waterproofing but won't accept paint, and polyurethane or hybrid sealants flex the most and outlast the rest on masonry and high-movement joints. Match the chemistry to how much the joint moves and whether it needs paint. Our guide to exterior repair material options breaks this down further if you're unsure.
Pro Tip: Buy one extra tube of your primary caulk. Running out mid bead and hunting for a color match at the hardware store is how a one hour job turns into a Saturday.
Where Should You Inspect Exterior Caulking First?
Walk the perimeter and check window and door frames, trim and corner boards, penetrations for vents and light fixtures, siding butt joints, flashing intersections, and foundation seams where applicable. These are the spots that take the most sun, rain, and thermal movement.
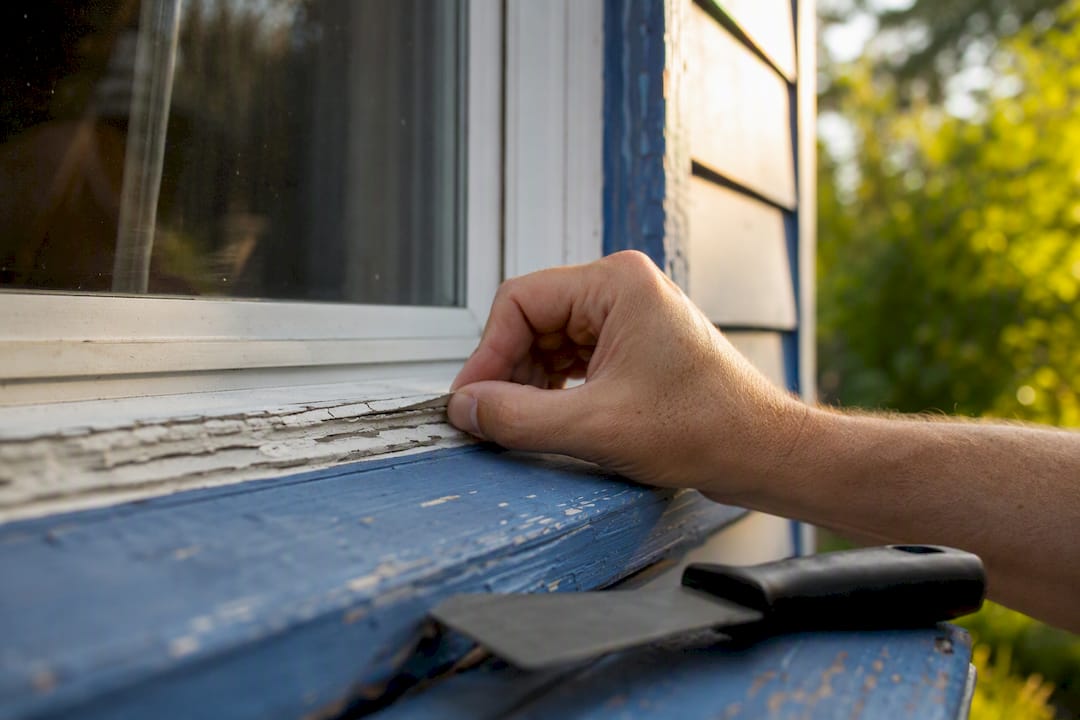
Look for cracking, gaps pulling away from the substrate, peeling, soft or crumbly texture, staining, or any sign of mold. A quick press test tells you a lot: push a fingertip into the bead, and if it separates from the wood or siding instead of flexing, adhesion is gone. Check joints again right after a hard rain for active leaks, and photograph problem spots so you can plan one efficient work session instead of five separate trips up the ladder.
How Do You Remove Old Exterior Caulk Safely?
Removal quality determines whether the new bead lasts two years or ten. Rushing this step is the single biggest reason repairs fail early.
- Score both edges of the old bead with a sharp utility knife.
- Pry the strip out with needle-nose pliers or a stiff putty knife.
- For stubborn silicone, switch to a razor scraper or an oscillating multi-tool with a scraper blade.
- Wipe the joint clean with isopropyl alcohol or a manufacturer-recommended solvent to strip residue.
Remove flaking paint before you touch the caulk itself, and work carefully around wood trim and flashing edges. This stepwise DIY workflow mirrors what contractors follow on job sites: full removal before any new material goes in, never caulking over what's already failing.
Stay on stable ground whenever the joint allows it, and if you bring in a heat gun or oscillating tool, wear eye protection and keep the tool moving so you don't scorch the substrate.
Pro Tip: Warm caulk peels out far easier than cold, brittle caulk. Do removal work on a mild, sunny afternoon, or warm a stubborn bead briefly with a hair dryer before scraping.
How Do You Prep a Joint Before Caulking?
Preparation is where most of the actual work lives. One estimate puts successful exterior sealing at roughly 80% preparation: clean, dry, repaired substrates matter more than the caulk brand you buy.
- Scrub masonry joints with a wire brush; rinse siding and trim with mild detergent and let them dry fully
- Allow 48 hours of drying time after pressure washing before you caulk
- Insert backer rod in any sufficiently deep gap, sized slightly larger than the joint depth to seat snugly without three-sided adhesion
- Mask both sides of straight joints with painter's tape, spaced to control your final bead width
Watch the forecast and the thermometer. Most manufacturers want temperatures above roughly 40 to 45°F with no rain expected for several hours after application. Warm, dry conditions in late spring through early fall generally give you the easiest working window.
How Do You Apply and Tool Exterior Caulk Correctly?
Getting the bead right comes down to nozzle angle, motion, and timing. Rush the tooling step and you'll see cracks within a season.
- Cut the nozzle at a 45 degree angle, sized to roughly match the joint width.
- Hold the gun so the tip rides against the smoother surface, typically the window frame rather than textured siding, for a straighter line.
- Apply steady pressure while dragging or pushing the gun along the joint in one continuous pass.
- Tool the bead into a slightly concave profile with a finishing tool or a wet fingertip.
That concave, or V-shaped, profile isn't cosmetic. A tooled concave bead distributes stress better than a rounded one and lasts longer under repeated expansion and contraction. Tool it within the manufacturer's window, often just 2 to 10 minutes after application, before it starts to skin over.
Cure times vary by chemistry: siliconized acrylics are typically paintable within an hour or two but fully cure over a couple weeks, polyurethanes need longer curing time, often a day or more before painting, and pure silicone never accepts paint at all. Pull the painter's tape before the bead skins over, clean tools with water for latex or a solvent for polyurethane, and reseal any leftover tubes with a nail through the tip to stop them from hardening.
Pro Tip: Keep a damp rag in your other hand the entire time you're tooling. A quick wipe between sections keeps excess caulk from smearing onto siding you don't want painted with sealant.

What Are the Most Common Exterior Caulking Mistakes?
Most failures trace back to one of these:
- Caulking over a joint that's still wet or dirty
- Using pure silicone where the trim needs future paint coverage
- Skipping backer rod on deep gaps, which causes three-sided adhesion and early cracking
- Applying caulk in direct hot sun or near-freezing temperatures
Some gaps should never be caulked at all: weep holes, designed drainage gaps at the base of siding, and certain butt joints that are meant to let moisture escape. Sealing these traps water behind the material and can rot the framing underneath. If a joint fails again shortly after resealing, or you find soft, rotted wood once the old caulk comes out, that's no longer a caulking problem.
How Often Should You Inspect and Reseal Exterior Caulk?
Lifespan depends heavily on chemistry. Acrylic latex tends to crack within 2 to 5 years, siliconized acrylic usually holds 5 to 10, and polyurethane or hybrid sealants can run past 15 years on the right joint. UV exposure and direct weather shorten all of these ranges.
Walk the exterior at least once a year, plus after any major storm, and caulking is worth treating as part of routine home weatherization since sealed joints cut drafts and block water intrusion at the same time. Spring and late summer tend to offer the mildest, driest conditions for the work. Materials for a handful of windows typically run under $50, while a full-exterior professional resealing job costs considerably more depending on square footage and access.
A Practical Note From the Field
Caulking looks simple until you're standing on a ladder wondering if that soft spot under the trim is just old paint or something worse. Exterior Genie's HAAG-certified inspectors see that distinction daily across 25 years of roofing and exterior work in South Carolina, and it changes how you'd approach a repair.
When It's Time to Call Exterior Genie Instead of DIY
A caulk gun fixes a gap. It does not fix rotted trim, a failed flashing detail, or a leak that's already gotten behind the siding, and those are the jobs where DIY caulking turns into a bigger repair bill down the road. If your inspection turns up soft wood, staining that keeps coming back after you reseal, or any work above what a stable ladder can safely reach, that's the point to bring in a professional.
Exterior Genie handles exactly these cases, from flashing replacement to storm-related exterior damage, and our HAAG-certified inspectors can also walk you through insurance claim assistance if the damage ties back to wind or hail. If you're weighing a full repair versus a patch job, start with our residential roofing services page to see what a proper inspection and quote looks like before the next storm makes the decision for you.
Sources
- Do it yourself: How to Remove and Replace Old Exterior Caulking — Building America Solution Center (PNNL)
- Bobvila
- Exterior Caulk Types 2026: Best Caulk for Painting Guide — FacadeColorizer
- Ultimate guide to exterior sealing for water protection — Seattle Trim Repair
FAQ
Can I caulk over old exterior caulk?
No. New caulk will not bond properly to old caulk or paint residue, and it usually peels away within months. Remove the old bead completely down to bare substrate first.
Where should you not caulk on a house exterior?
Avoid sealing designed weep holes, drainage gaps at the base of siding, and certain butt joints meant to release moisture. Sealing these traps water behind the material and can lead to rot.
How do you properly caulk exterior trim?
Clean and dry the joint, add backer rod if the gap is deep, apply a continuous bead with the nozzle riding the smoother surface, and tool it into a concave profile within a few minutes of application.
Why do some guides recommend Windex when caulking?
A light spray of a soapy or ammonia-based cleaner helps a wet finishing tool glide smoothly over fresh caulk without sticking, giving a cleaner tooled line. It works as a lubricant, not as a cleaner for the joint itself.