
Do these six things first after finding roof damage: get everyone off the roof and out of the attic, take time-stamped photos before anything is moved, tarp active leaks to stop interior damage, call your insurer to open a claim, schedule a written inspection from a licensed contractor or HAAG-certified inspector, and save every receipt tied to the storm. A roof insurance claim checklist only works if the first moves happen fast and in the right order. Skip the documentation step and you can lose leverage even on a legitimate claim, because adjusters weigh evidence gathered close to the storm date far more than a description offered weeks later. NOAA storm records for your date and county fill gaps in your own evidence, and understanding the difference between ACV and RCV payouts before you file changes how you plan for repair costs.
- Get people and pets away from unstable roof sections and sagging ceilings.
- Photograph and video the damage from the ground and, if safe, the attic before cleanup.
- Tarp or cover active leaks to prevent secondary water damage.
- Call your insurance company the same day or the next business day.
- Book a written inspection with a licensed roofer or HAAG-certified inspector.
- Keep every receipt for tarps, buckets, or emergency labor.
Key Takeaways
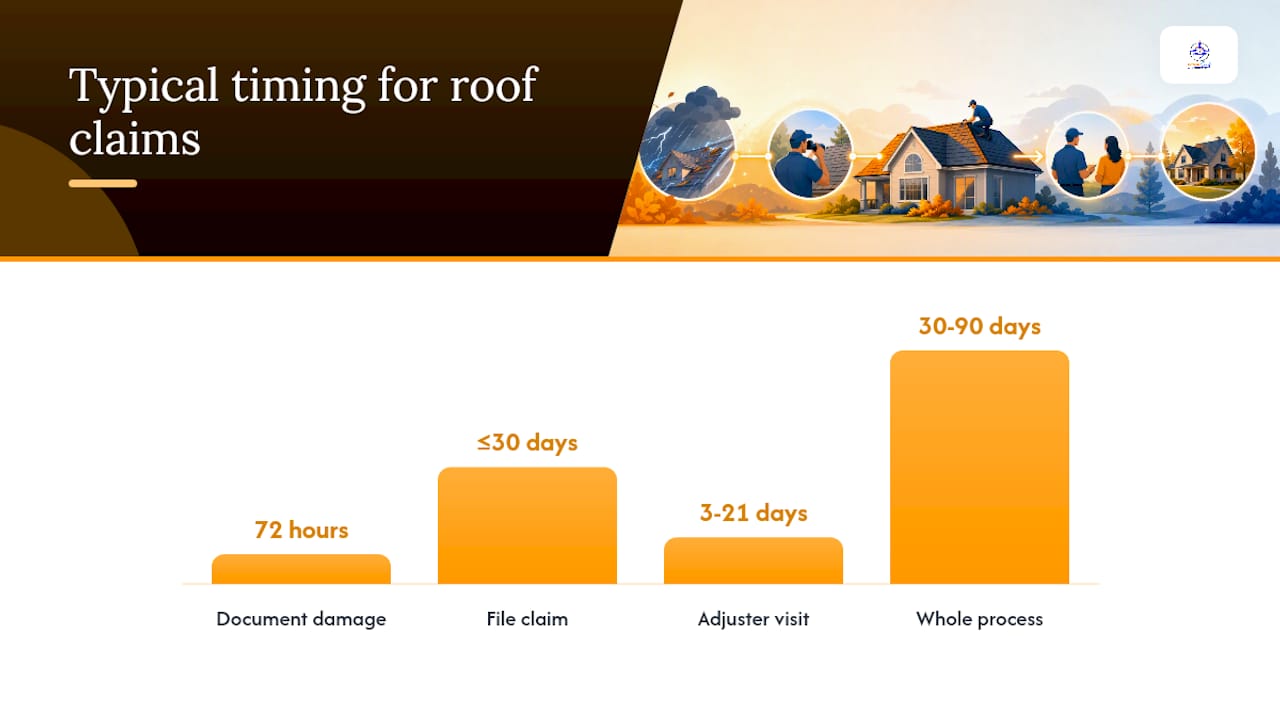
A roof insurance claim succeeds when documentation happens within 72 hours, a written contractor inspection precedes the insurer call, and every receipt and communication gets logged.
| Point | Details |
|---|---|
| Document fast | Take time-stamped photos and video within 72 hours of the storm to preserve claim strength. |
| Inspect before you file | Get a written, photo-backed contractor or HAAG-certified inspection before calling your insurer. |
| Understand ACV vs. RCV | Know that the first check is often reduced by depreciation, released later after final invoices. |
| Watch for red flags | Avoid storm-chasing contractors who pressure you to sign before an adjuster inspects the roof. |
| Get local support | Exterior Genie offers 24/7 emergency tarping and HAAG-certified inspections for Lexington and Columbia homeowners. |
Table of Contents
- Roof Insurance Claim Checklist: The Full Sequence
- How Should You Document Roof Damage for a Claim?
- What Does Homeowners Insurance Actually Cover on a Roof?
- What Happens After You File the Claim?
- Why a Contractor or HAAG-Certified Inspector Matters
- Common Pitfalls and Red Flags After a Storm
- Sources
- FAQ
Roof Insurance Claim Checklist: The Full Sequence
A roof insurance claim moves through predictable stages, and knowing the order keeps you from missing a step that costs money later. The workflow below reflects what industry guides recommend as the standard path from storm to settlement, with typical timing built in so you know what "normal" looks like.
- Confirm safety and stop further damage. Keep people off the roof, shut off electricity to wet areas if needed, and move valuables away from active leaks.
- Document within 72 hours. Photos and video taken close to the storm date carry more weight than evidence gathered later, since documentation is the single most important factor in whether a claim holds up.
- Make temporary repairs and save receipts. Tarping, plywood, or a temporary patch prevents further loss and is typically reimbursable, but only with a receipt attached.
- Get a written contractor inspection before you call your insurer. A licensed roofer or HAAG-certified inspector documents hail hits, wind lift patterns, and collateral damage with photos and measurements, which anchors your claim's scope from day one.
- File the claim. Most carriers want notice within a reasonable window after the loss, often 30 days or less depending on your policy, though exact language varies by insurer.
- Schedule the adjuster visit. This typically happens within 3 to 21 days of filing, depending on storm volume in your area.
- Have your contractor meet the adjuster on-site. Two sets of trained eyes on the roof reduce disputes over scope and materials.
- Review the estimate and ACV vs. RCV math. Understand what's held back as depreciation before you sign anything.
- Complete the repair or replacement. Choose a contractor who matches the carrier-approved scope, or supplements it with documentation if something was missed.
- Submit final invoices. This releases recoverable depreciation, typically within 14 to 30 days of submission.
- Register warranties and file every record. Keep the final invoice, warranty paperwork, and claim number together for future reference.
The whole process, from first call to final check, generally runs 30 to 90 days, though disputed claims or backlogged adjusters after a major regional storm can stretch that timeline considerably. Roof replacement insurance tips almost always come back to this same principle: the homeowner who documents early and gets professional backup before filing ends up with a cleaner, faster claim than the one who waits and hopes the adjuster fills in the blanks.
Pro Tip: Get your contractor's written inspection report in hand before you call the insurance company. It gives the adjuster a real scope to respond to instead of a vague description, and it's much harder to argue down a documented estimate than an undocumented claim.
Owens Corning's own storm damage checklist echoes this same order: document, protect the property, contact the insurer, then get a professional estimate. When a manufacturer with decades of roofing data recommends the same sequence independent adjusters expect, that's a strong signal the order matters more than most homeowners assume. Bookmark or print a copy of your roof repair insurance checklist so you're not improvising mid-storm season.
How Should You Document Roof Damage for a Claim?
Photos win or lose claims more often than any other single factor. Adjusters and contractors both look for a specific set of images, and missing even one category can slow your payout or invite a lowball estimate.
- Wide shots of each roof slope from the ground, showing the full damage pattern.
- Close-ups of individual hail hits or torn shingles with a coin or tape measure for scale.
- Attic photos showing daylight through the deck, wet insulation, or staining.
- Interior shots of ceiling stains, drips, or water on walls tied to the roof leak.
- Collateral damage: dented gutters, bent AC fins, torn screens, and damaged fencing, all of which corroborate a wind or hail event.
Video walkthroughs matter too, especially a slow pass around the exterior narrated with the date. If you have older photos of your roof from before the storm, an inspection report, or listing photos, save them for comparison. Neighbors' damage and local news coverage of the same storm add weight, as does a saved copy of the NOAA storm event report for your date and ZIP code.
Beyond photos, keep a written log: dates, times, who you spoke with, and what was said. Save every receipt for emergency repairs, and ask your contractor for an inspection report that includes the date, a line-item estimate, and photos matched to each damage point. Collateral damage to soft metals like gutters and AC fins is particularly persuasive to adjusters because it confirms impact patterns consistent with hail or high wind, rather than gradual wear.
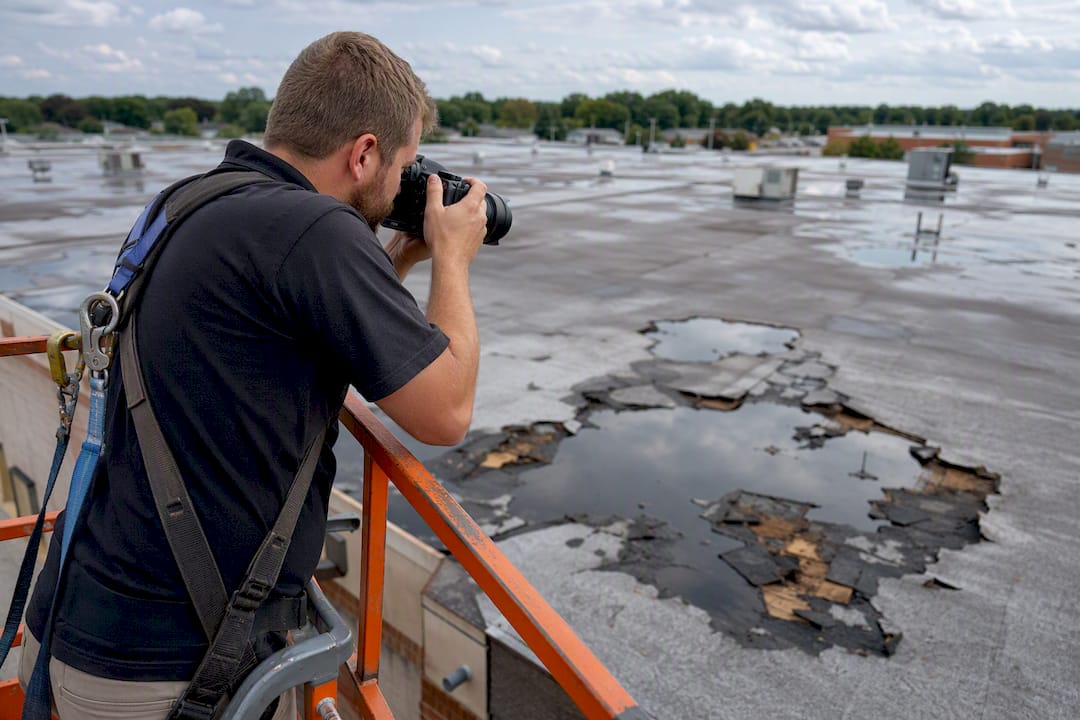
Pro Tip: Don't climb onto a damaged roof yourself for photos. Shoot everything you can safely capture from the ground, then let a licensed contractor handle the rooftop images. Getting a photographed, written report from a pro before you file is worth more than a dozen shaky phone pictures.
What Does Homeowners Insurance Actually Cover on a Roof?
Coverage hinges on cause, not just damage. Standard homeowners policies pay for sudden, accidental events, wind, hail, fallen trees, fire, but they exclude damage from age, neglect, or gradual wear, and that distinction decides more claims than homeowners expect. A 20-year-old roof with curling shingles from sun exposure isn't a covered loss even if it started leaking the same week as a hailstorm. Even something as unglamorous as rodent damage to shingles typically falls under maintenance exclusions rather than a covered peril, since it's treated as a gradual problem, not a sudden event.
- Covered: wind uplift, hail impact, falling limbs or trees, fire, and most sudden accidental events.
- Not covered: wear and tear, poor maintenance, manufacturing defects, and most cases of long-term neglect.
Once a claim is approved, the payout math depends on whether your policy carries Actual Cash Value (ACV) or Replacement Cost Value (RCV) coverage for the roof. ACV pays the replacement cost minus depreciation for the roof's age and condition, an upfront check that's often noticeably smaller than the repair bill. RCV policies pay that same depreciated amount first, then release the rest, called recoverable depreciation, once you complete the work and submit final invoices. Understanding replacement cost value ahead of time keeps you from panicking when the first check looks too small.
Deductibles complicate the math further. Some policies apply a flat dollar deductible; others apply a percentage-based wind or hail deductible, which can run higher than homeowners realize on higher-value homes. If your repair estimate lands close to or below your deductible, it's often smarter to pay out of pocket and skip the claim entirely, since a filed claim can affect renewal pricing even when the payout was modest.
What Happens After You File the Claim?
Filing opens the clock on a fairly predictable sequence, and knowing the typical windows helps you spot when something's moving slower than it should. Adjusters generally schedule inspections within 3 to 21 days of the claim being opened, longer during peak storm season when a whole region files claims at once.
- Claim opens and you receive a claim number and adjuster contact information.
- Adjuster inspection happens on-site, usually running a series of 10-by-10 test squares on each roof slope to count hail hits and check for wind damage patterns.
- Written estimate follows, typically within 7 to 21 days of the inspection.
- Initial ACV check is issued once the estimate is approved.
- Repair or replacement work begins, generally taking 2 to 12 weeks depending on scope and material availability.
- Final invoices go in, and recoverable depreciation is typically released within 14 to 30 days after submission.
Adjusters check the interior as much as the roof itself, looking for staining, wet insulation, and signs the damage traces back to the storm date rather than a preexisting issue. Coordinate your contractor to be on-site during the adjuster's visit; a second set of trained eyes catches missed damage before the estimate is finalized. State Farm's own claims guidance notes that a solid contractor estimate should list material quantities, labor, permits, warranties, and a completion timeline, exactly the detail adjusters expect to see matched against their own scope.
Pro Tip: Write down your claim number and your adjuster's direct phone number the day you get them. If your contractor finds damage the adjuster missed, once you know your Xactimate line items, a supplemental claim with photos and a revised estimate is far easier to submit than starting over.
Why a Contractor or HAAG-Certified Inspector Matters
A written, photo-backed inspection before you file does more than speed things up. It sets the scope of damage on your terms first, which means the adjuster is responding to documented evidence instead of writing the first draft of your claim. Getting that inspection before you call the carrier tends to reduce disputes over what's actually covered.
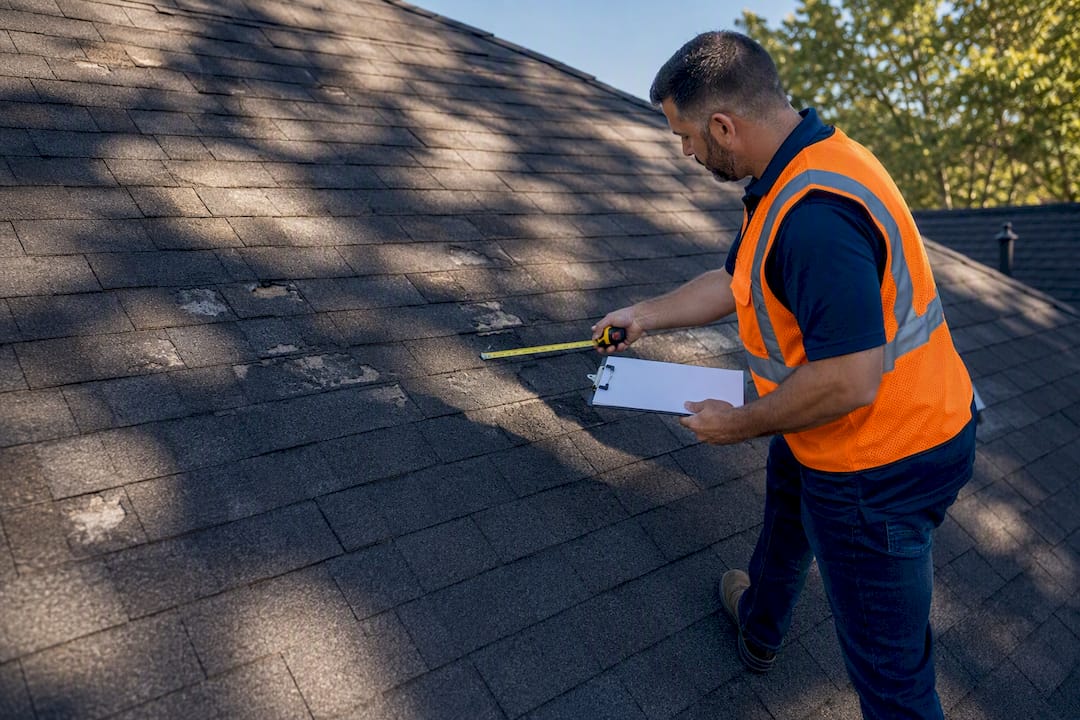
Before hiring anyone, require proof of license and insurance, a detailed written estimate with material specs, a realistic timeline, and clear language on who handles permits and warranties. The estimate itself matters more than most homeowners realize when it comes time to reconcile your contractor's numbers against the adjuster's.
HAAG-certified inspectors carry specific training in hail impact forensics and wind damage patterns, credentials that carry real weight when an insurer questions whether damage is storm-related or pre-existing.
Pro Tip: Ask your contractor to photograph the adjuster's chalk marks and test squares during the inspection. And read any assignment-of-benefits paperwork line by line before signing; it can sign away your right to negotiate your own claim.
Common Pitfalls and Red Flags After a Storm
Storm season brings out door-to-door contractors who pressure homeowners into signing on the spot, often before an adjuster has even seen the roof. That pressure is the biggest red flag in the whole process.
- Unlicensed or uninsured contractors going door to door right after a storm.
- Pressure to sign a contract or assignment-of-benefits form immediately, before you've reviewed it.
- Vague estimates with no written material specs, quantities, or timeline.
- Contractors who remove damaged materials before your insurer has inspected them.
On the homeowner side, the most common reasons claims get denied or reduced are delayed filing, thin documentation, and evidence that maintenance was neglected. Never sign a waiver or assignment-of-benefits form without reading every clause, and always get a denial in writing before you escalate. If a settlement feels wrong, you generally have three paths forward: invoke the policy's appraisal clause, hire a public adjuster, or file a complaint with your state's Department of Insurance.
A Field Perspective on What Actually Saves Claims
I've watched an adjuster walk right past hail bruising on a three-tab roof because it doesn't show the way it does on architectural shingles. It took a contractor pointing to the granule loss pattern, matched against test squares, to get the scope corrected. That's the value of a second trained set of eyes before you settle. Exterior Genie's HAAG-certified inspectors and 24/7 emergency tarping exist for exactly that gap between what a homeowner sees and what an adjuster is trained to catch.
Get Local Help With Your Roof Insurance Claim
Storm damage doesn't wait for business hours, and neither does Exterior Genie. Beyond the checklist, the real advantage for homeowners in Lexington and Columbia is having a HAAG-certified inspector and a written, Xactimate-style estimate in hand before your carrier's adjuster ever shows up, which is the single biggest factor in how smoothly a claim actually goes.

Exterior Genie provides 24/7 emergency tarping to stop damage from spreading while your claim is still being filed, along with HAAG-certified inspections that document hail counts, wind patterns, and collateral damage in the same detail adjusters look for. Their crews build estimates that match the line items carriers expect to see, then manage the claim process alongside you from filing through final invoice. If you're in the Lexington or Columbia service area and need someone on the roof before your adjuster gets there, visit the insurance claims assistance page or call to schedule an inspection today.
Sources
Save your county's NOAA storm report, Owens Corning's storm damage checklist, and American Family's roof coverage guide for reference. A reinstatement cost assessment resource helps homeowners understand policy valuation limits. Your state's Department of Insurance can also step in if a dispute stalls.
This article is general information, not a substitute for advice from a qualified financial advisor. Consult a qualified financial professional about your own circumstances before acting on anything here.
- Filing an Insurance Claim for Roof Damage: 2026 Guide | The Roofing Brief
- Documenting Roof Damage for an Insurance Claim | Roof Policy
- How to File a Roof Insurance Claim in 2026: Step-by-Step Guide | HomeCostLab
- Roof Storm Damage Checklist What To Do After A ... - Owens Corning
FAQ
What should be my first step on this roof insurance claim checklist?
Get people safely away from the damage, then photograph everything from the ground before making temporary repairs like tarping.
How long do I have to file a roof damage claim?
Most policies expect notice within a reasonable window, often 30 days, though exact deadlines vary by insurer and state, so check your policy language directly.
What's the difference between ACV and RCV payouts?
ACV pays replacement cost minus depreciation upfront, while RCV policies release that same depreciated amount first, then pay the remainder, called recoverable depreciation, after you complete repairs and submit final invoices.
Should I get a contractor inspection before calling my insurer?
Yes. A written, photo-documented inspection from a licensed contractor or HAAG-certified inspector, like those Exterior Genie provides, anchors your claim's scope before the adjuster arrives.
What if the adjuster denies an on-site inspection?
Request the denial and reasoning in writing, then have your contractor submit a documented estimate with photos so you have independent evidence to support an appeal or a formal dispute through your state's insurance department.