
The best defense against wind damage is a roof built as one connected system: wind-rated shingles or metal rated to ASTM D7158 Class H, a fully sealed roof deck, and hurricane straps that tie the roof structure to the walls below. Miss any one of those three, and the other two matter a lot less. A roof with premium shingles but a poorly nailed deck fails the same way a cheap roof does when hit by moderately strong winds.
Act on these first, before you read another word about wind mechanics or claims paperwork:
- Check your starter strips and ridge caps now. These are the first components to lift in sustained wind, and they're visible from the ground with binoculars.
- Photograph any visible damage immediately after a storm, before debris cleanup disturbs the evidence your insurer will want to see.
- Schedule a HAAG-certified inspection if you suspect uplift, even without obvious leaks. Hidden damage under intact-looking shingles is common.
Programs like IBHS FORTIFIED and testing standards like ASTM D7158 Class H exist because product marketing alone doesn't predict roof survival. Installation quality and structural continuity do. Exterior Genie's HAAG-certified inspectors see this pattern constantly: two identical shingle products, one installed to spec and one not, with wildly different outcomes after the same storm.
Key Takeaways
Wind-rated materials, a sealed roof deck, and continuous structural connections from shingle to foundation together determine whether a roof survives a major storm intact.
| Point | Details |
|---|---|
| Address the three pillars together | Wind-rated materials, sealed decking, and hurricane straps only work as a system, not individually. |
| Inspect from the ground first | Wait for safety clearance, survey with binoculars, and photograph everything before climbing anything. |
| Choose tested, approved products | Require ASTM D7158 Class H or equivalent, plus Miami-Dade NOA or FM approval documentation. |
| Document before you call your insurer | Timestamped photos and a written contractor or HAAG report strengthen every claim conversation. |
| Call a HAAG inspector for hidden damage | Exterior Genie's HAAG-certified inspectors identify uplift and fastening issues surface checks miss. |
Table of Contents
- Why Does Wind Damage Roofs in the First Place?
- What Should You Check After a Wind Storm?
- Which Roofing Materials Perform Best in High Wind?
- How Do Hurricane Straps and Fasteners Prevent Uplift Failure?
- What Roof Details Fail First in High Wind?
- How Do Gutters and Trees Affect Wind Damage Risk?
- Should You Repair or Replace a Wind-Damaged Roof?
- How Do You Document a Wind Damage Insurance Claim?
- How Do You Hire a Roofing Contractor for Wind Repair?
- Why Does a HAAG Certified Inspection Matter?
- Where Can You Read More on Wind-Resistant Roofing Standards?
- An Editorial Perspective on Wind-Ready Roofing
- Get Your Roof Storm Ready With Exterior Genie
- Sources
- FAQ
Why Does Wind Damage Roofs in the First Place?
Wind doesn't peel a roof apart the way most people picture it. It creates uplift, a suction force pulling shingles and decking upward, combined with turbulent eddies that spin off roof edges, corners, and hips. Those turbulent zones are why damage almost never starts in the middle of a roof slope. It starts at the perimeter.
A few mechanics worth understanding before you spend money on upgrades:
- Uplift versus downward pressure: wind blowing over a roof surface drops air pressure above the shingles, and the higher pressure trapped underneath pushes up. This is the same principle that lifts an airplane wing.
- Edge and corner amplification: wind speed increases and separates as it flows around a building's corners, which is why corners and rake edges experience uplift forces two to three times higher than the center of the roof field.
- Wind-driven rain and debris: once a single shingle lifts, wind-driven rain gets underneath it, and flying debris (branches, fence panels, neighboring roof material) can tear additional shingles loose or puncture the deck.
Picture a gable roof from above during a storm: wind hits the windward slope and rides up and over the ridge, then separates into a turbulent, low-pressure zone across the leeward slope and both gable ends. Those separation zones, plus every corner and hip line, are the "high-lift" areas where FORTIFIED and Miami-Dade product testing concentrates its attention. If you're mapping your own roof for vulnerability, start at the corners and work inward.
NSSL's wind education resources explain that damaging straight-line wind events, including derechos, routinely produce gusts in the 60 to 100 mph range, well within the failure threshold for improperly installed roofing. The August 2020 Midwest derecho is a good reminder that this isn't only a coastal hurricane problem. That single event produced widespread shingle loss and structural roof damage across Iowa, Illinois, and Indiana, hundreds of miles from any coastline.
What Should You Check After a Wind Storm?
Wait until the storm has fully passed and it's safe to go outside before doing anything. The National Weather Service is unambiguous on this point: downed power lines, unstable trees, and secondary wind gusts kill and injure people who go outside too soon after a storm. Your first move is a ground-level survey, not a ladder.
From the ground, with binoculars if you have them, look for:
- Missing or torn-off shingles, especially clustered near edges, ridges, and valleys.
- Lifted shingle edges or ridge caps that look like they're peeling rather than lying flat.
- Displaced or bent flashing around chimneys, vents, and skylights.
- Granules and shingle debris collecting in gutters, downspouts, and your yard.
- Dented or missing gutters, soffit panels, or fascia boards.
Inside the house, check your attic (if accessible without climbing on the roof) for visible daylight through the decking, damp insulation, or nail points backing out of the sheathing. None of this requires getting on the roof. Climbing onto a wind-damaged roof, especially one with hidden deck damage, is a job for a trained inspector, not a homeowner in tennis shoes.
Document everything before you touch it. Take wide shots of each roof slope, close-up photos of any lifted or missing shingles, and interior photos of ceiling stains or water intrusion. Note the date and time; most phones timestamp photos automatically, which matters later. When you first call your insurer, stick to observed facts: "shingles are missing on the north slope" and "water is coming through the ceiling in the upstairs bathroom," not speculation about cause or age.
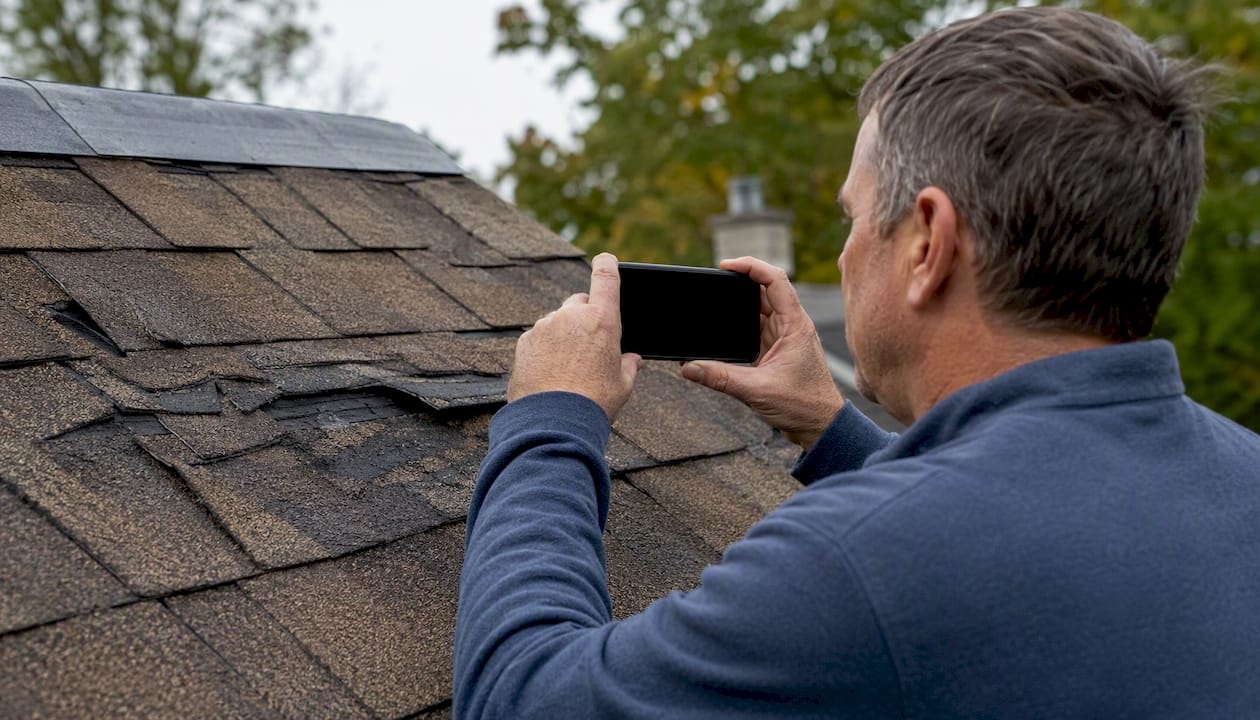
Prompt, thorough documentation changes claim outcomes. Insurers and independent claims resources both point to the same pattern: claims supported by dated photos and a clear timeline move faster and get contested less often, a point Vector Claim Solutions makes in detail for homeowners navigating the process for the first time.
Which Roofing Materials Perform Best in High Wind?
For most homeowners rebuilding or upgrading in a wind-prone area, the highest-impact choice is an ASTM D7158 Class H rated asphalt shingle, or a properly installed standing-seam metal roof with matched uplift ratings, laid over a fully sealed roof deck. Class H shingles are tested to withstand sustained high winds when installed to the manufacturer's exact specification, not as a general durability claim independent of installation.
Product approval matters as much as the product itself. Miami-Dade County's Notice of Acceptance (NOA) program is the strictest wind and impact testing regime in the country, and products that carry it have been tested for uplift resistance, water intrusion, and impact under conditions well beyond a standard building code minimum. FM approvals and UL listings serve a similar function for commercial assemblies and specific components. If a contractor can't produce a product approval document on request, that's worth noting before you sign anything.
| Material type | Best for | Wind rating basis | Retrofit difficulty | Typical cost range | Maintenance notes |
|---|---|---|---|---|---|
| Asphalt shingles (Class H) | Inland and moderate coastal exposure | ASTM D7158 Class H | Low to moderate | Lower end of reroof pricing | Inspect starter strips and ridge caps yearly |
| Standing-seam metal | Coastal and hurricane-prone exposure | FM/UL uplift ratings, FORTIFIED compliant | Moderate to high | Higher end of reroof pricing | Check seam integrity and fastener clips after major storms |
| FORTIFIED shingle upgrade package | Homeowners wanting stronger inland protection at moderate cost | IBHS FORTIFIED + ASTM D7158 | Moderate | Mid-range, above standard reroof | Annual inspection recommended by installer |
| Sealed-deck + Class H combo | New construction or full reroof in any wind zone | ASTM D7158 + sealed deck method | Moderate (best done during full reroof) | Mid to upper range | Periodic underlayment seam check |
Underlayment is the layer most homeowners never think about, and it's often the difference between a repair and a full interior remodel after a storm. Fully adhered peel-and-stick underlayment, sold under names like GAF StormGuard, CertainTeed WinterGuard, and Owens Corning WeatherLock, self-seals around nail penetrations and resists wind-driven water intrusion even if the shingle layer above it is compromised. Taped-seam synthetic underlayment costs less per square but relies more heavily on installer precision at the seams. Industry cost data puts peel-and-stick systems at a modest premium over taped seams, a tradeoff most inspectors consider worth paying in any wind-exposed region.
A few upgrade packages homeowners commonly ask about:
- FORTIFIED shingle upgrade: Class H shingles, sealed deck, and enhanced fastening, done during a standard reroof for a moderate cost increase.
- Metal standing-seam + straps: higher upfront cost, but among the strongest assemblies available for coastal and high-exposure properties.
- Sealed deck + Class H shingles: the most common mid-range choice for homeowners who want real wind resistance without a full metal roof budget.
How Do Hurricane Straps and Fasteners Prevent Uplift Failure?
A wind-rated shingle on a poorly fastened deck is a wasted investment. The roof only performs as well as its weakest connection, and that connection runs from the shingle nail down through the decking, through the rafters or trusses, and into the wall framing via hurricane straps or clips. This is called load path continuity, and it's the single most overlooked factor in wind resistance.
When you're evaluating a contractor's proposal or an inspector's report, ask these questions directly:
- Are hurricane straps or clips present at every rafter-to-wall connection, and what's the spacing?
- Are fasteners ring-shank nails, not smooth-shank common nails? Ring-shank nails resist pull-out under repeated uplift cycling far better.
- What's the nailing pattern for the shingles, and does it match the manufacturer's high-wind installation instructions (often six nails per shingle instead of four)?
- What fastener density is specified for the decking itself, based on ASCE 7 wind-load calculations for your exposure category?
IBHS recommends using ASCE 7-based wind design values with an added safety factor, rather than the bare code minimum, for both low-slope and steep-slope roofs. That extra margin is cheap insurance against the kind of unpredictable gust spikes that show up in derechos and tropical systems alike.
Retrofitting hurricane straps into an existing roof carries a moderate cost per strap depending on access and framing type, with labor typically scheduled as a short job for an average single-family home. Ask your contractor whether your project crosses that threshold before work starts, not after.
What Roof Details Fail First in High Wind?
Flat shingle fields rarely fail on their own. The trouble spots are chimneys, skylights, roof-to-wall transitions, vent pipe boots, and rake or eave terminations, anywhere the roof plane changes direction or has a penetration through it.
Watch for these specific failure modes:
- Loose step flashing around chimneys and dormers, which lets wind-driven rain track down into the wall cavity.
- Unsealed or cracked pipe boots, a small rubber component that dries out and cracks years before the shingles around it show wear.
- High nails through the shingle's adhesive strip, which prevents the self-sealing strip from bonding shingles together and leaves them vulnerable to the very first strong gust.
- Missing or damaged starter strip at the eaves, the first line of defense against wind getting underneath the lowest course of shingles.
Pro Tip: Ask your contractor to show you the pipe boots and step flashing before they close up the job, and ask specifically whether they're using a high-nail pattern that clears the adhesive strip. Contractors who bristle at that question are usually the ones cutting corners on it.
Not every flashing issue needs immediate replacement. A single lifted shingle near a vent pipe with no active leak can typically wait for a scheduled repair. Active water intrusion, a torn boot during a storm, or exposed decking after a wind event needs temporary tarping immediately, followed by permanent repair within days, not weeks.
How Do Gutters and Trees Affect Wind Damage Risk?
Keeping gutters clear, trimming trees back from the roofline, and securing loose soffit and fascia panels all reduce the debris load and localized uplift points that turn a moderate storm into a major repair bill. A branch impact that dents a gutter is an inconvenience. The same branch tearing loose a section of soffit gives wind an entry point under the roof edge, which is a much bigger problem.
A practical seasonal maintenance rhythm:
- Spring and fall: clean gutters and downspouts, check for loose fasteners on gutter hangers, and confirm downspouts drain away from the foundation.
- After every significant storm: walk the yard for debris and check gutters for granule buildup, a sign of shingle wear you'd otherwise miss.
- Annually or biannually depending on tree cover: trim branches back at least six to ten feet from the roofline, since overhanging limbs both drop debris and funnel wind directly at the roof edge.
- Anytime you notice sagging: secure or replace loose soffit panels and fascia boards promptly, since a gap here is exactly the kind of pressure point wind exploits first.
Most regions see their highest storm frequency in specific windows, hurricane season along the coasts and severe convective season inland during spring and early summer. Scheduling your gutter and tree maintenance just ahead of those windows, rather than after the first storm of the season, is the difference between prevention and reaction.
Should You Repair or Replace a Wind-Damaged Roof?
Repair makes sense when damage is localized, the decking underneath is sound, and the roof still has meaningful service life left. Replacement becomes the right call when damage is spread across multiple slopes, the deck itself is compromised, or the roof was already near the end of its expected lifespan before the storm hit.
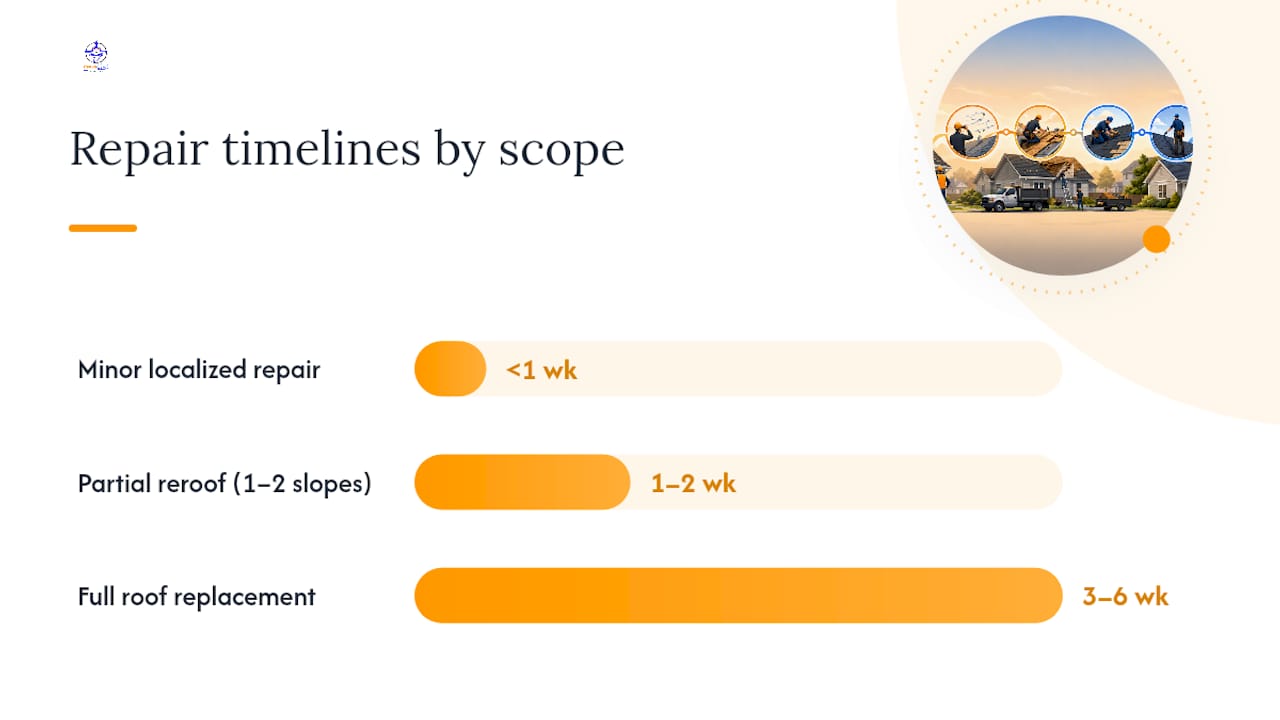
| Scope of work | Typical cost range | Typical timeline |
|---|---|---|
| Minor localized patch repair | Lower end, several hundred dollars | Same day to a few days |
| Partial reroof (one or two slopes) | Mid range | One to two weeks from inspection to completion |
| Full roof replacement | Higher end, varies with square footage and material | Three to six weeks including permitting |
A few decision points worth applying before you commit either direction:
- Request a full estimate when damage covers more than one roof slope or when you're unsure whether the deck itself was compromised.
- Request a HAAG inspection specifically when an insurance claim is involved or when damage isn't visually obvious but you suspect uplift.
- Factor in remaining roof life. A repair on a roof that's already 18 years into a 20-year lifespan often costs nearly as much long-term as replacing it outright.
FM's guidance on wind-damaged roof systems recommends emergency temporary repairs immediately after damage occurs, followed by a defined permanent repair evaluated separately, rather than treating a tarp as a long-term fix. Temporary tarping is appropriate for exposed decking or active leaks and should be handled by a professional; DIY tarping on a steep or wet roof is one of the more dangerous home repair tasks a homeowner can attempt.
How Do You Document a Wind Damage Insurance Claim?
Photograph everything and keep a written record of every conversation, but don't volunteer opinions about cause or prior condition when you first talk to your insurer or their adjuster. Stick to what you observed and when.
Build your documentation file with:
- Timestamped photos of every damaged area, both wide shots and close-ups.
- A written contractor inspection report describing the scope and cause of damage.
- A HAAG inspection report if one was performed, since insurers widely recognize this credential.
- Receipts for any emergency tarping or temporary repairs performed before the adjuster's visit.
- A log of every call or email with your insurance company, including dates and names.
When the adjuster arrives, a few dos and don'ts matter more than people expect:
- Do walk the property with the adjuster and point out documented damage directly.
- Don't speculate that damage is "probably from age" or "maybe it was already like that." Let the inspection findings speak for themselves.
- Do ask about the supplement process if additional damage is found once repair work begins.
- Don't accept a first settlement offer without comparing it to your contractor's written scope of work.
- Do request a reinspection if your contractor's estimate and the insurer's assessment disagree significantly.
Hytz Roofing's guide on immediate wind-damage steps covers similar ground on what to prioritize in the first 48 hours after a storm, which is worth a look if you want a second perspective on sequencing. For direct help navigating the claims conversation itself, Exterior Genie provides insurance claims assistance through HAAG-certified inspectors who document damage in the same language adjusters use.
How Do You Hire a Roofing Contractor for Wind Repair?
Prioritize a licensed, insured contractor who follows manufacturer installation specs, can produce product approval documentation, and is willing to have their work checked by a HAAG-certified inspector. A contractor who resists any of those three is telling you something.
Before you sign anything, confirm:
- Proof of current insurance and license, verified independently rather than taken on their word.
- References specifically from storm or wind-damage repairs, not just general roofing jobs.
- A written scope of work that names fastener type, nailing pattern, and deck-sealing method, not just "reroof per code."
- Product approval documents (Miami-Dade NOA where relevant to your material choice).
- Clear warranty terms covering both materials and workmanship separately.
Red flags worth walking away from:
- Verbal-only estimates with nothing written down.
- High-pressure tactics pushing you to sign the same day, especially right after a storm when door-to-door crews flood a neighborhood.
- A contractor discouraging you from getting a second opinion or an independent inspection.
- Refusal to provide product documentation when you ask for it directly.
A standard contractor inspection tells you what needs fixing. A HAAG inspection tells you why it failed, whether that's improper fastening, aged materials, or genuine storm force beyond the product's rating, and that distinction often determines whether an insurance claim gets approved at full scope or gets disputed line by line.
Why Does a HAAG Certified Inspection Matter?
A HAAG-certified inspection provides a standardized, insurer-recognized assessment that catches installation and uplift problems a routine visual check misses entirely. Insurance companies across the country recognize the HAAG credential specifically because it trains inspectors to distinguish storm damage from installation defects and prior wear, a distinction that decides whether a claim gets paid.
Field experience bears this out consistently. A roof with a handful of visibly missing shingles might look like a minor cosmetic repair from the ground. A HAAG-trained inspector climbing that same roof frequently finds a pattern of high-nailing across dozens of shingles that never showed on the surface, meaning the entire field was compromised and vulnerable to the next storm regardless of how it looked. That finding changes a homeowner's repair scope from a patch job to a full reroof recommendation, backed by documented evidence an insurer can't easily dispute.
A thorough HAAG-standard inspection report typically includes:
- Roof measurements and slope documentation.
- Full photographic evidence of every damaged and at-risk area.
- Fastener observations, including nailing pattern and any high-nail findings.
- Deck condition assessment, including moisture and attachment integrity.
- Flashing and penetration evaluation at every roof transition point.
- Recommended repair scope with estimated materials and labor.
A properly documented HAAG report doesn't just say "damage found." It specifies exactly where uplift occurred, whether fastening met code at the time of installation, and whether the damage pattern is consistent with the wind speeds recorded during the storm event in question.
That level of specificity is what separates a claim that gets approved in one round from one that drags through multiple reinspections.
Where Can You Read More on Wind-Resistant Roofing Standards?
The guidance in this article draws on established engineering and industry standards, and each is worth bookmarking if you're planning upgrades or evaluating a contractor's proposal:
- IBHS ROOFS Best Practices Guide for sealed-deck methods, ASCE-based wind design, and approved product programs.
- NSSL's wind education resources for the physics behind uplift and edge/corner failure zones.
- National Weather Service wind safety guidance for post-storm safety protocol.
- FM Data Sheet DS 1-30 for emergency and permanent repair procedures on wind-damaged roofs.
- NOAA Storm Prediction Center annual summaries for regional severe wind event frequency.
An Editorial Perspective on Wind-Ready Roofing
The roofing industry sells wind resistance as a product feature, something you buy off a shelf by picking the right shingle brand. That framing misses the point. Every credible standard referenced here, from IBHS to ASTM to Miami-Dade's NOA program, exists precisely because installation quality, not product selection alone, decides whether a roof survives. A Class H shingle nailed with a four-nail pattern instead of six performs like a much cheaper product the moment gusts climb past 60 mph.
What gets underestimated most is the load path. Homeowners fixate on shingles because that's what they can see, while the hurricane straps and deck fastening that actually hold the roof to the house sit invisible until something fails. If you take one thing from this guide, let it be that a contractor who can explain fastener density and strap spacing without hesitation knows more about wind resistance than one who only talks brand names. Exterior Genie's HAAG-certified inspectors are trained to check exactly those hidden connections, because that's where storms actually win.
Get Your Roof Storm Ready With Exterior Genie
Exteriorgenie brings HAAG-certified inspection and 24/7 emergency response together under one roofing contractor, so you're not juggling a separate inspector, a separate repair crew, and a separate insurance advocate after a storm.

Homeowners who read this guide are usually in one of two situations: planning a wind-resistant upgrade before the next storm season, or standing in the yard right now looking at missing shingles. Either way, Exteriorgenie's veteran-owned crews handle both the technical side (proper fastening, sealed decks, product approvals) and the paperwork side (HAAG-standard documentation your insurer recognizes). If you're dealing with active wind damage, start with a wind damage roof repair estimate and get a HAAG-certified inspector on your property before you talk to your adjuster again.
Sources
- IBHS — ROOFS Best Practices Guide
- NSSL — Wind education
- National Weather Service — Wind safety and guidance
FAQ
What Is the 25% Rule for Roofing?
The 25% rule generally refers to building codes that require a full roof replacement, rather than a partial repair, once damage or exposed structural work affects 25% or more of the roof surface. Local code requirements vary, so confirm the exact threshold with your municipality or contractor before assuming which rule applies.
What Should You Do if Your Roof Is Damaged by Wind?
Wait until it's safe, survey the damage from the ground, photograph everything with timestamps, and arrange temporary tarping for any active leaks or exposed decking. Schedule a HAAG-certified inspection before filing your insurance claim so you have standardized documentation on hand.
How Strong Does Wind Have to Be to Rip a Roof Off?
Improperly installed shingles can lift in moderately strong winds, while properly installed and correctly rated materials, like ASTM D7158 Class H shingles with sealed decking and hurricane straps, are designed to withstand sustained high winds. Installation quality, not just the product rating, determines the real-world threshold.
What Should You Avoid Saying to a Roof Insurance Adjuster?
Avoid speculating about the cause or age of damage, such as saying it was "probably already there" or "maybe from age." Stick to factual observations, let your contractor's or HAAG inspector's report establish cause, and don't agree to a settlement before comparing it against a written scope of work.
When Does a HAAG Certified Inspection Make Sense?
A HAAG inspection is worth scheduling anytime damage isn't visually obvious but you suspect uplift, or whenever an insurance claim is involved, since insurers widely recognize the HAAG standard for distinguishing storm damage from installation defects.